Perfect US desert roadtrip - 2-week loop from PHX / DEN / SLC
National parks in Utah are world renowned. While the most famous road trip through the deserts of Utah covers Bryce, Zion, etc, there is a less traveled and debatably more gorgeous area of Utah in the east part of the state. This guide covers a 2-week long road trip loop that can be taken from Denver, Phoenix, or Salt Lake City. This loop can be condensed or extended based on time by either skipping some of these locations or adding in some suggested areas that I have written about below. The guide below outlines the loop starting from Denver. National parks visited on this trip include Canyonlands, Arches, Petrified Forrest, and Mesa Verde.
Note on where to camp
I did this trip on a budget and only paid for 3 nights of camping! My favorite website I always use while roadtripping is freecampsites.net - it is a free compilation of all open space and free campsites. If you ever need somewhere to park for the night or pitch a tent, I highly recommend this website! Make sure to read the reviews before going and save the coordinates in your phone in case of zero service. The comments should give you an idea if this is a “show up to sleep and leave” or a relaxing campsite. The 3 nights I paid for were 1 in the national park (the free campsite was an extra 45 min diversion) and 2 nights for a backpacking permit in the Indian Reservation for Rainbow Bridge.
Note on food
I brought most of the food I needed on this trip in a cooler or dried backpacking food. I recommend packing food and a stove with gas because outside of Moab, there are not many places to get food. While I make my own backpacking food from scratch, my favorite brand for backpacking is Backpackers Pantry and the standard top ramen with salami / veggies from the grocery store!
Note on parks pass
I highly recommend purchasing the yearly National Parks pass when you enter the park. In this guide, I outline visiting 4 national parks and multiple national monuments. The yearly parks pass is $80, which pays for admission to 3 national parks. You’ll absolutely get your moneys worth for this thing! You can buy a parks pass upon entering a national park or monument. This is better than buying online in advance because they charge you a fee to ship / process online, so save yourself the headache and just buy one there.
Other tips on packing
This road trip spends a lot of time in remote areas. I recommend having the following items:
Camping gear (sleeping bag, sleeping pad, tent). Whether you decide to sleep in a tent or your car, make sure you are prepared. The desert gets cold at night, so don’t be fooled!
Cooking equipment (gas, stove, cooler, spork, soap, snacks, etc)
5 gallon water container and water filter. There’s not a lot of water out there so just in case you get stranded in your car or end up in a sticky situation, you always want water with you!
Checks. Campgrounds tend to take weird amounts of money, like $17, and don’t provide change. Checks are super nice to have just in case you don’t have exact change.
Cash. I usually carry about $30 in cash, again, just in case I can’t pay with credit card or check. I didn’t need to use it this time, but it’s good to have in case of emergency or if you need small things like firewood.
Day 1: Drive Denver to north Canyonlands national park (6 hours)
Start your journey with a long drive! If you’re looking to break up the drive, consider:
Breakfast in Vail (I personally like the Little Diner)
Depending on time of day… Vail Brewing in Eagle Vail
3 mile hike at Hanging Lakes. Note that you will need to pay for a permit to hike here due to conservation efforts after fires / mudslides. We’re just glad the trail is finally open!
Lunch in Grand Junction
Make sure you fill up on gas and get all the food you need before turning off to the North Rim of Canyonlands.
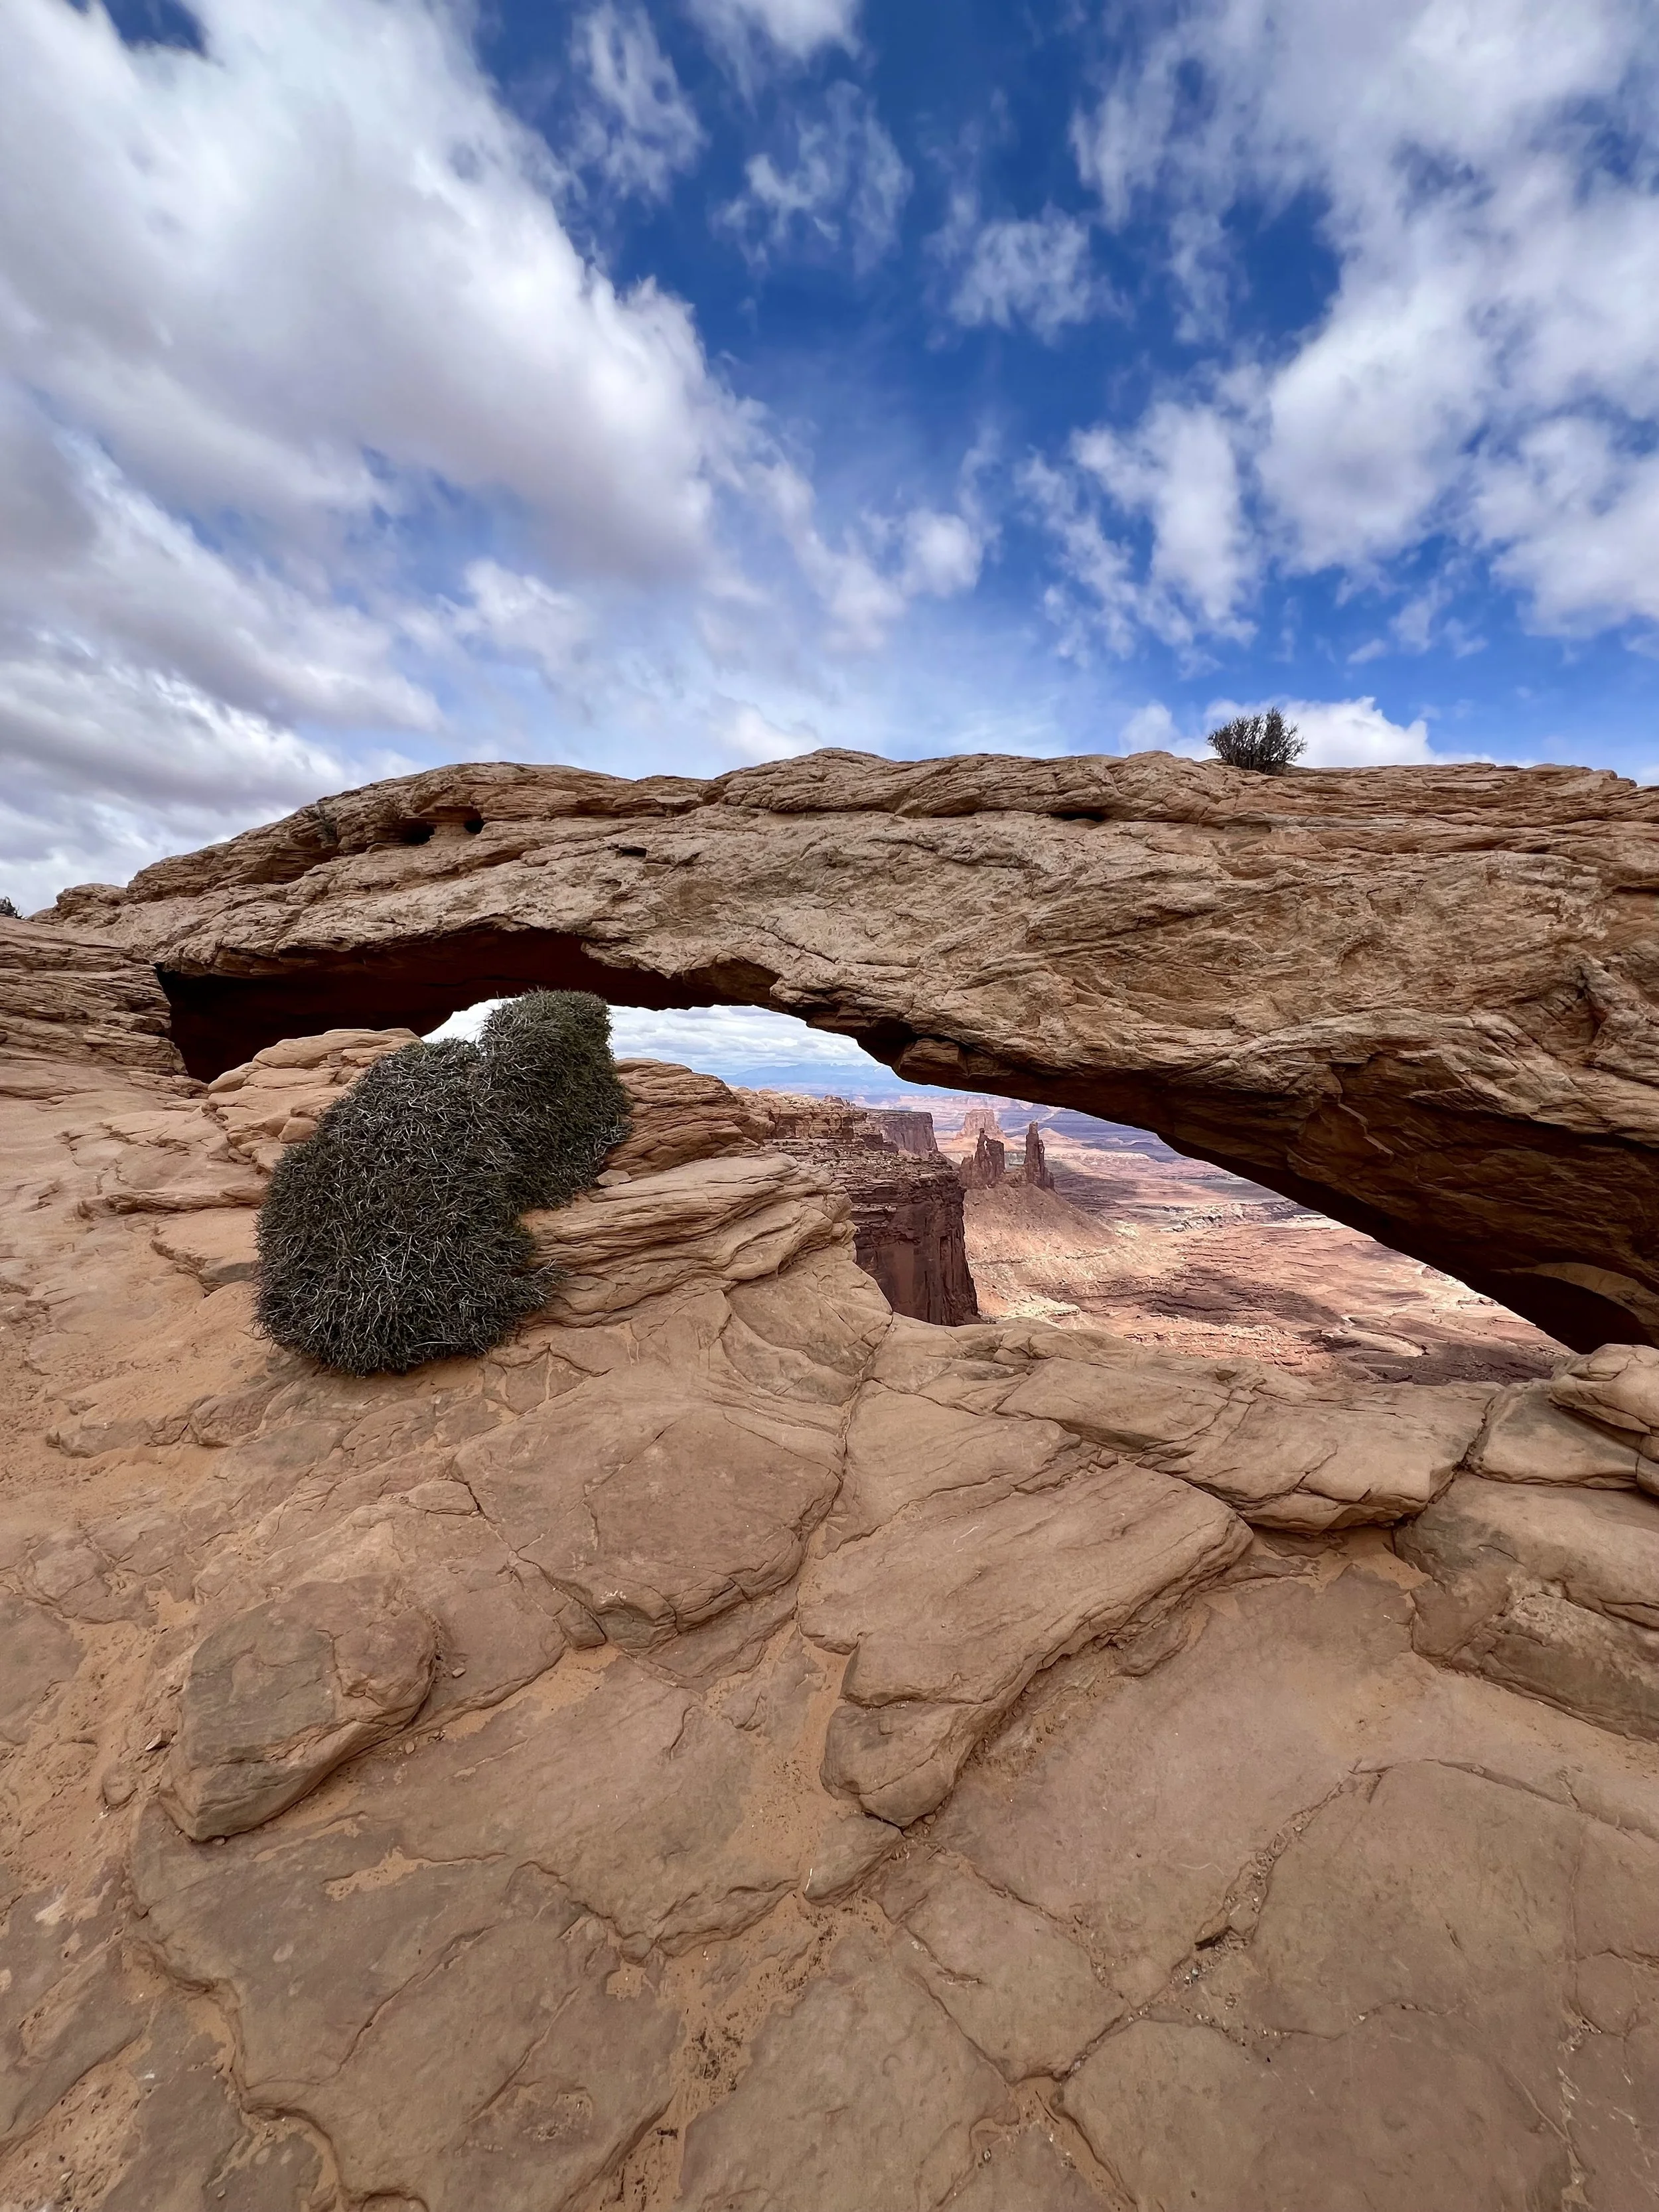
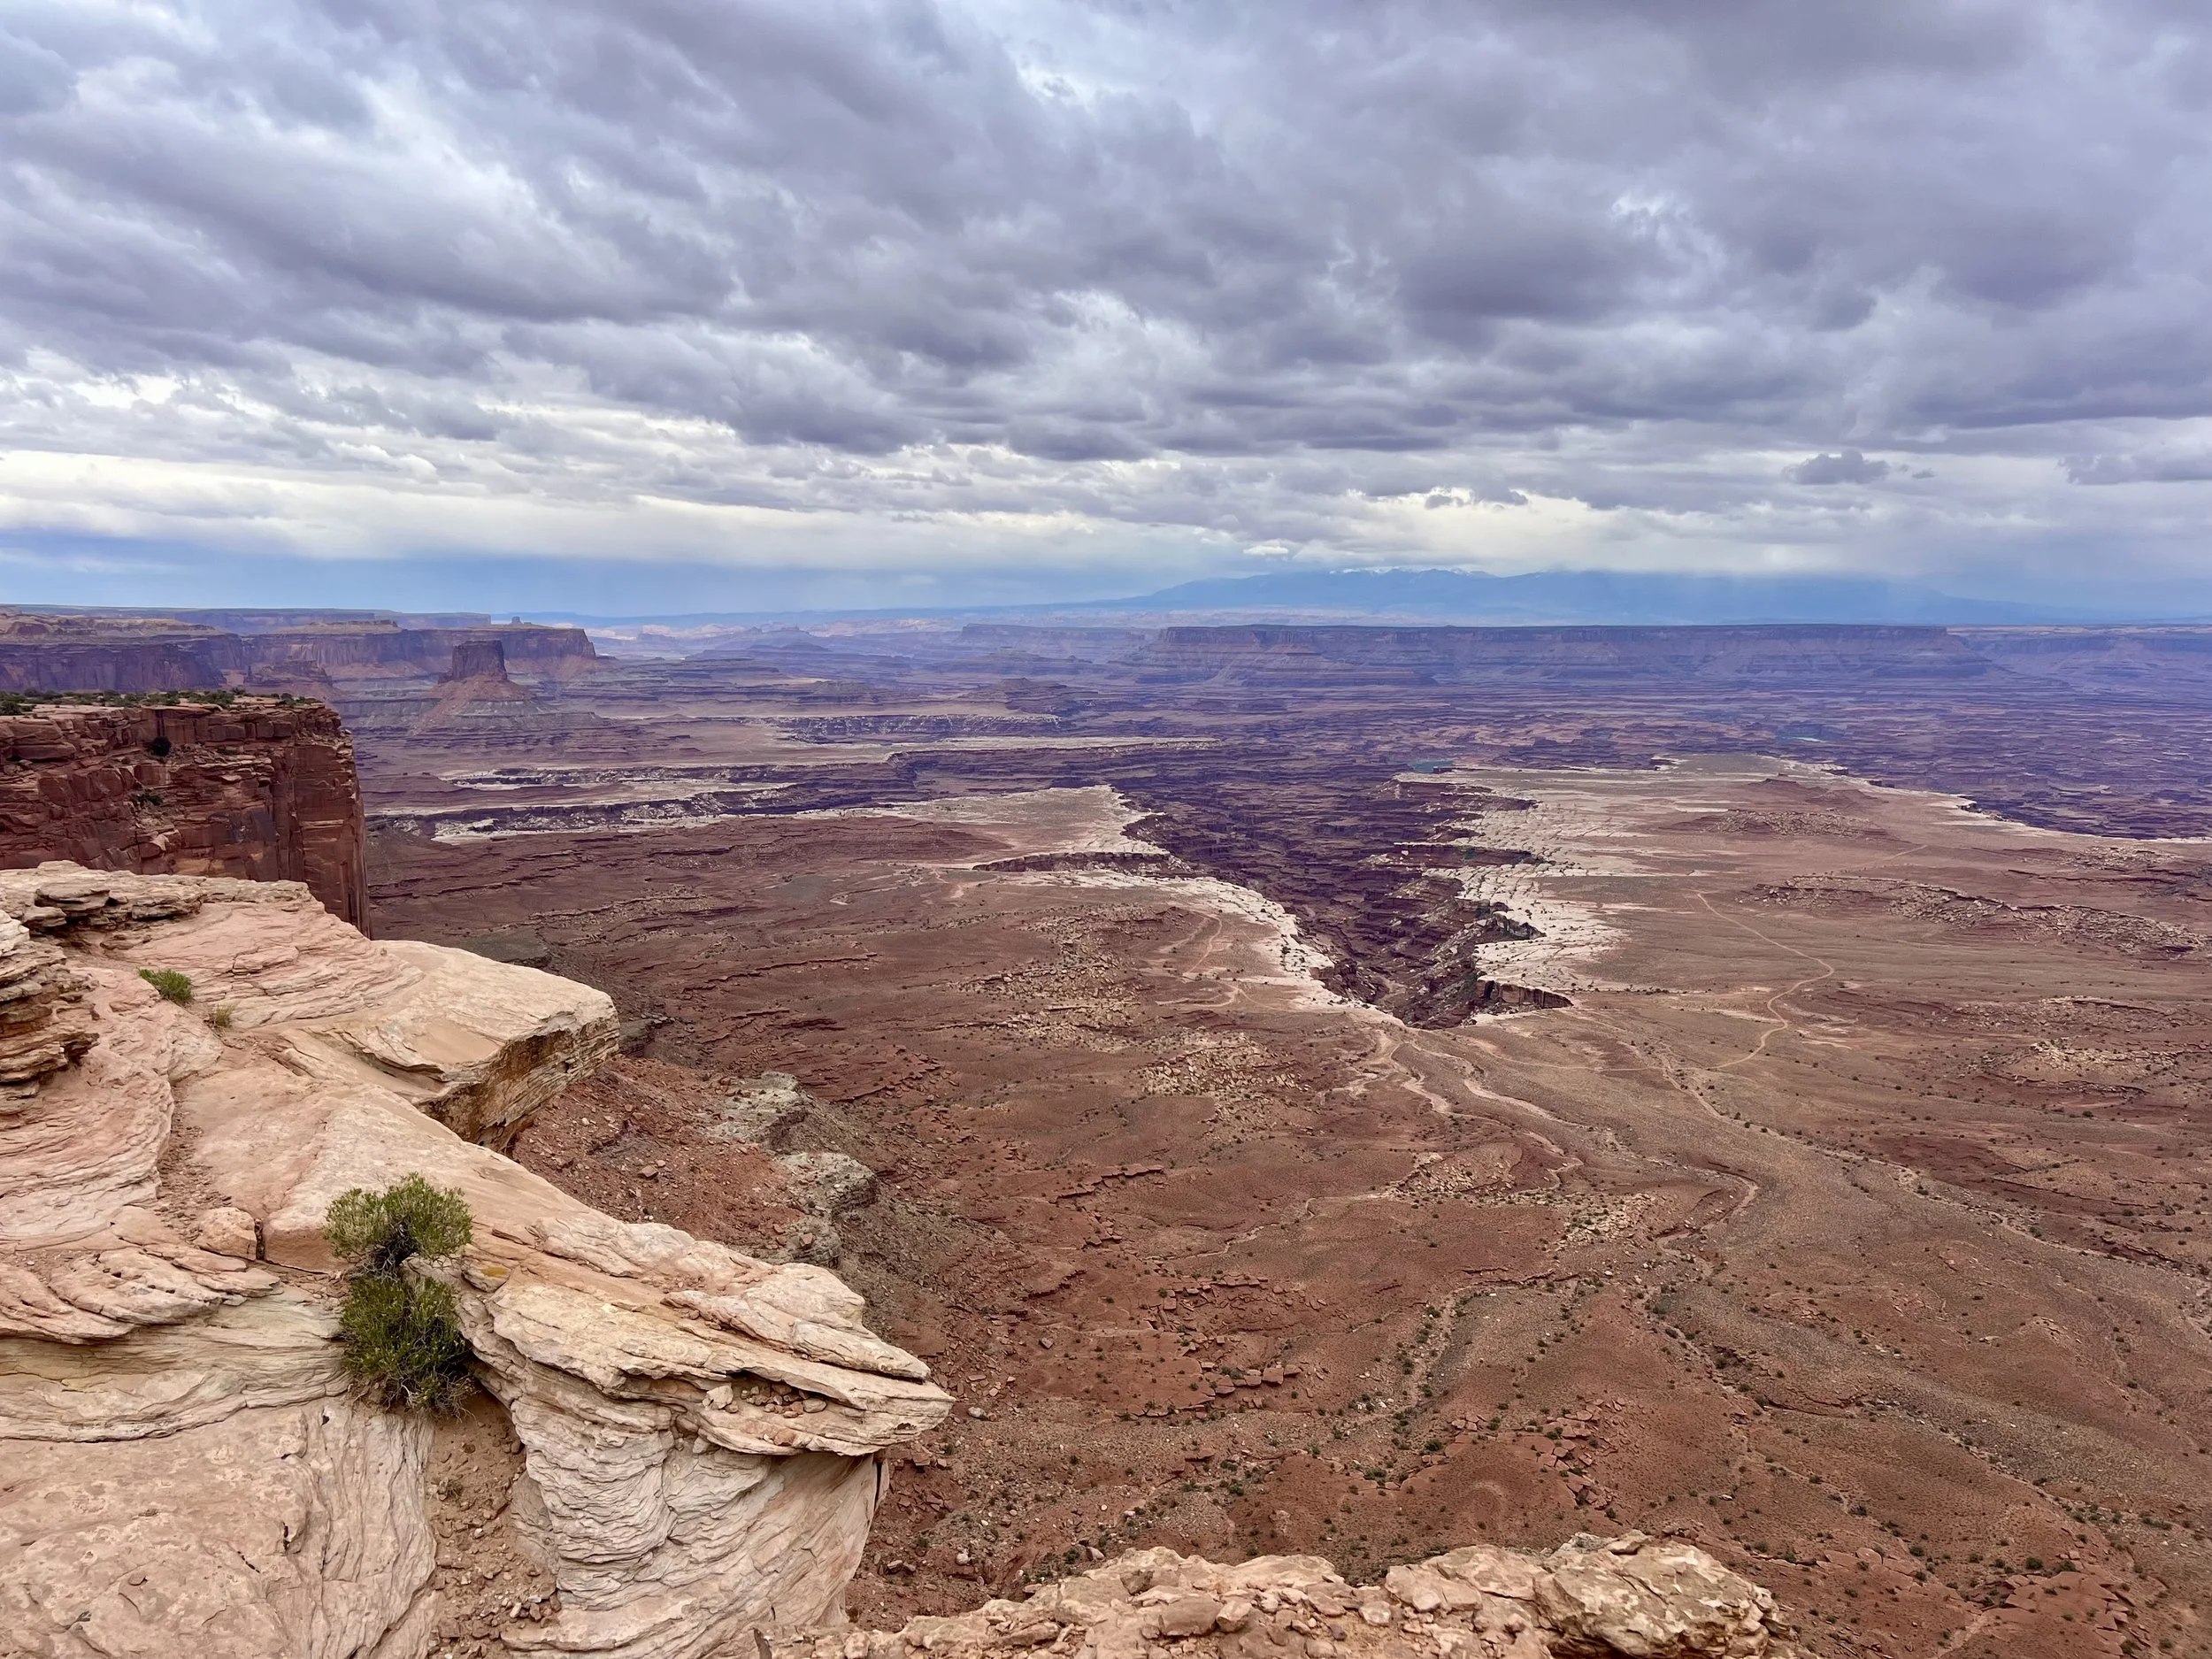
Depending on how much time you have (and where you want to camp), first secure your campsite in the park if you are doing first-come first-serve and then drive to the key lookouts or do some short hikes. My suggestions:
Grand View (1.8 mi)
White Rim (1.8 mi)
Mesa Arch (0.7 mi)
Aztec Butte (1.6 mi)
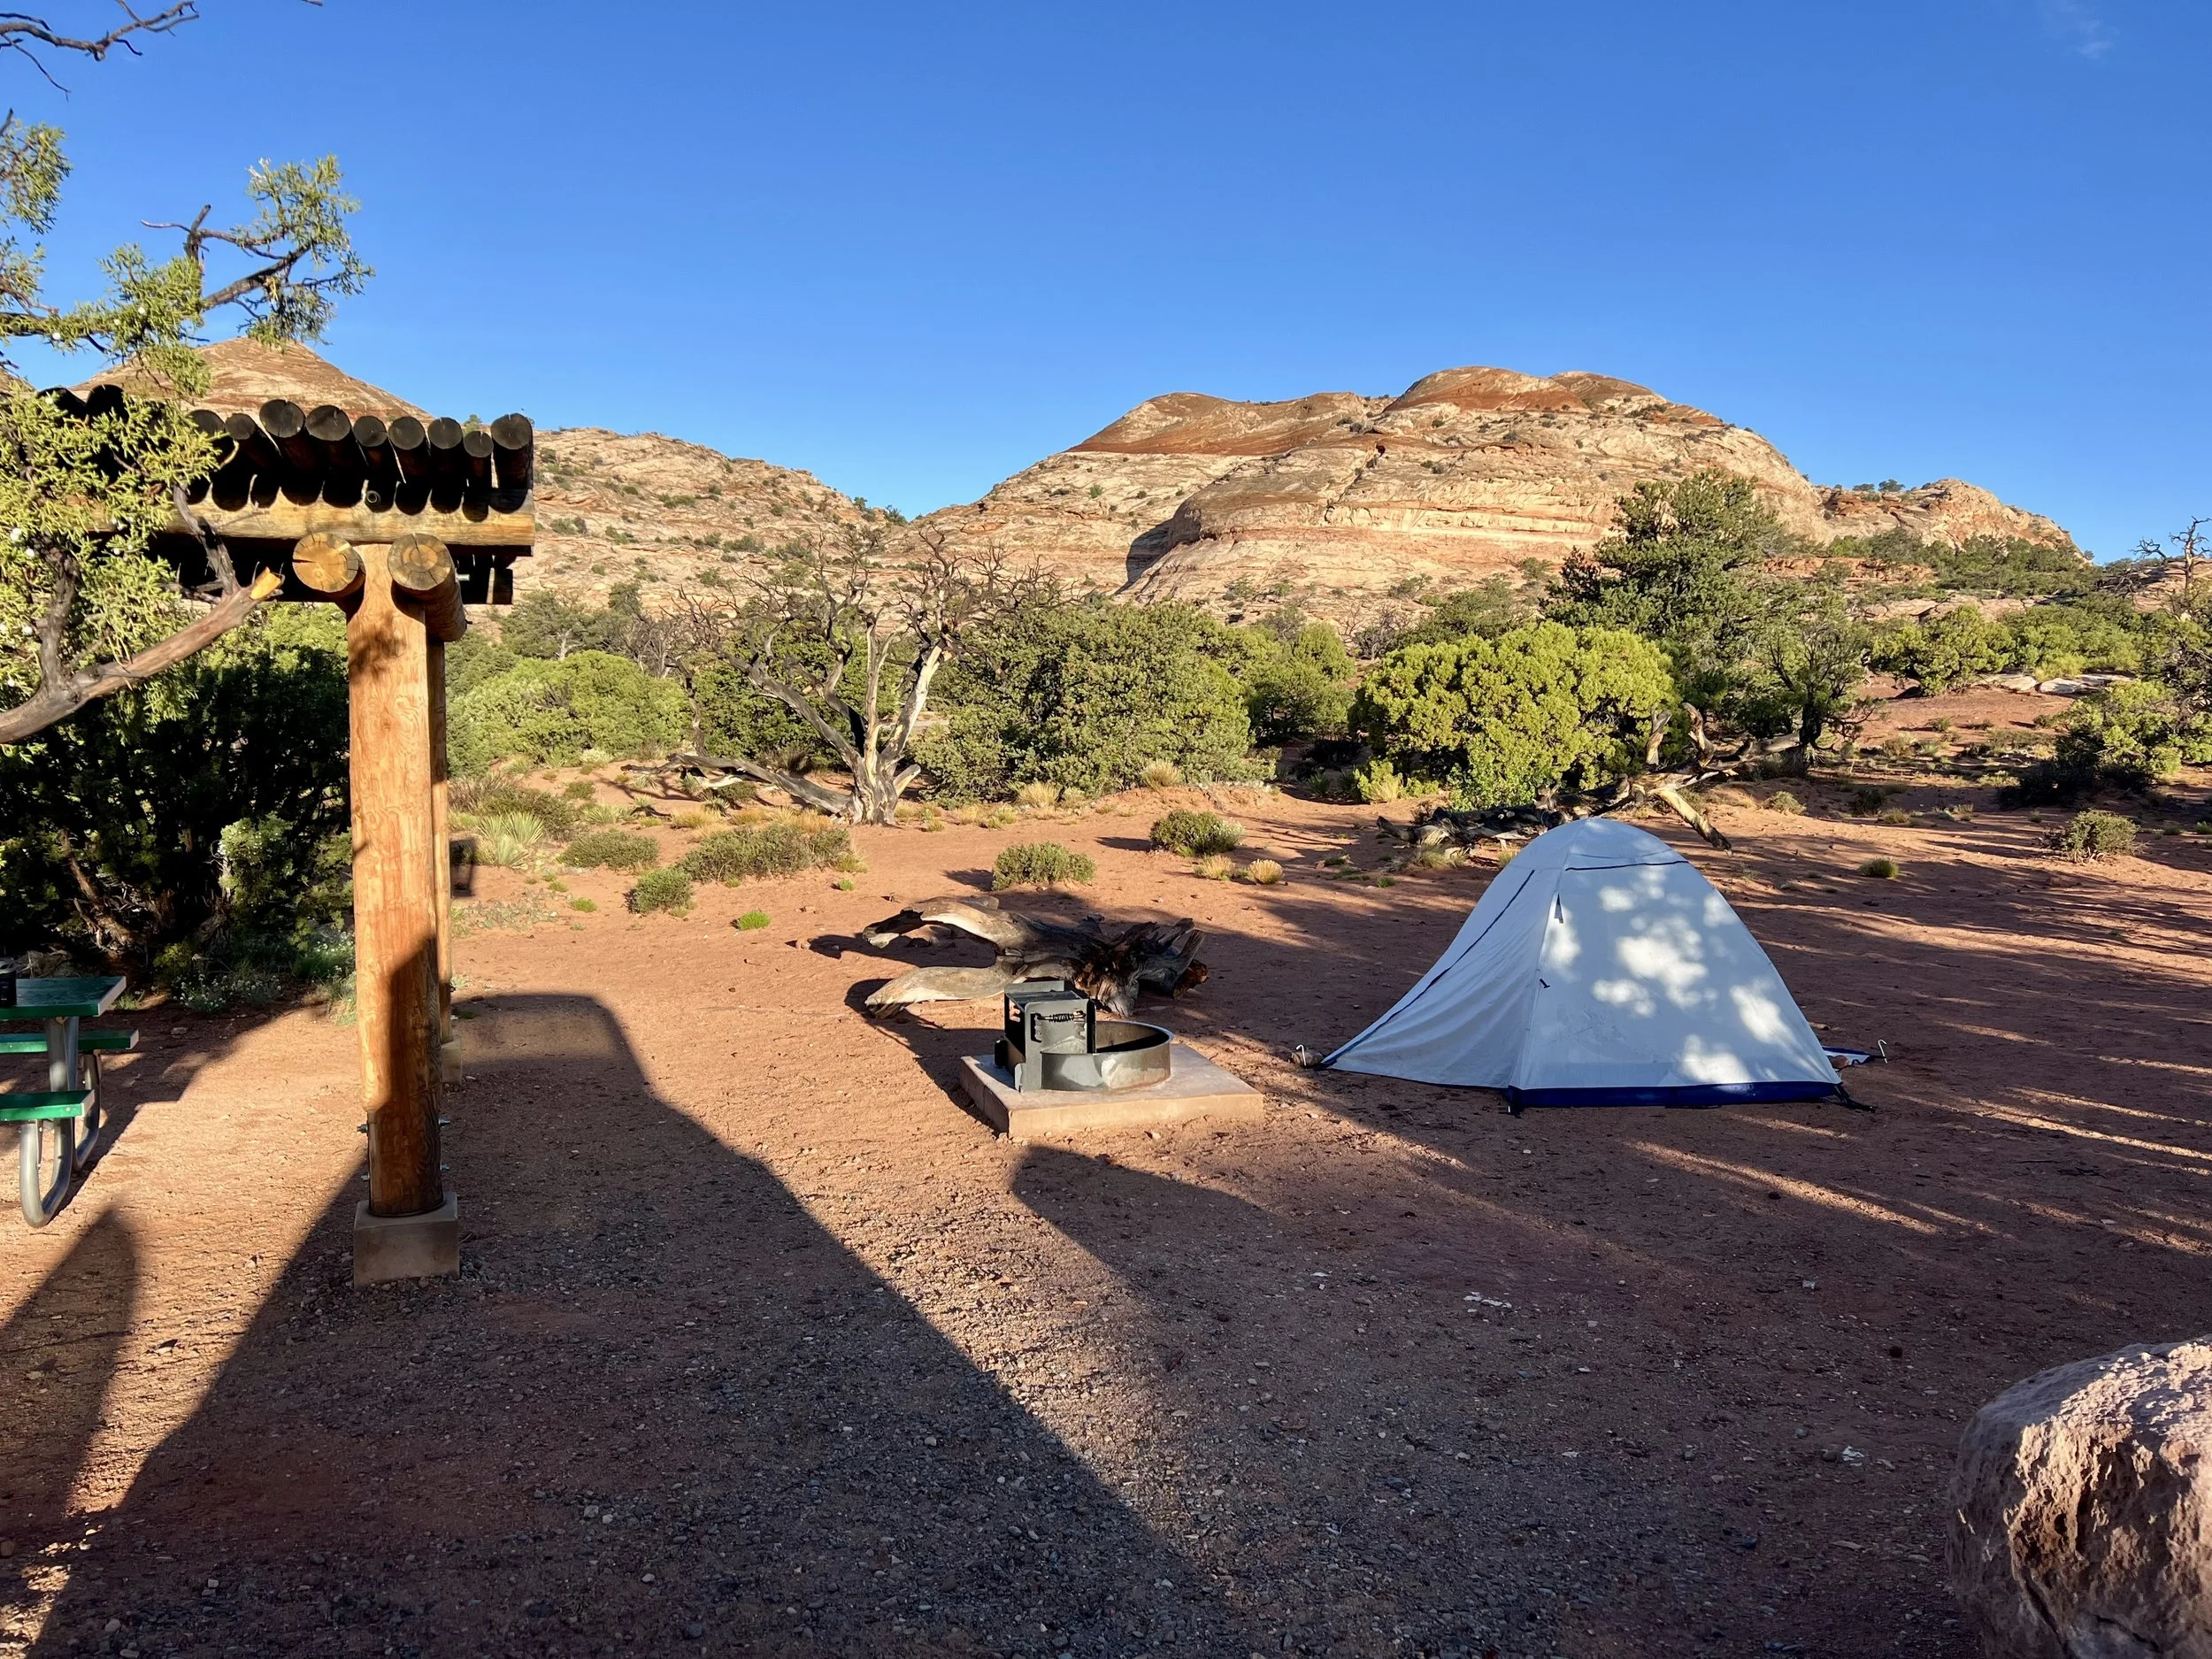
Camp: Lone Mesa Campground, first-come first-serve ($15/night, card/ check / cash)
Note there are free campsites outside the park entrance, but it will add 45 mins each way onto your drive if you plan to explore the park further
Day 2: North Canyonlands national park
Today, plan to spend your whole day in the park. In the morning, hike the famous Syncline trail (8 miles) before it gets hot. This trail is a loop and goes down into a valley before climbing back up the other direction. It has a boulder / climbing section that can be hard for those not adept at route finding (it’s marked, but easy to get off trail). It’s also a popular backpacking loop if you’re interested, but I was happy to do it in a day because a large backpack wouldn’t have been particularly fun on the boulders.
Spend your evening at the free campsite outside the park or Dead Horse State Park (paid campsite).

Day 3: Arches National Park
Get an early start today and drive to Arches National Park. Note that they have a timed entry system from 7am to 4pm, meaning you need to reserve in advance to get into the park. Either arrive before 7am or book in advance for an entry permit!
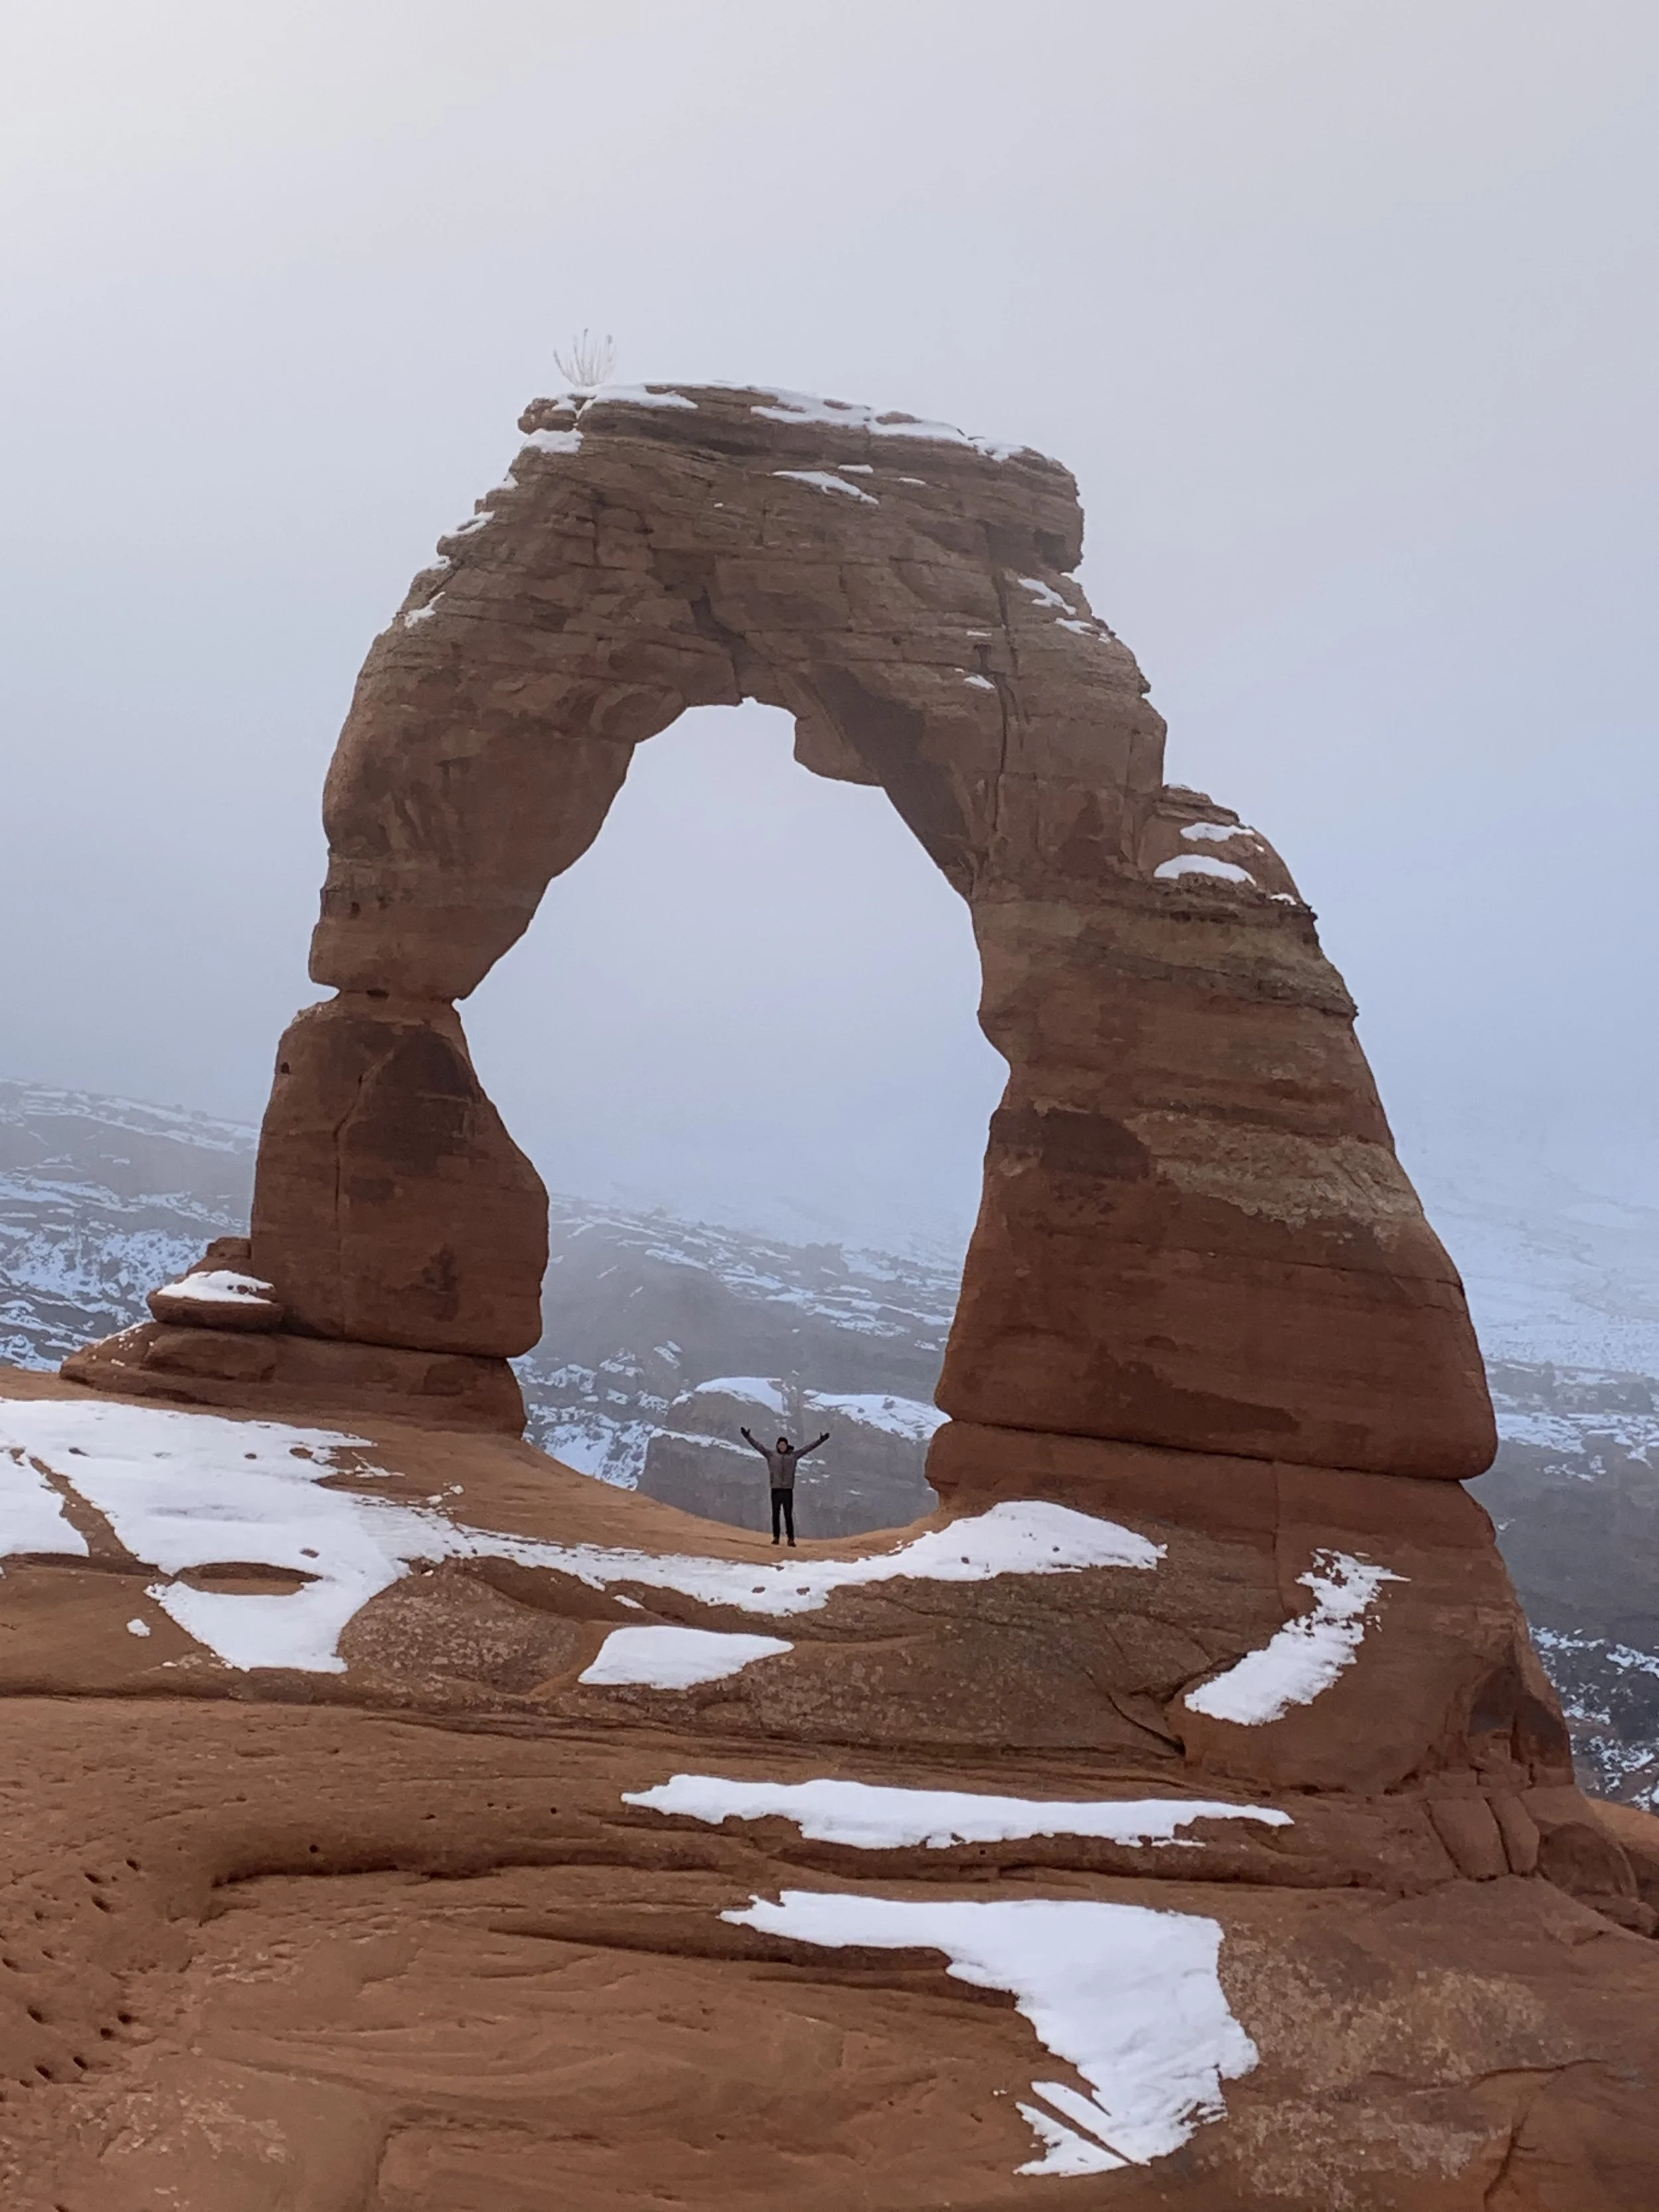
You can spend all day here and stop at every viewpoint. My do not miss is the hike to delicate arch, which you should tackle early in the morning or for sunset. It’s the best hike in the park.
Other notable mentions:
Double arch
Double O arch
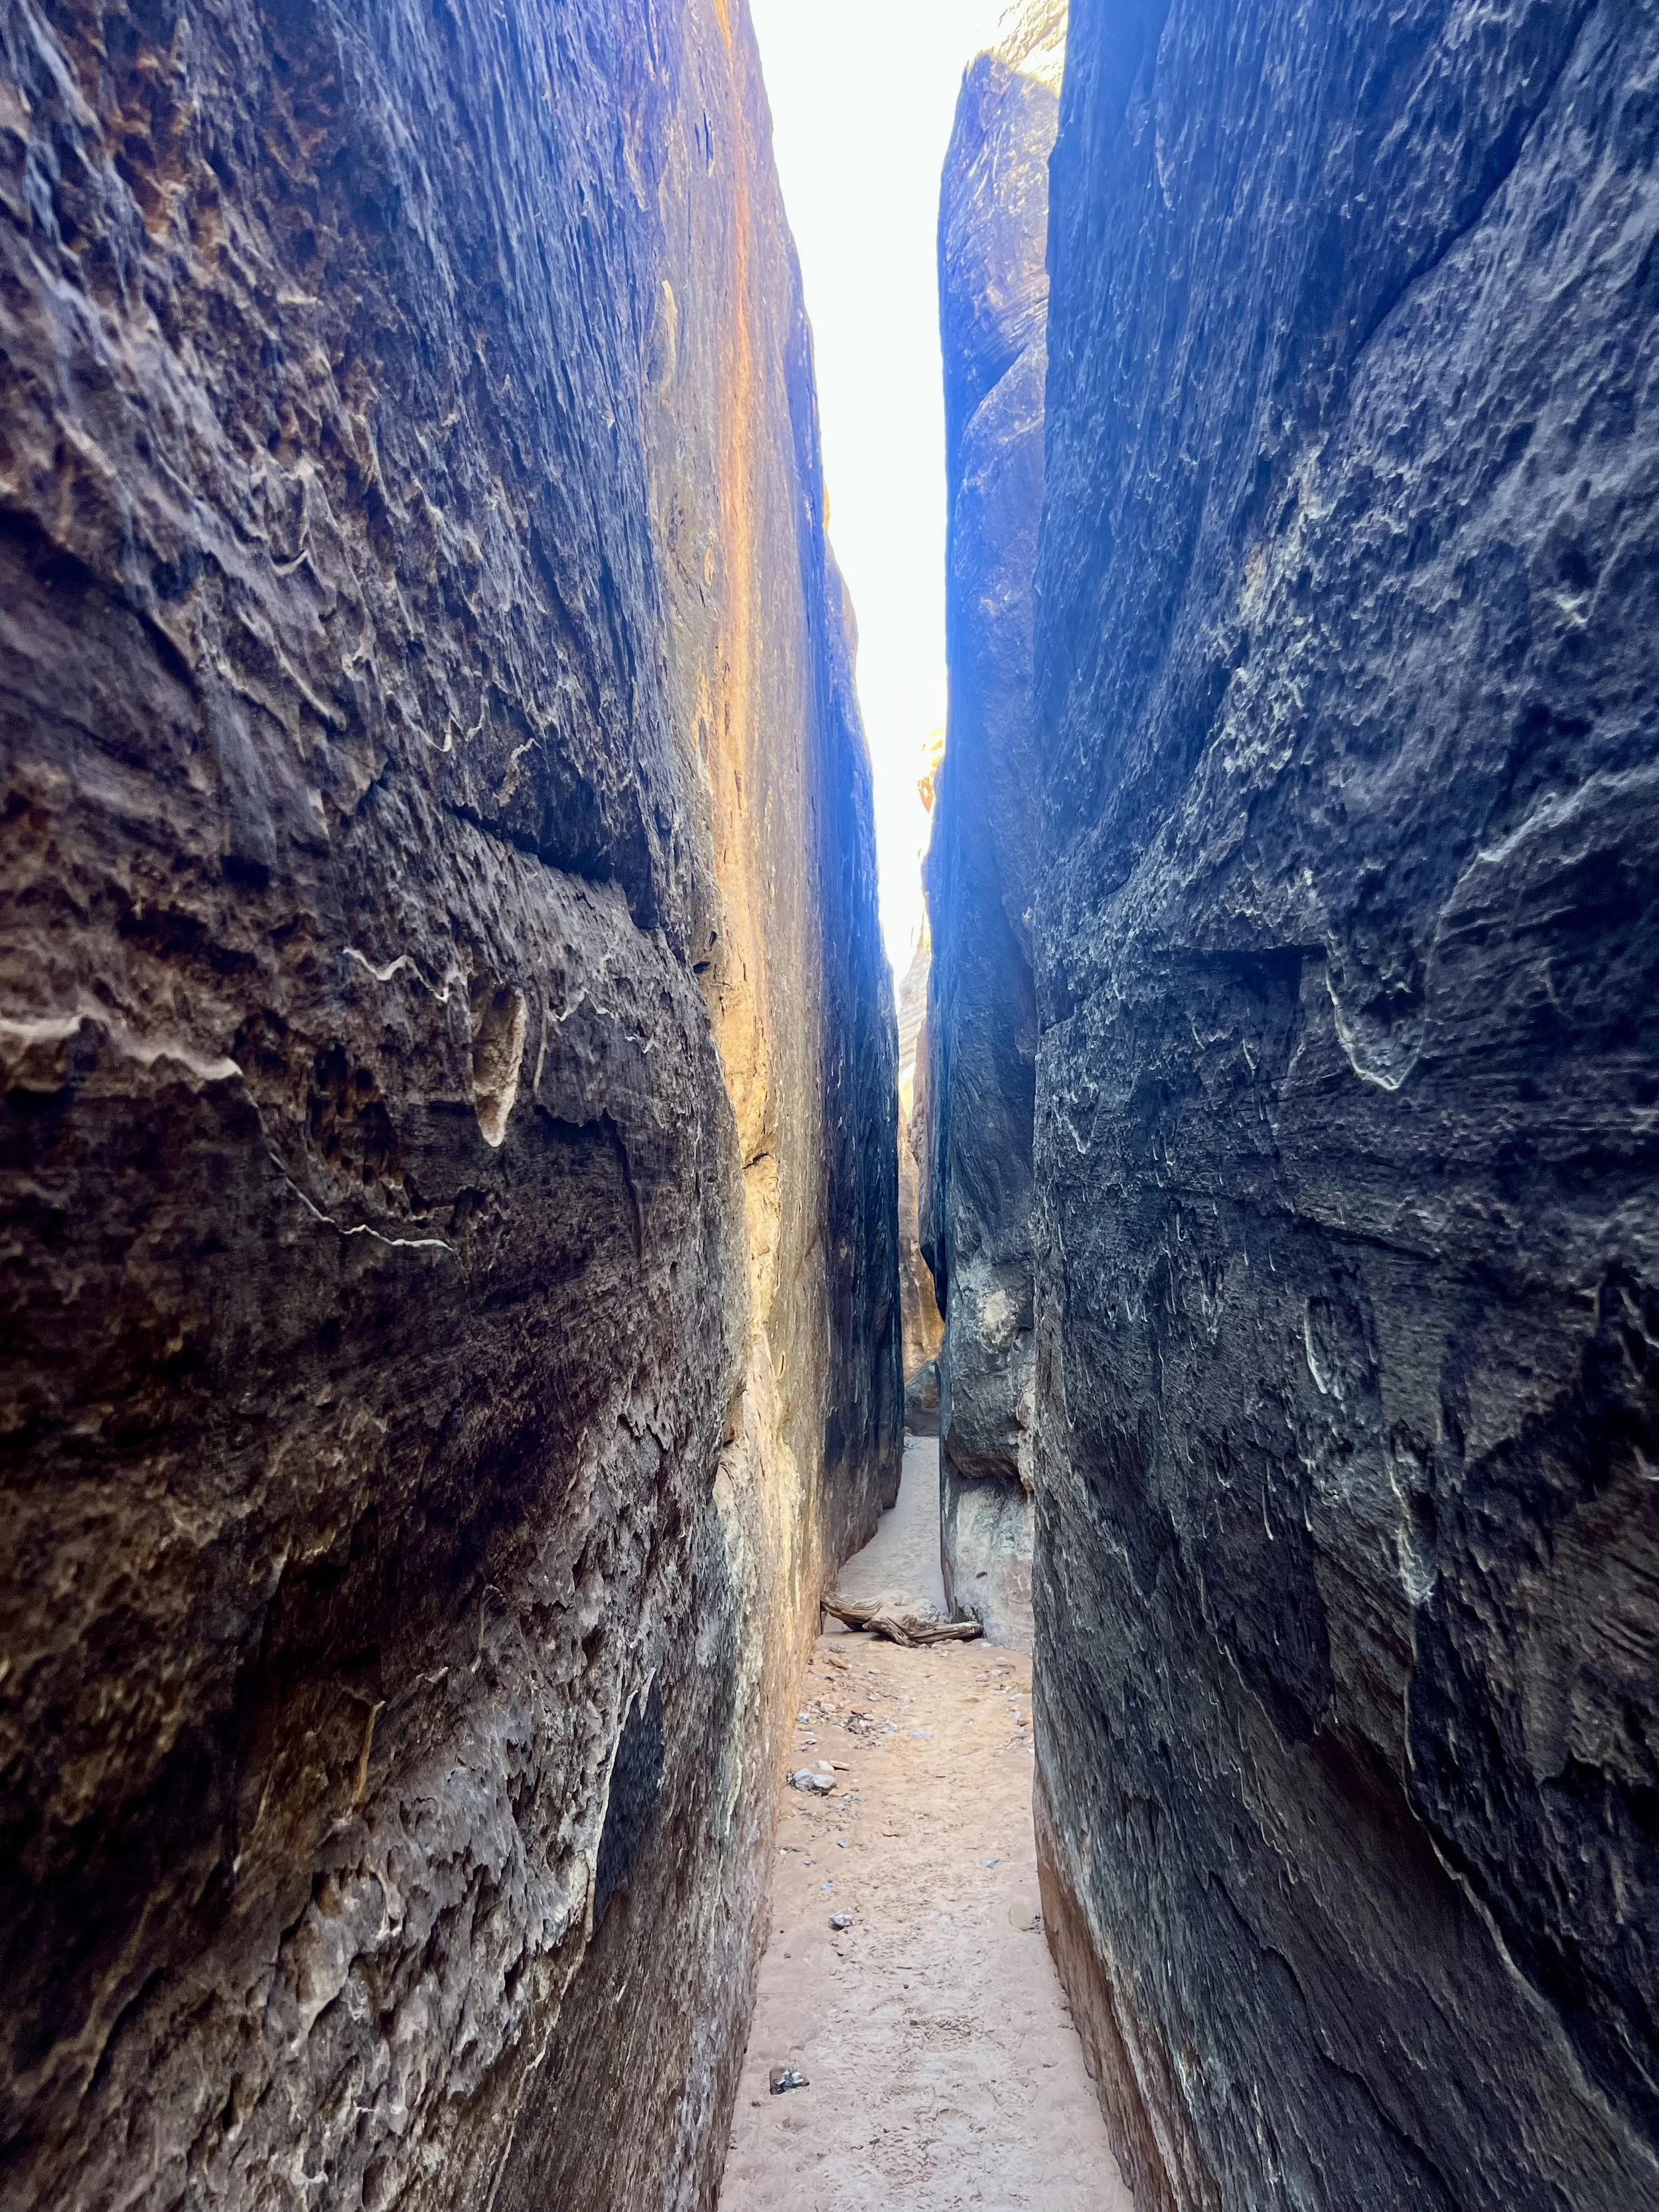
Fiery Furnace (you need to book this in advance! It’s a guided ranger tour where you can adventure through a slot canyon. Make sure to book it 1-2 weeks in advance)
1 day is enough to see Arches unless you want to add on Fiery Furnace, then I would give yourself 2 days.
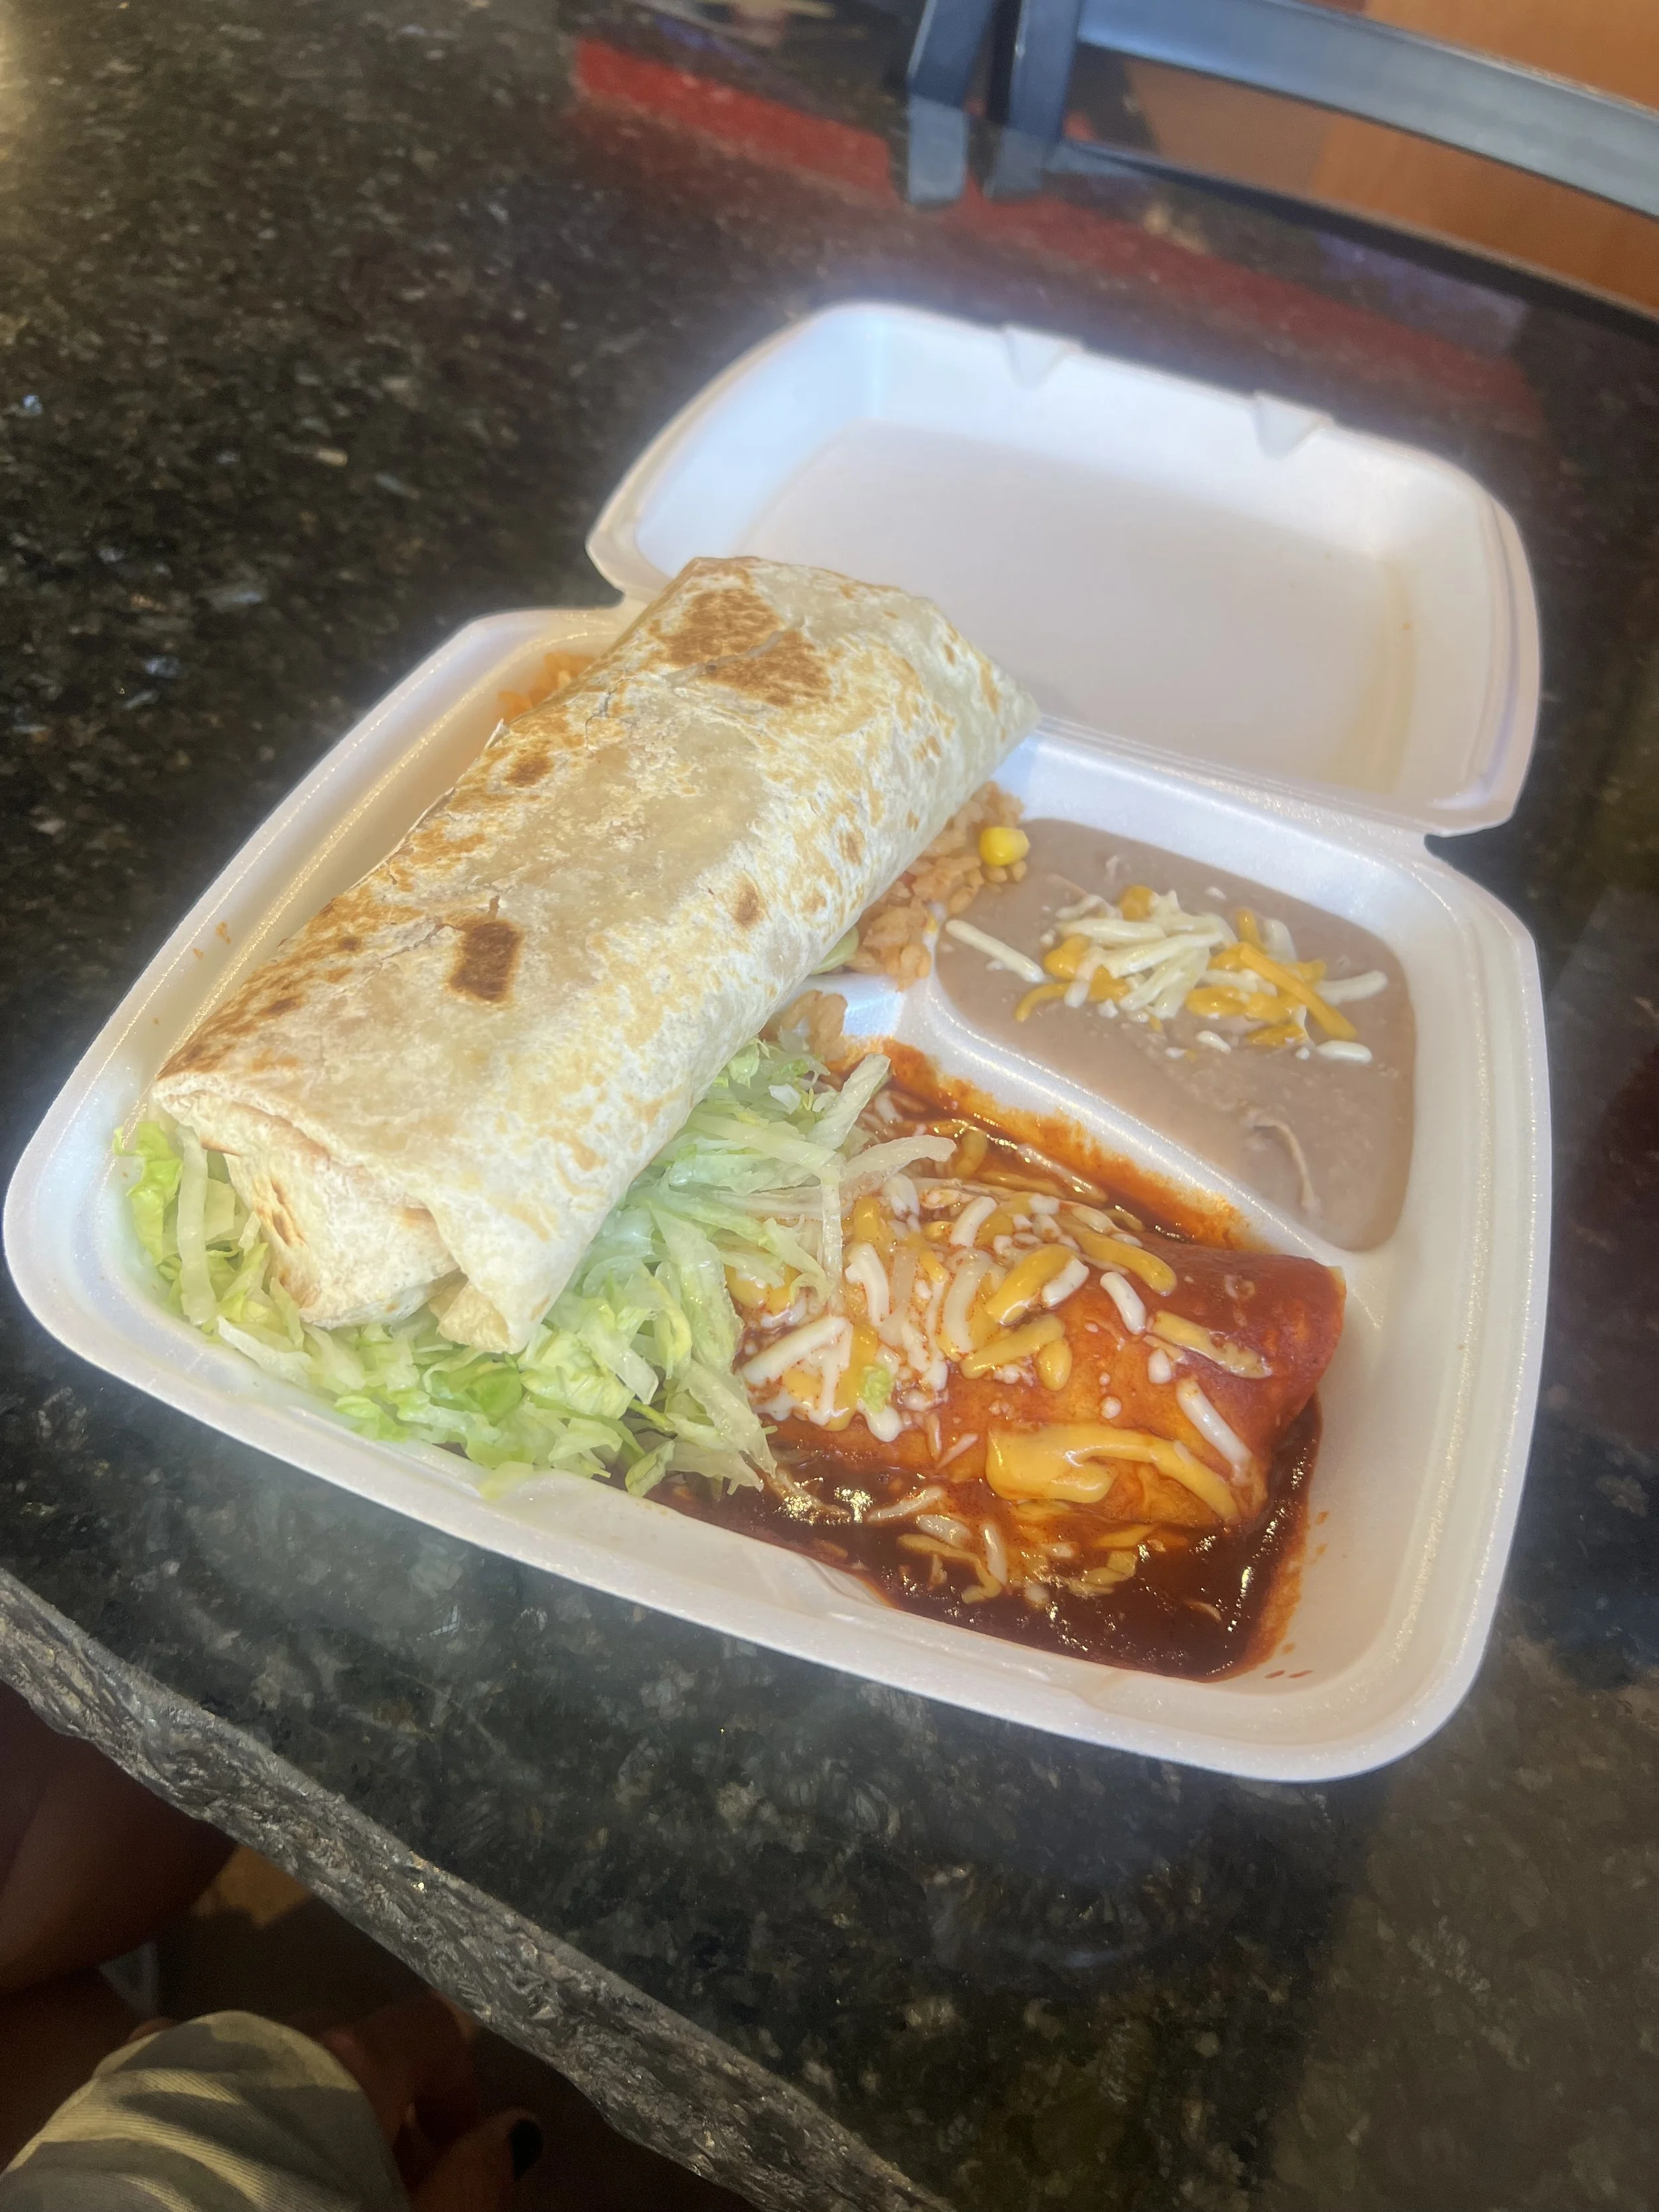
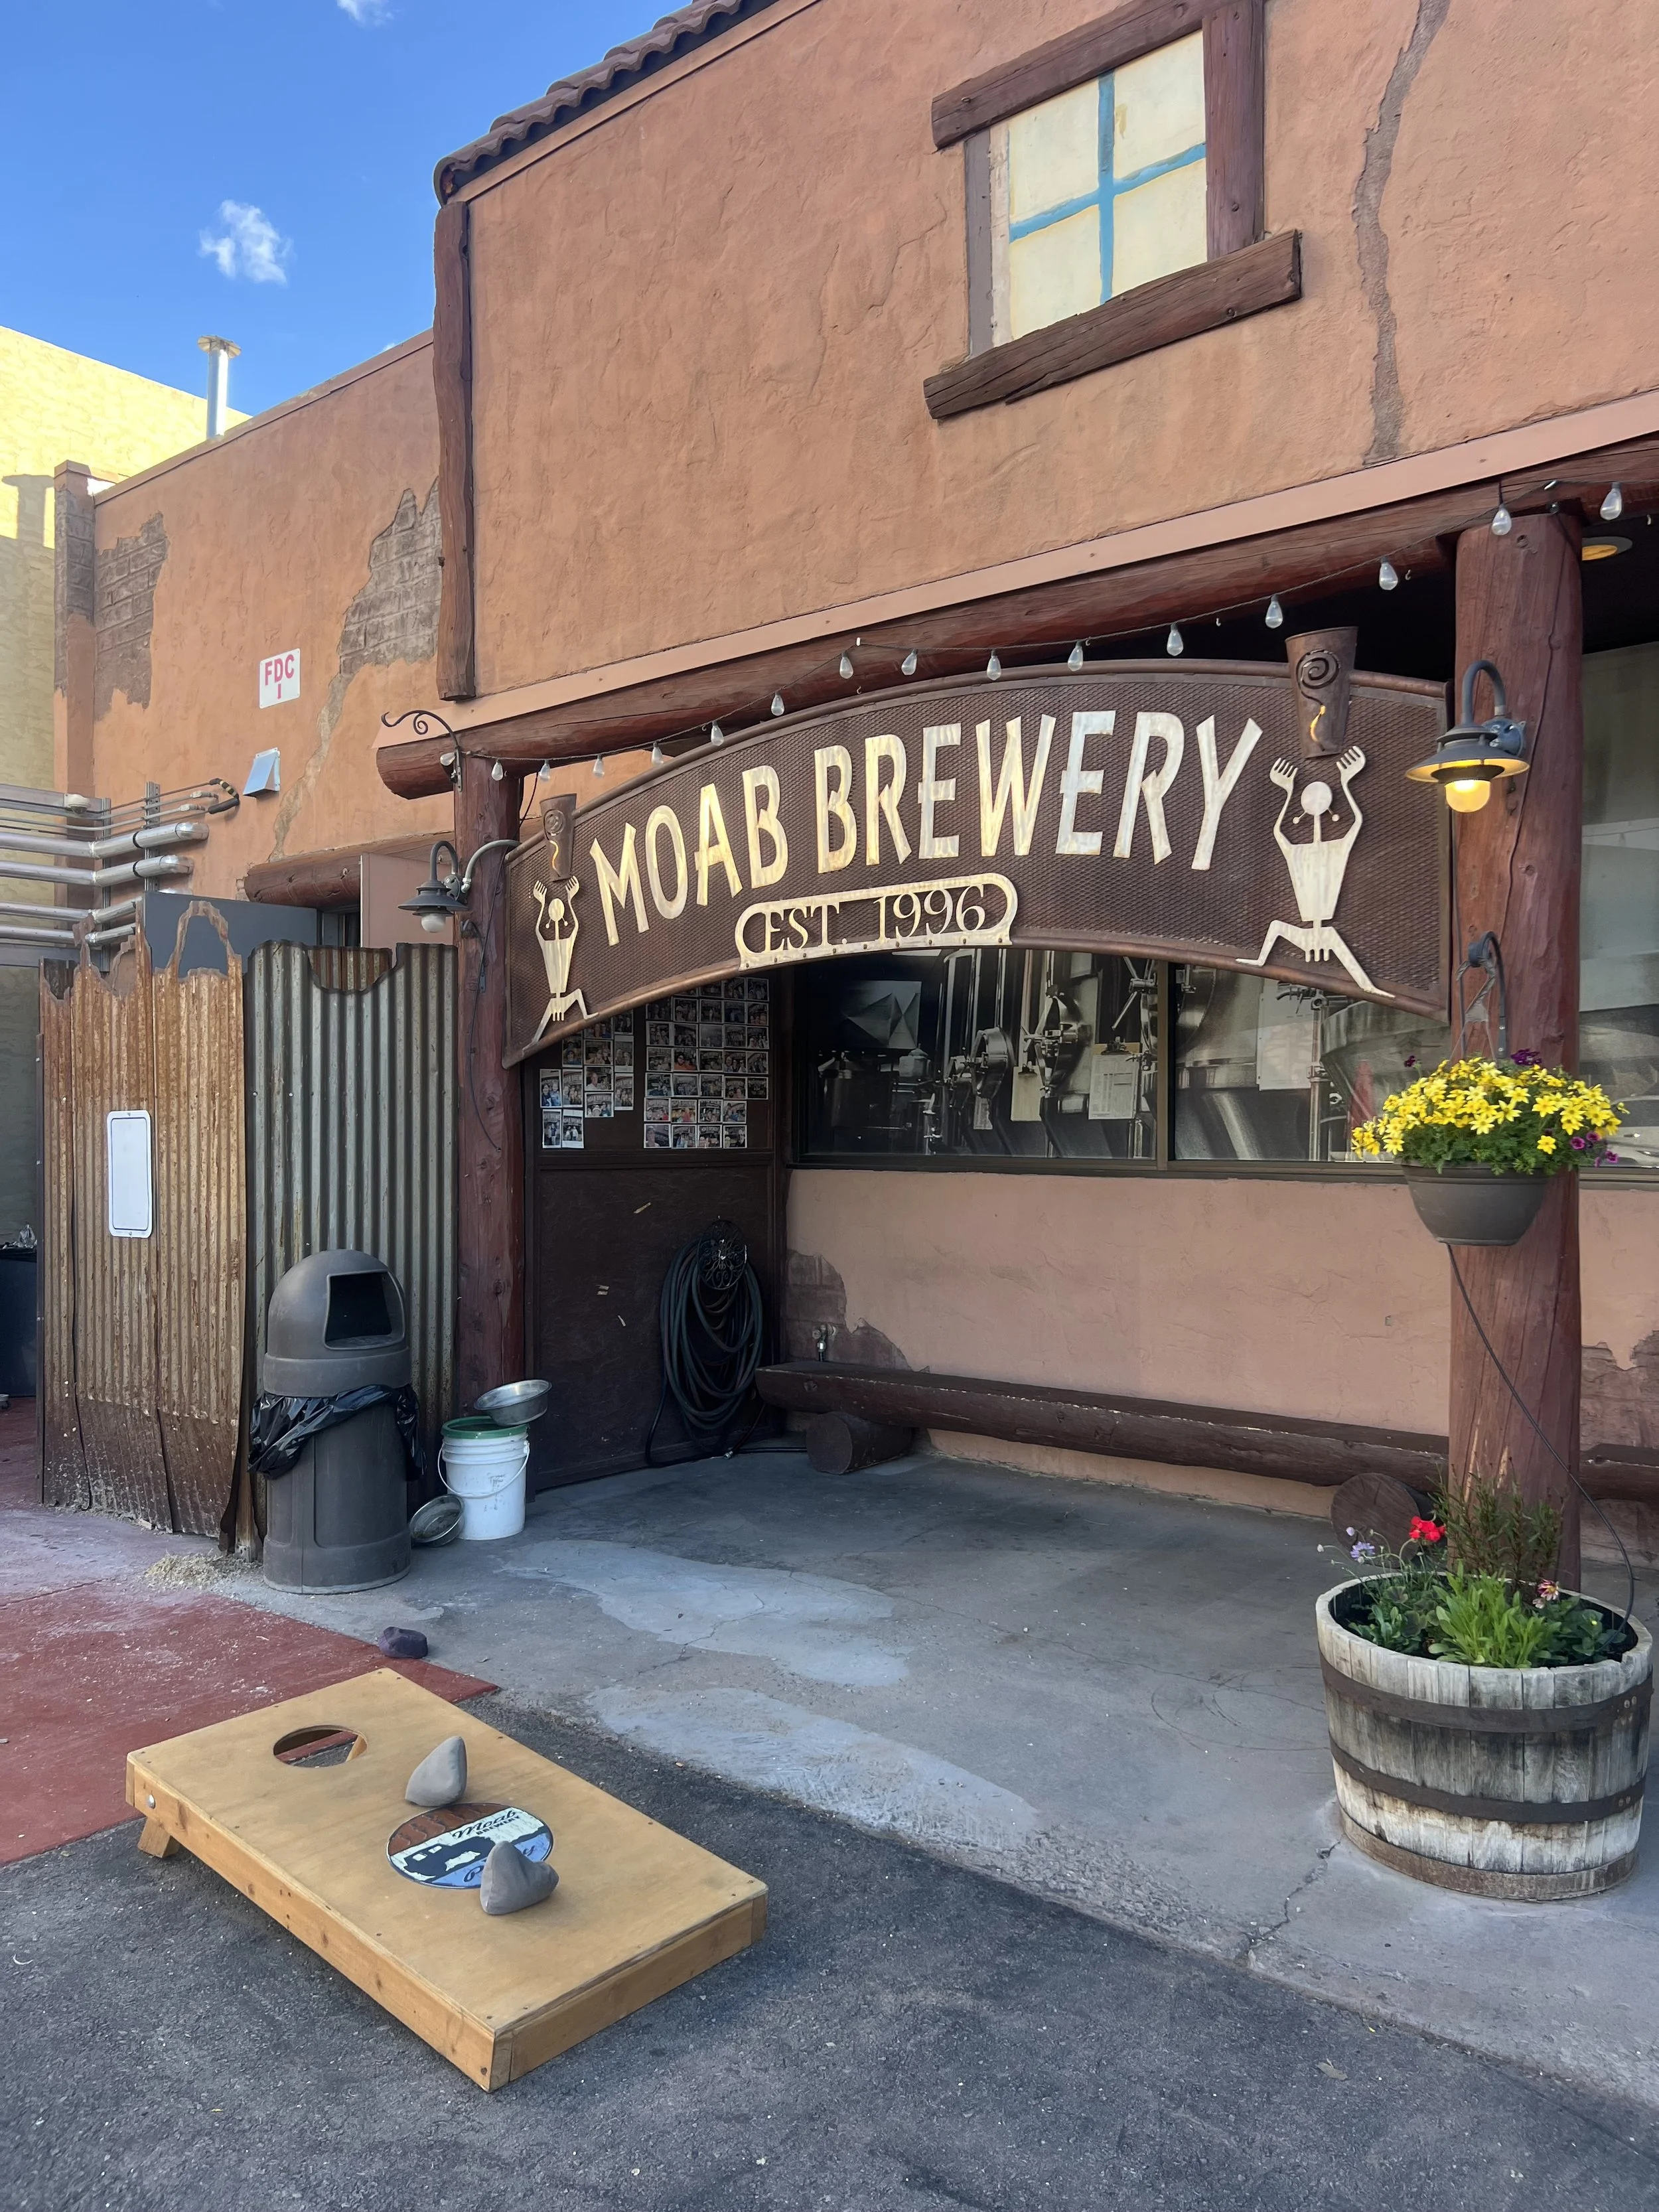
Drive into Moab for the evening and have dinner / camp. I recommend Giliberto’s Mexican Taco Shop.
(Note that photos below are from a separate trip to arches in the winter with snow!)

Day 4: Moab & South Canyonlands National Park
In the morning, hike Corona Arch. It’s a quick 2-3 mile trail but totally worth the adventure. You cross a railroad and go up a rocky plateau with gorgeous views. This is hands down one of the best hikes in Moab, and I wouldn’t skip it!

After Corona Arch, have lunch in Moab and, if you’re up for it, do one more hike in the area. You can head to the La Sal Mountains in the South. If you’re looking for other things to do in Moab, you can book an ATV tour or other adventures below:
In the afternoon, take a 2 hour drive to the South Canyonlands entrance. Again there is no services here, so make sure you stock up on food and water before camping outside the park.
A free campsite just outside the park is Hamburger Rock Campground.
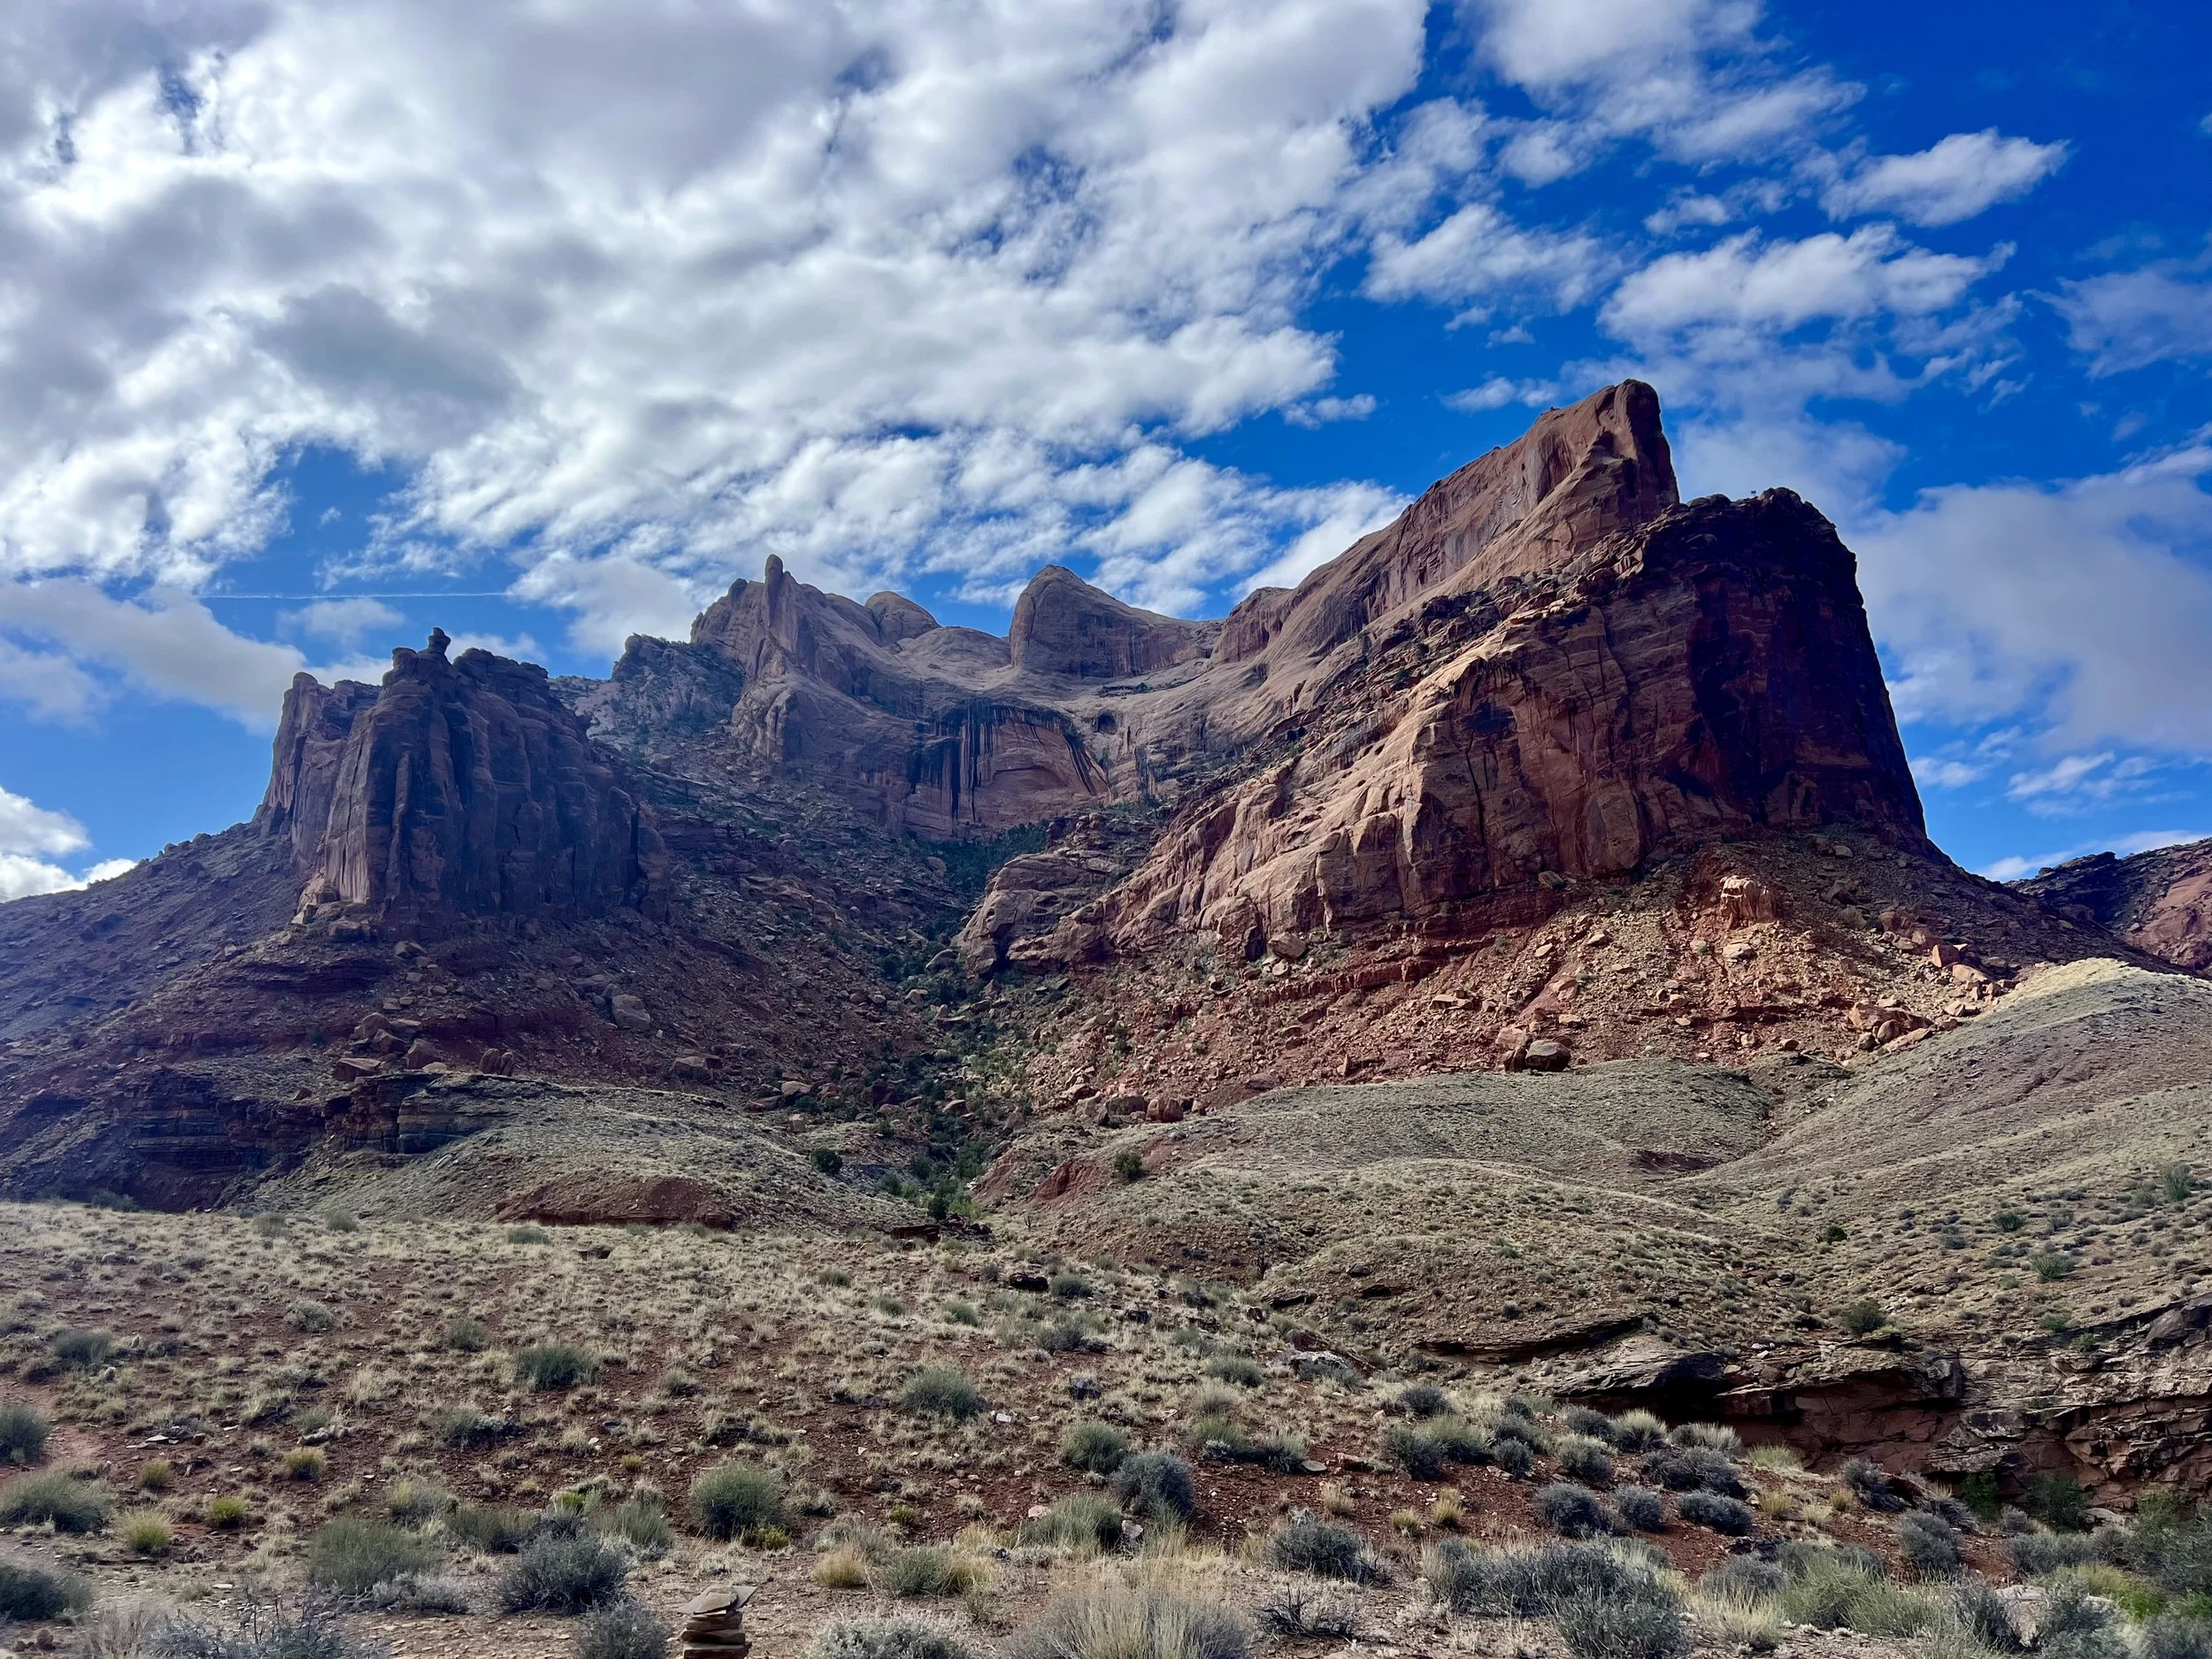
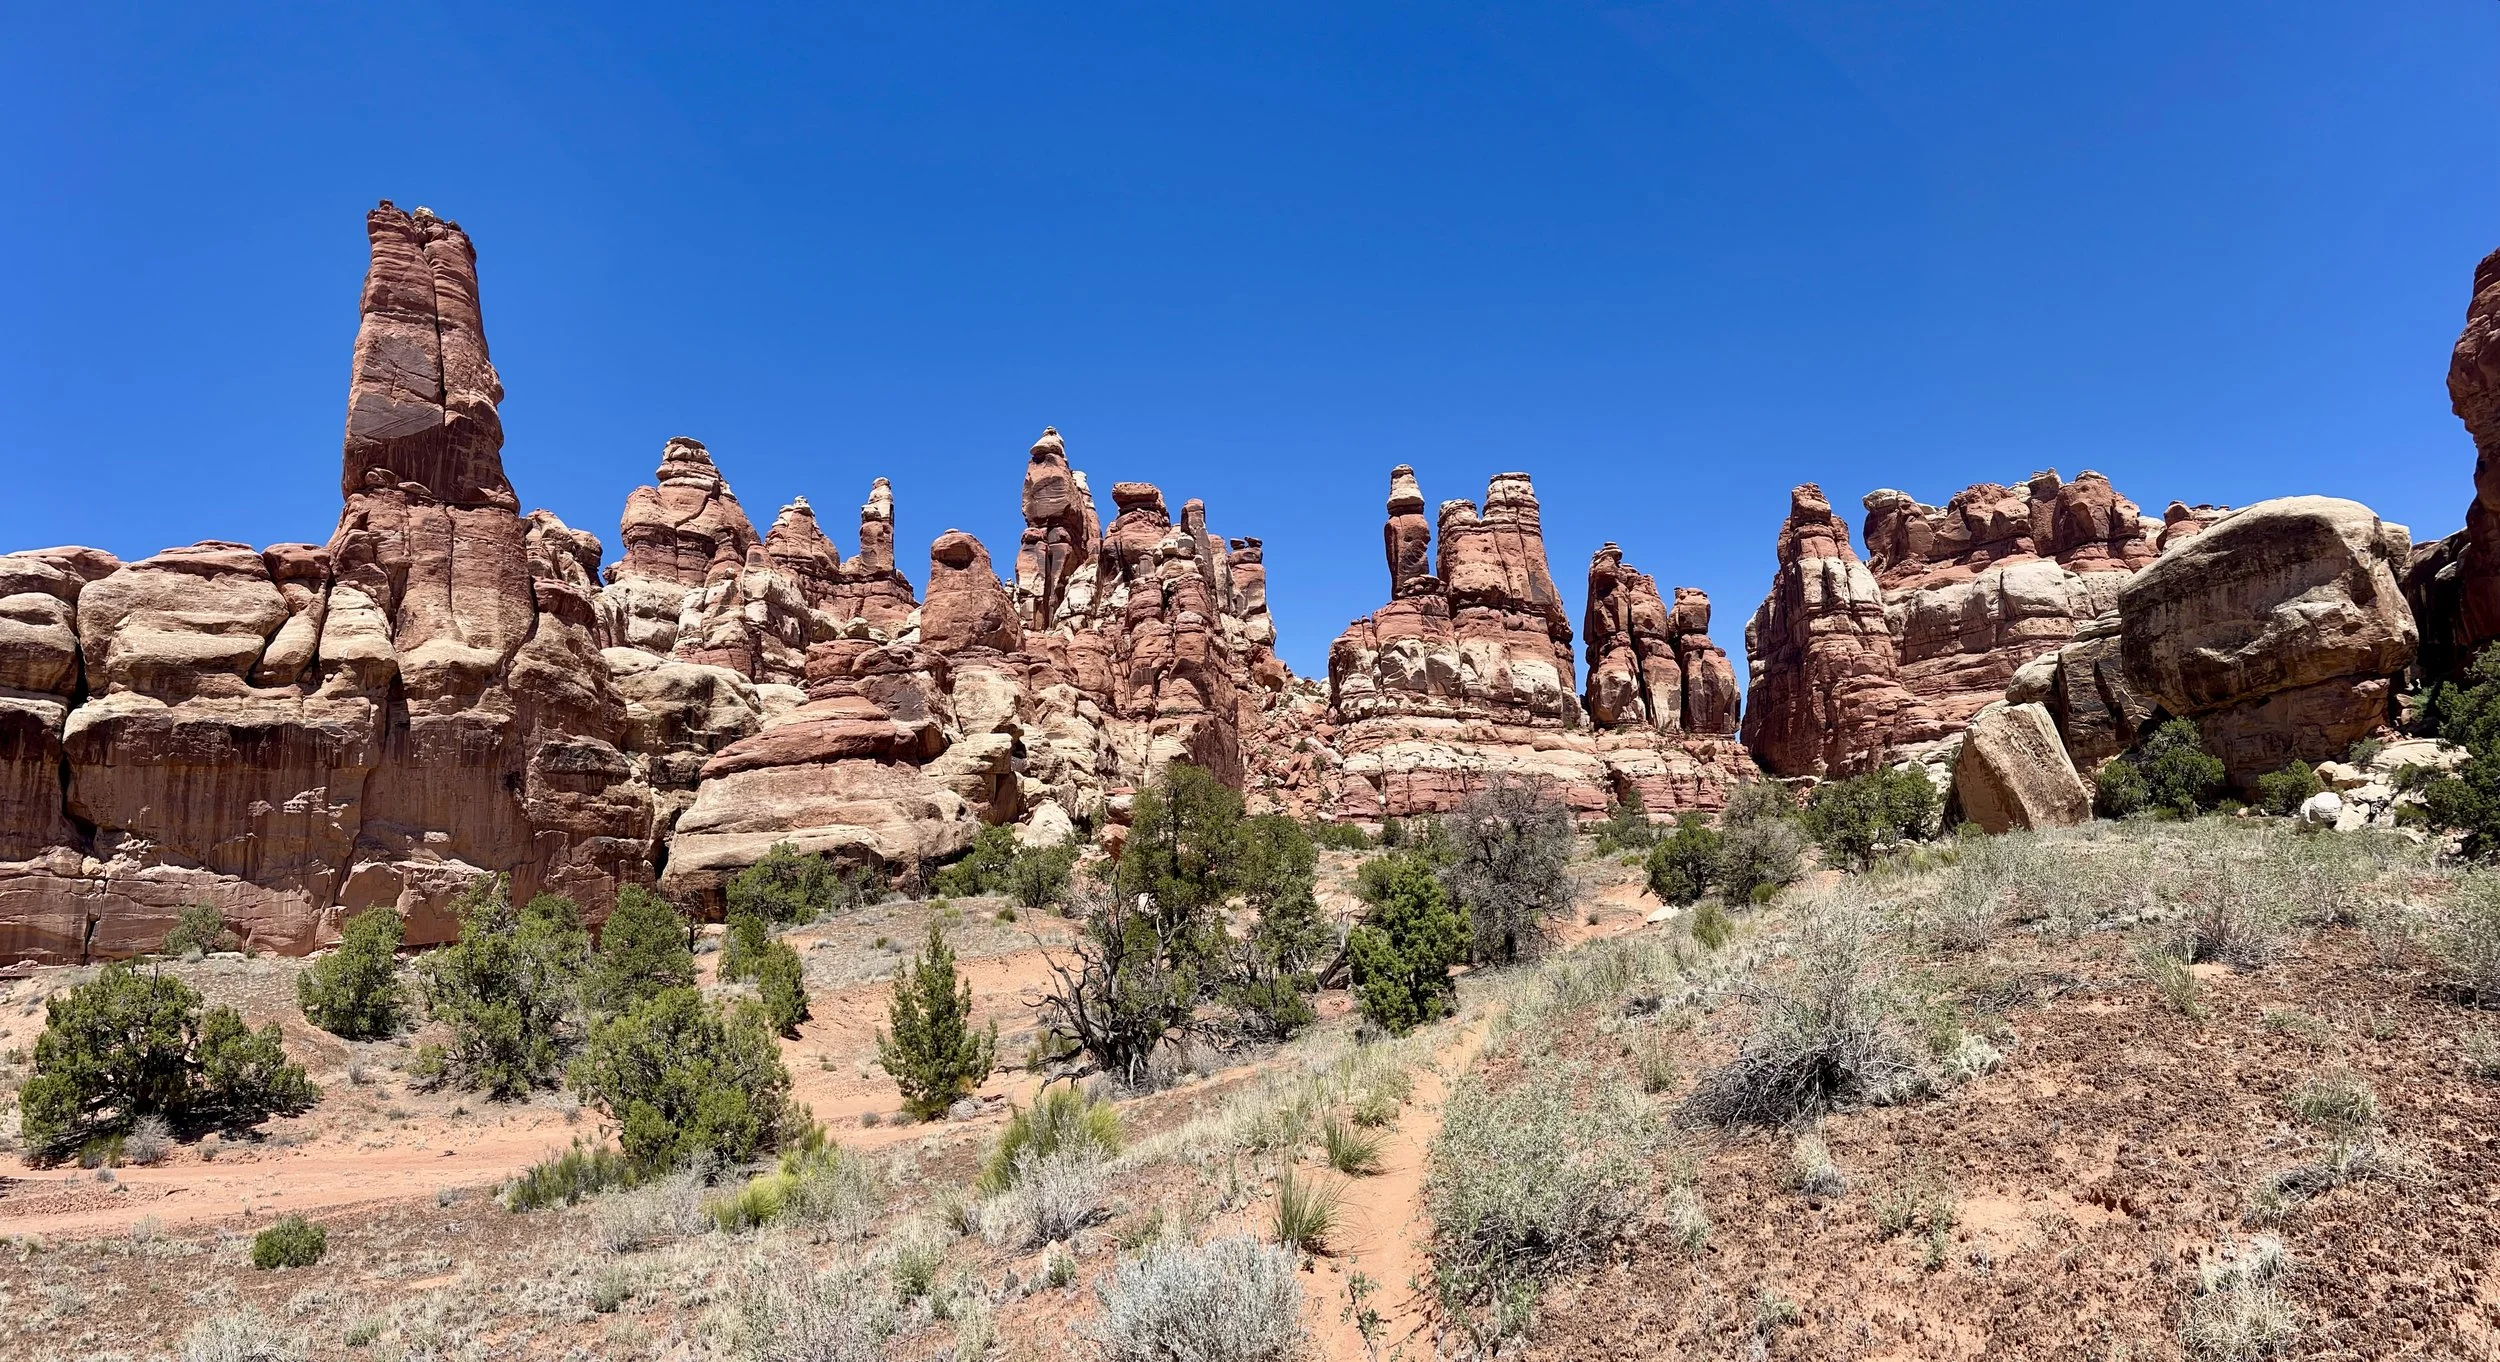
Day 5: South Canyonlands National Park - the Needles
South Canyonlands, also called the Needles, is the prettiest and most remote part of the national park. It’s really popular for backpacking trips and off-roading.
If you are interested in backpacking, you need to book a permit nearly 4 months in advance through recreation.gov - check when the permits open and set an alarm! It’s a really popular place to go.
If you have a 4 wheel drive and high clearance car and like off-roading, this is a great place to do it. There are vehicle campgrounds throughout the park, and I suggested this trip to friends across the country who are car people. Note that you cannot do this without 4WD experience, it’s pretty intense. The ranger station did have camping openings for the next day when I asked at the ranger station, but similar to backpacking, you should book in advance for weekends.
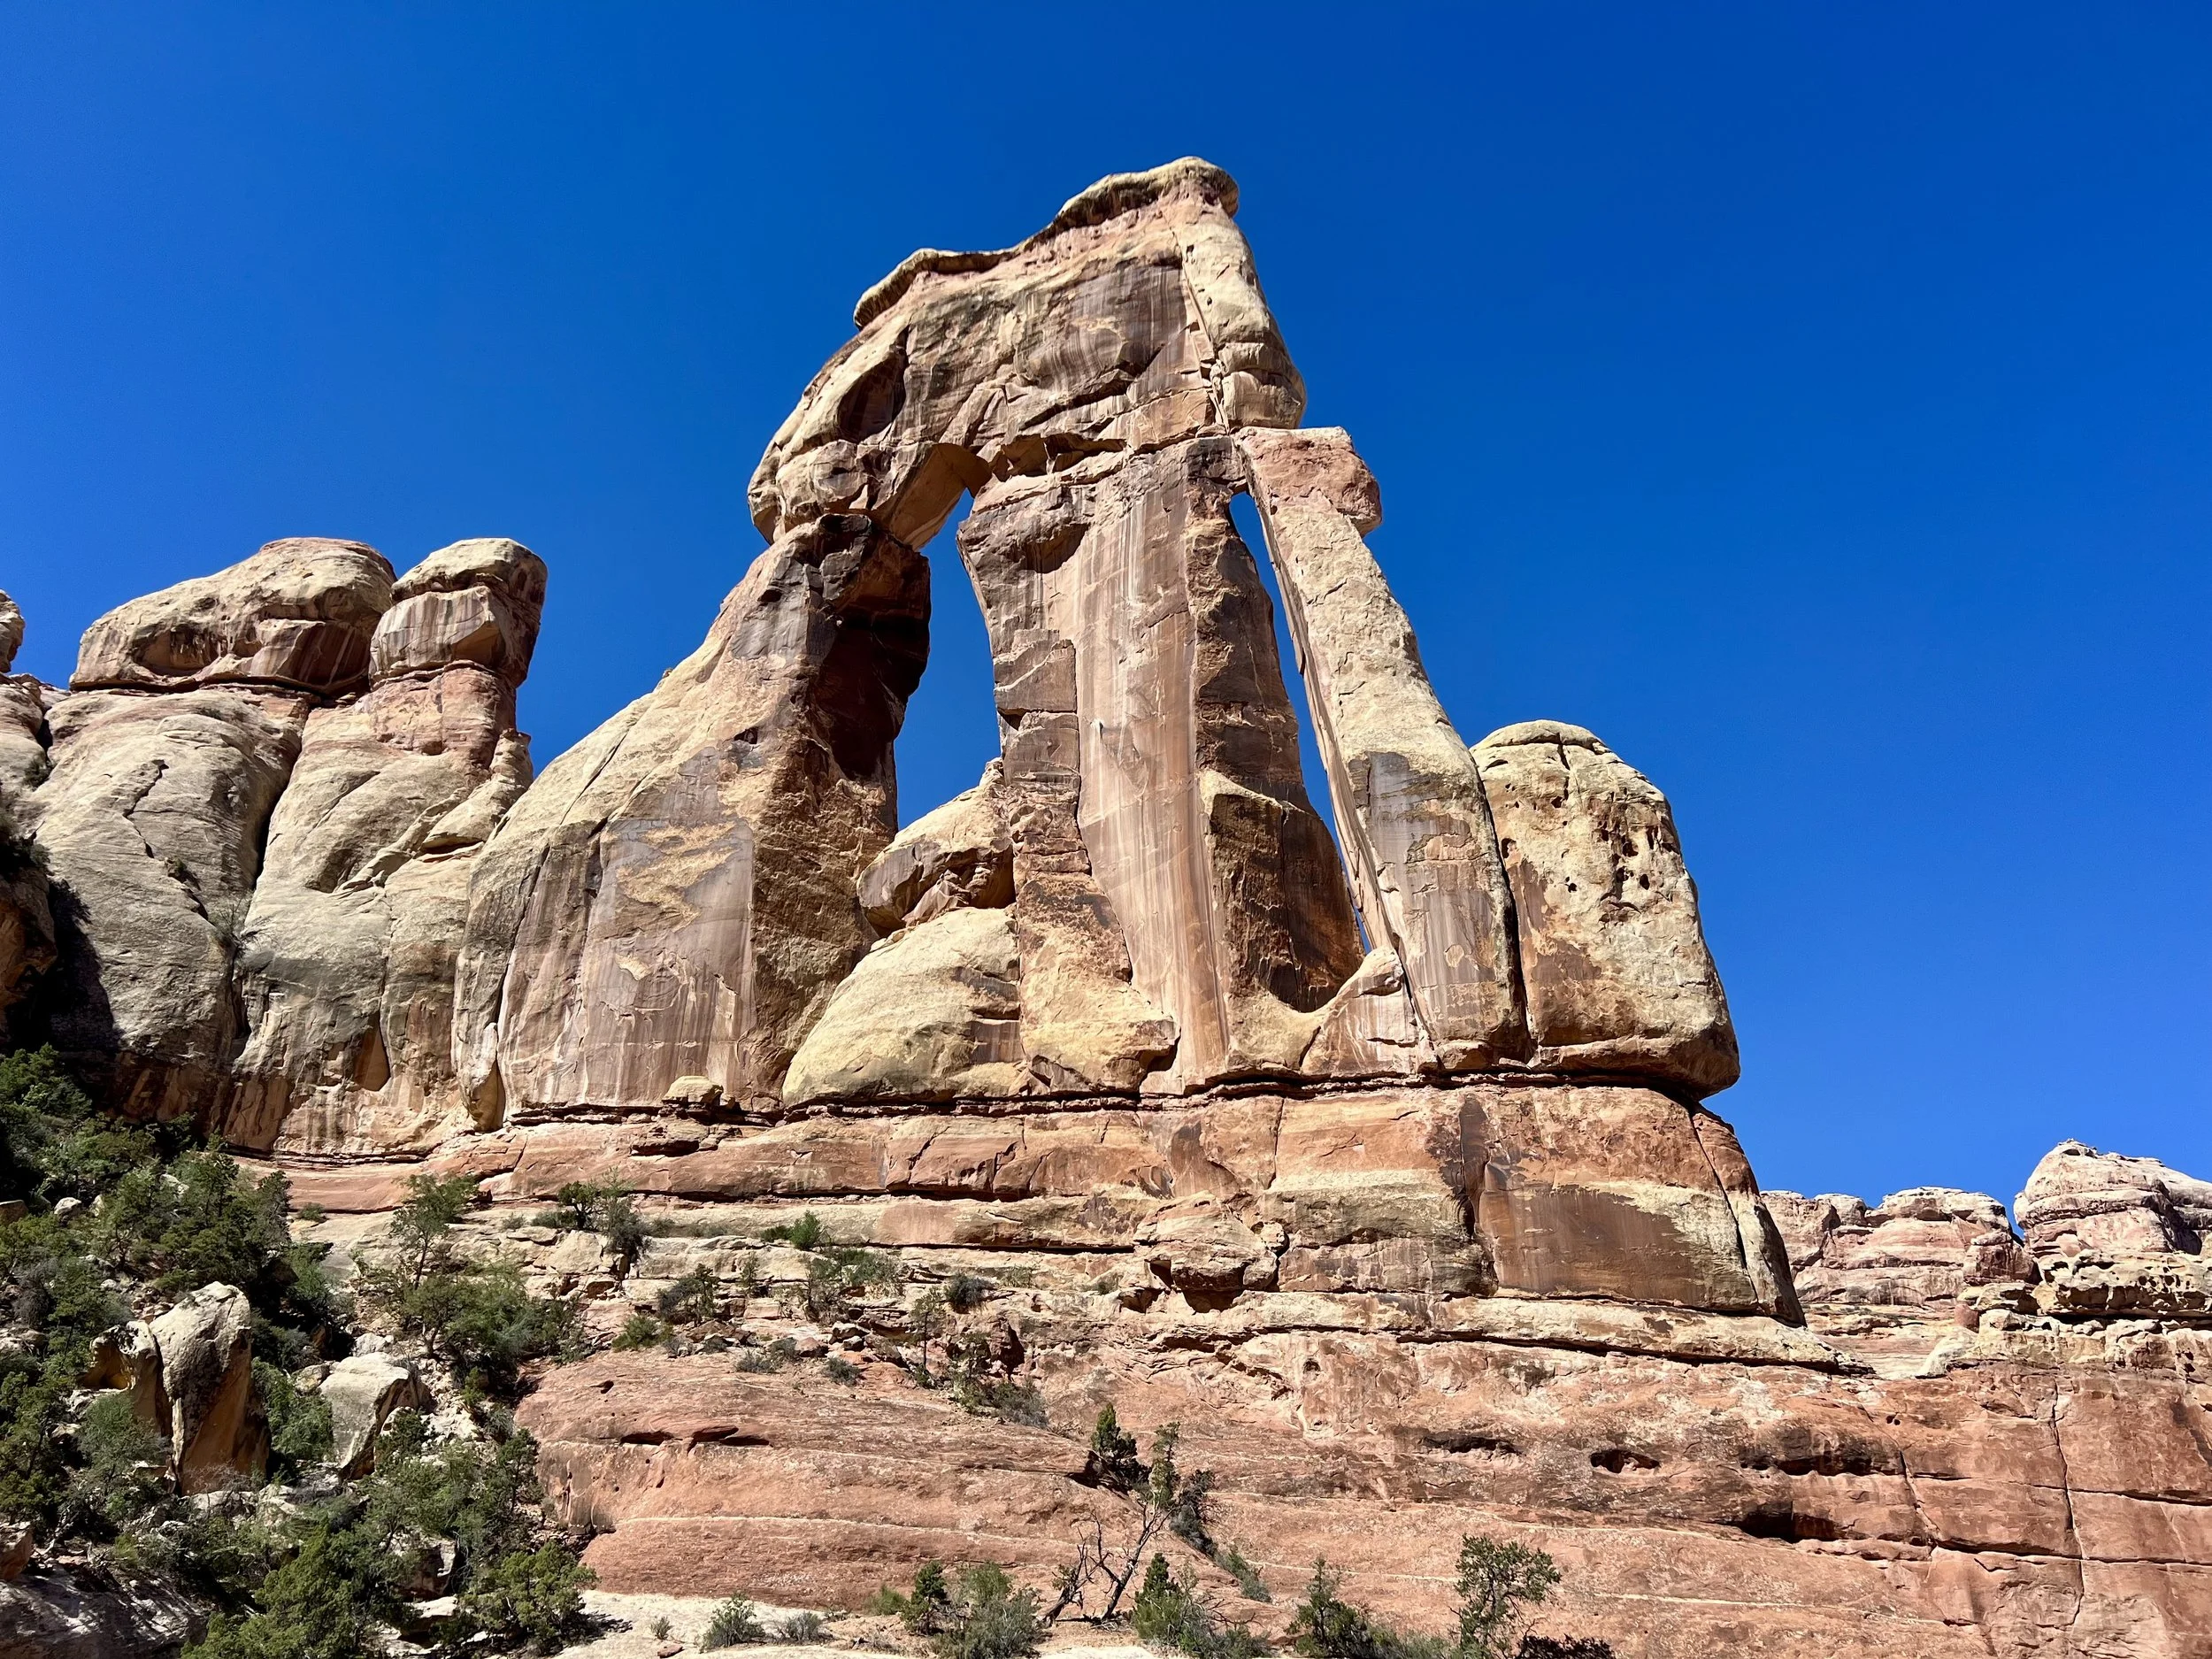
I hiked a long loop that is typically done for backhanding covering Druid arch / Chester Park / Devils Pocket, and was about 17 miles. I hitched a ride with some jeepers for the last 1.5 miles, adding to the adventure.
On your way out of the park, make sure to stop at Newspaper Rock. This is a large petroglyph site that is right off the road.
Camp outside the park in Blanding using freecampsites.net

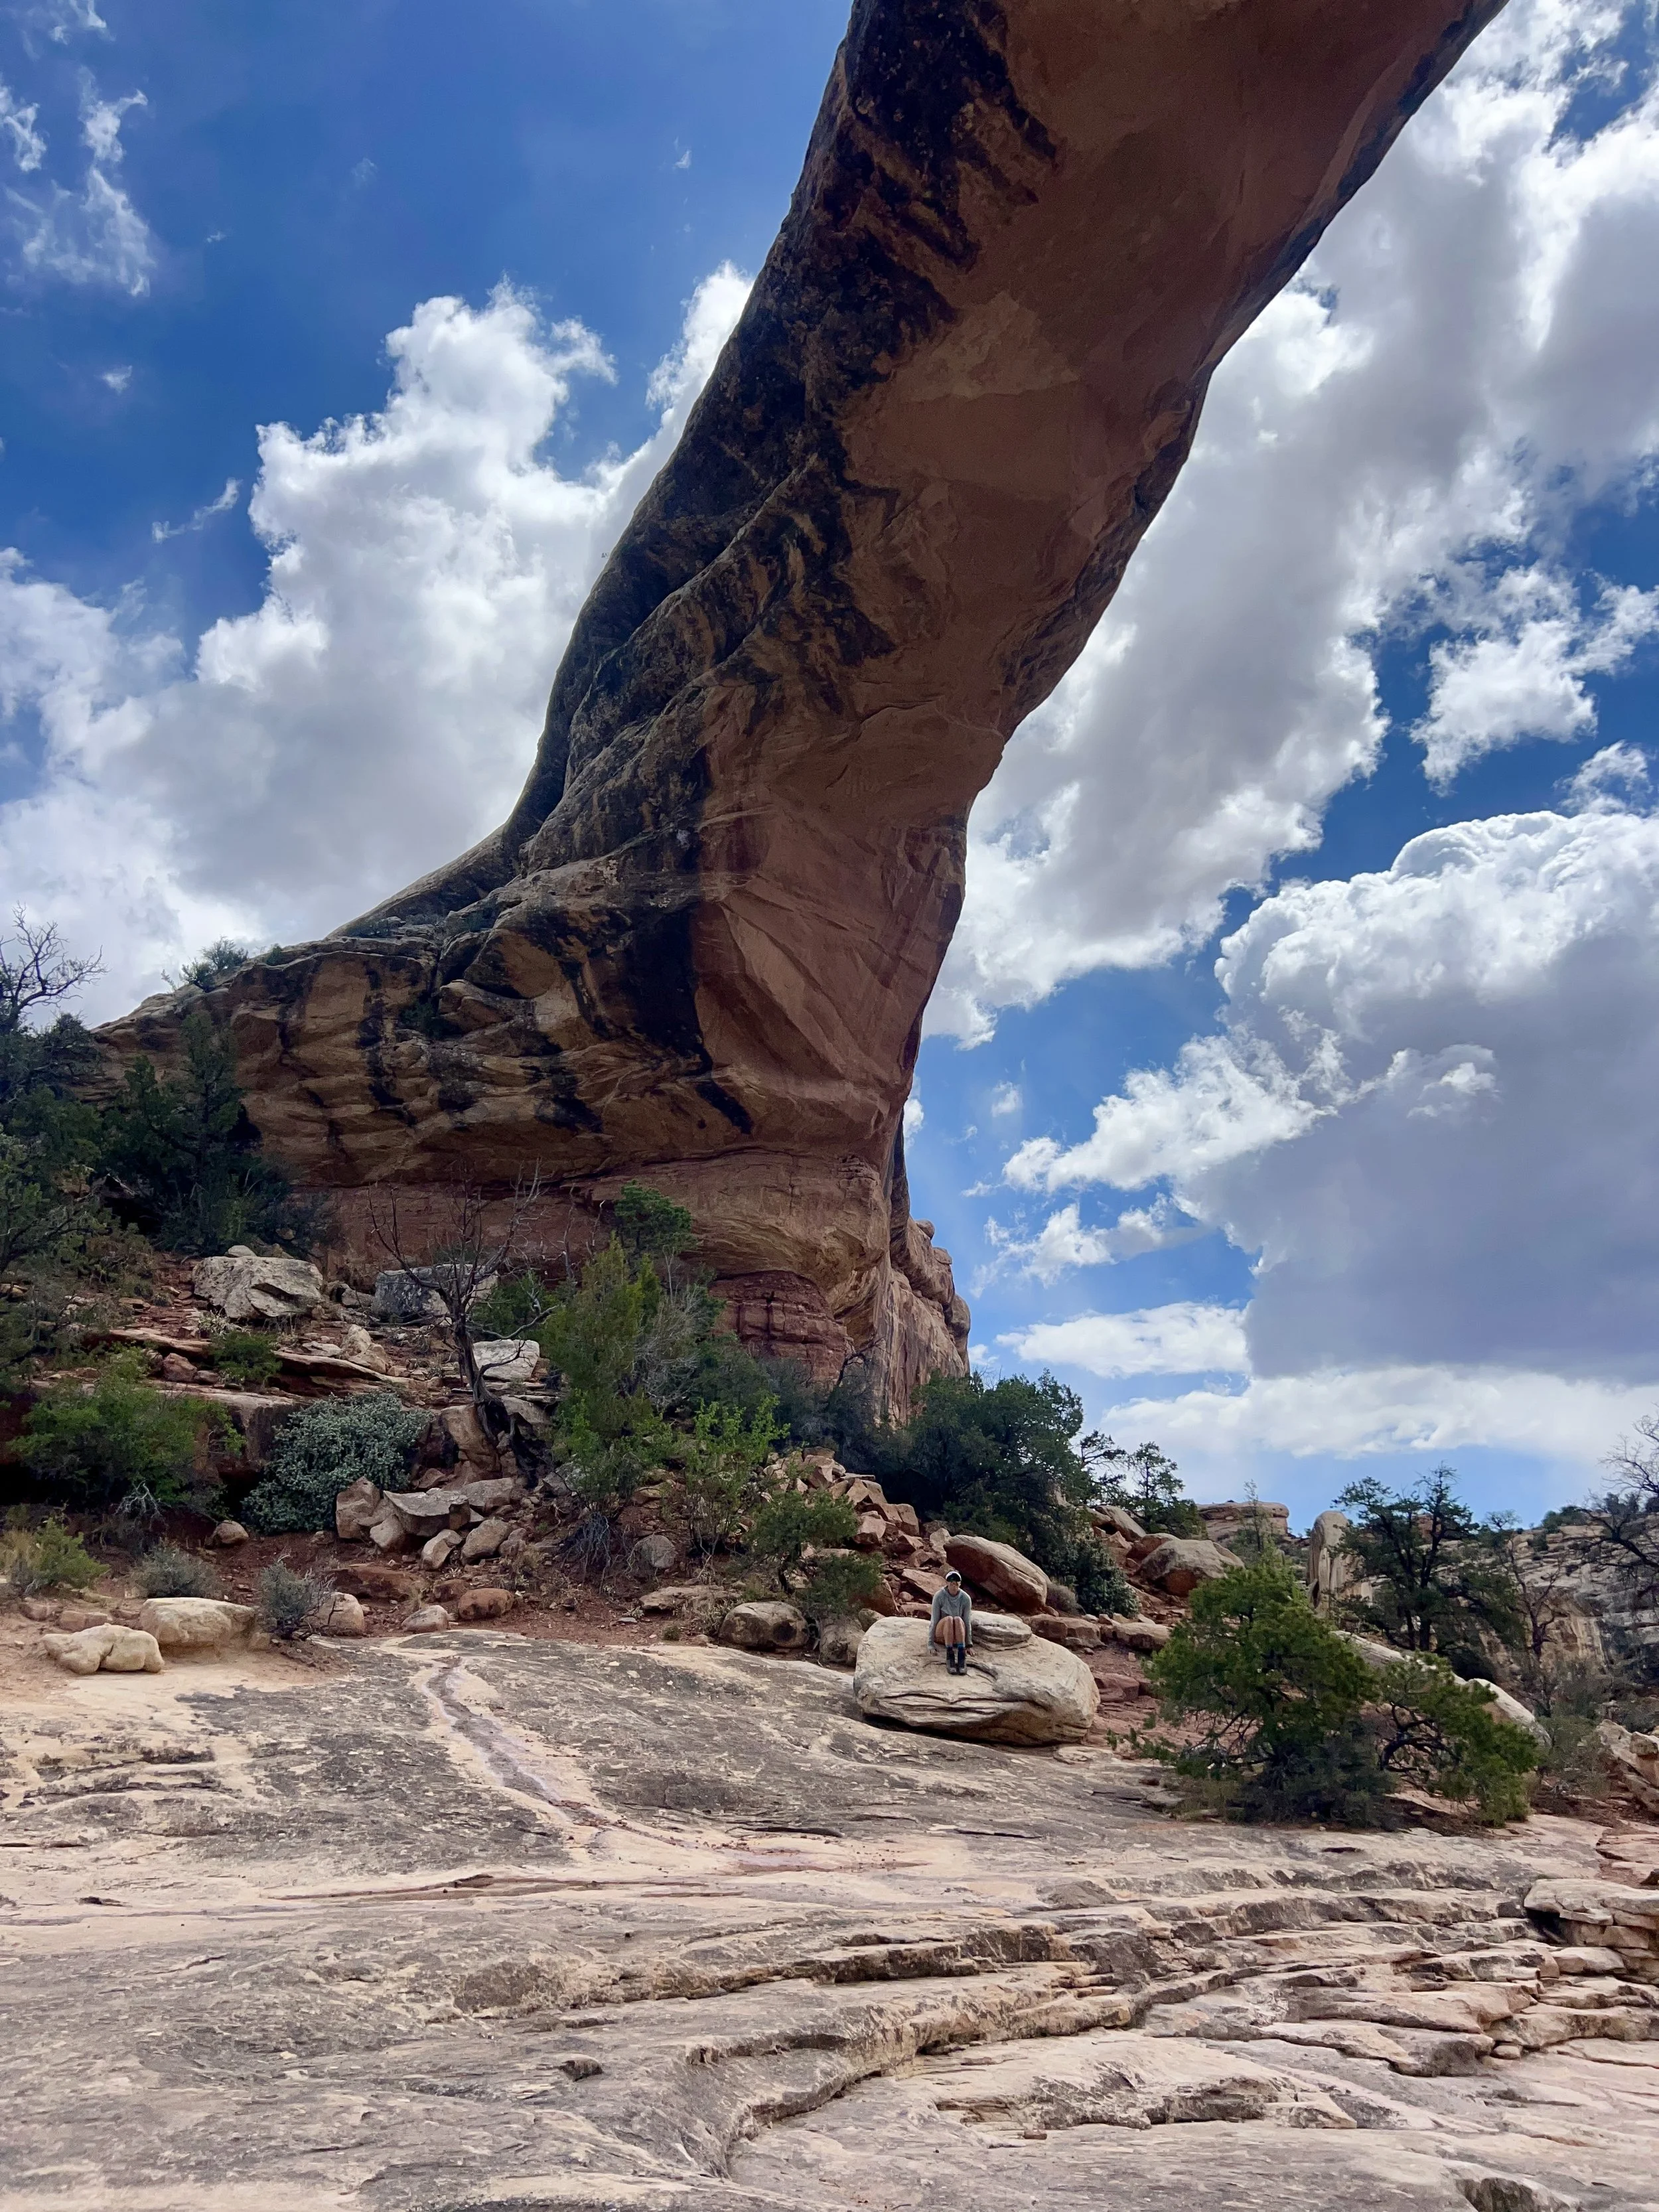
Day 6: Natural Bridges
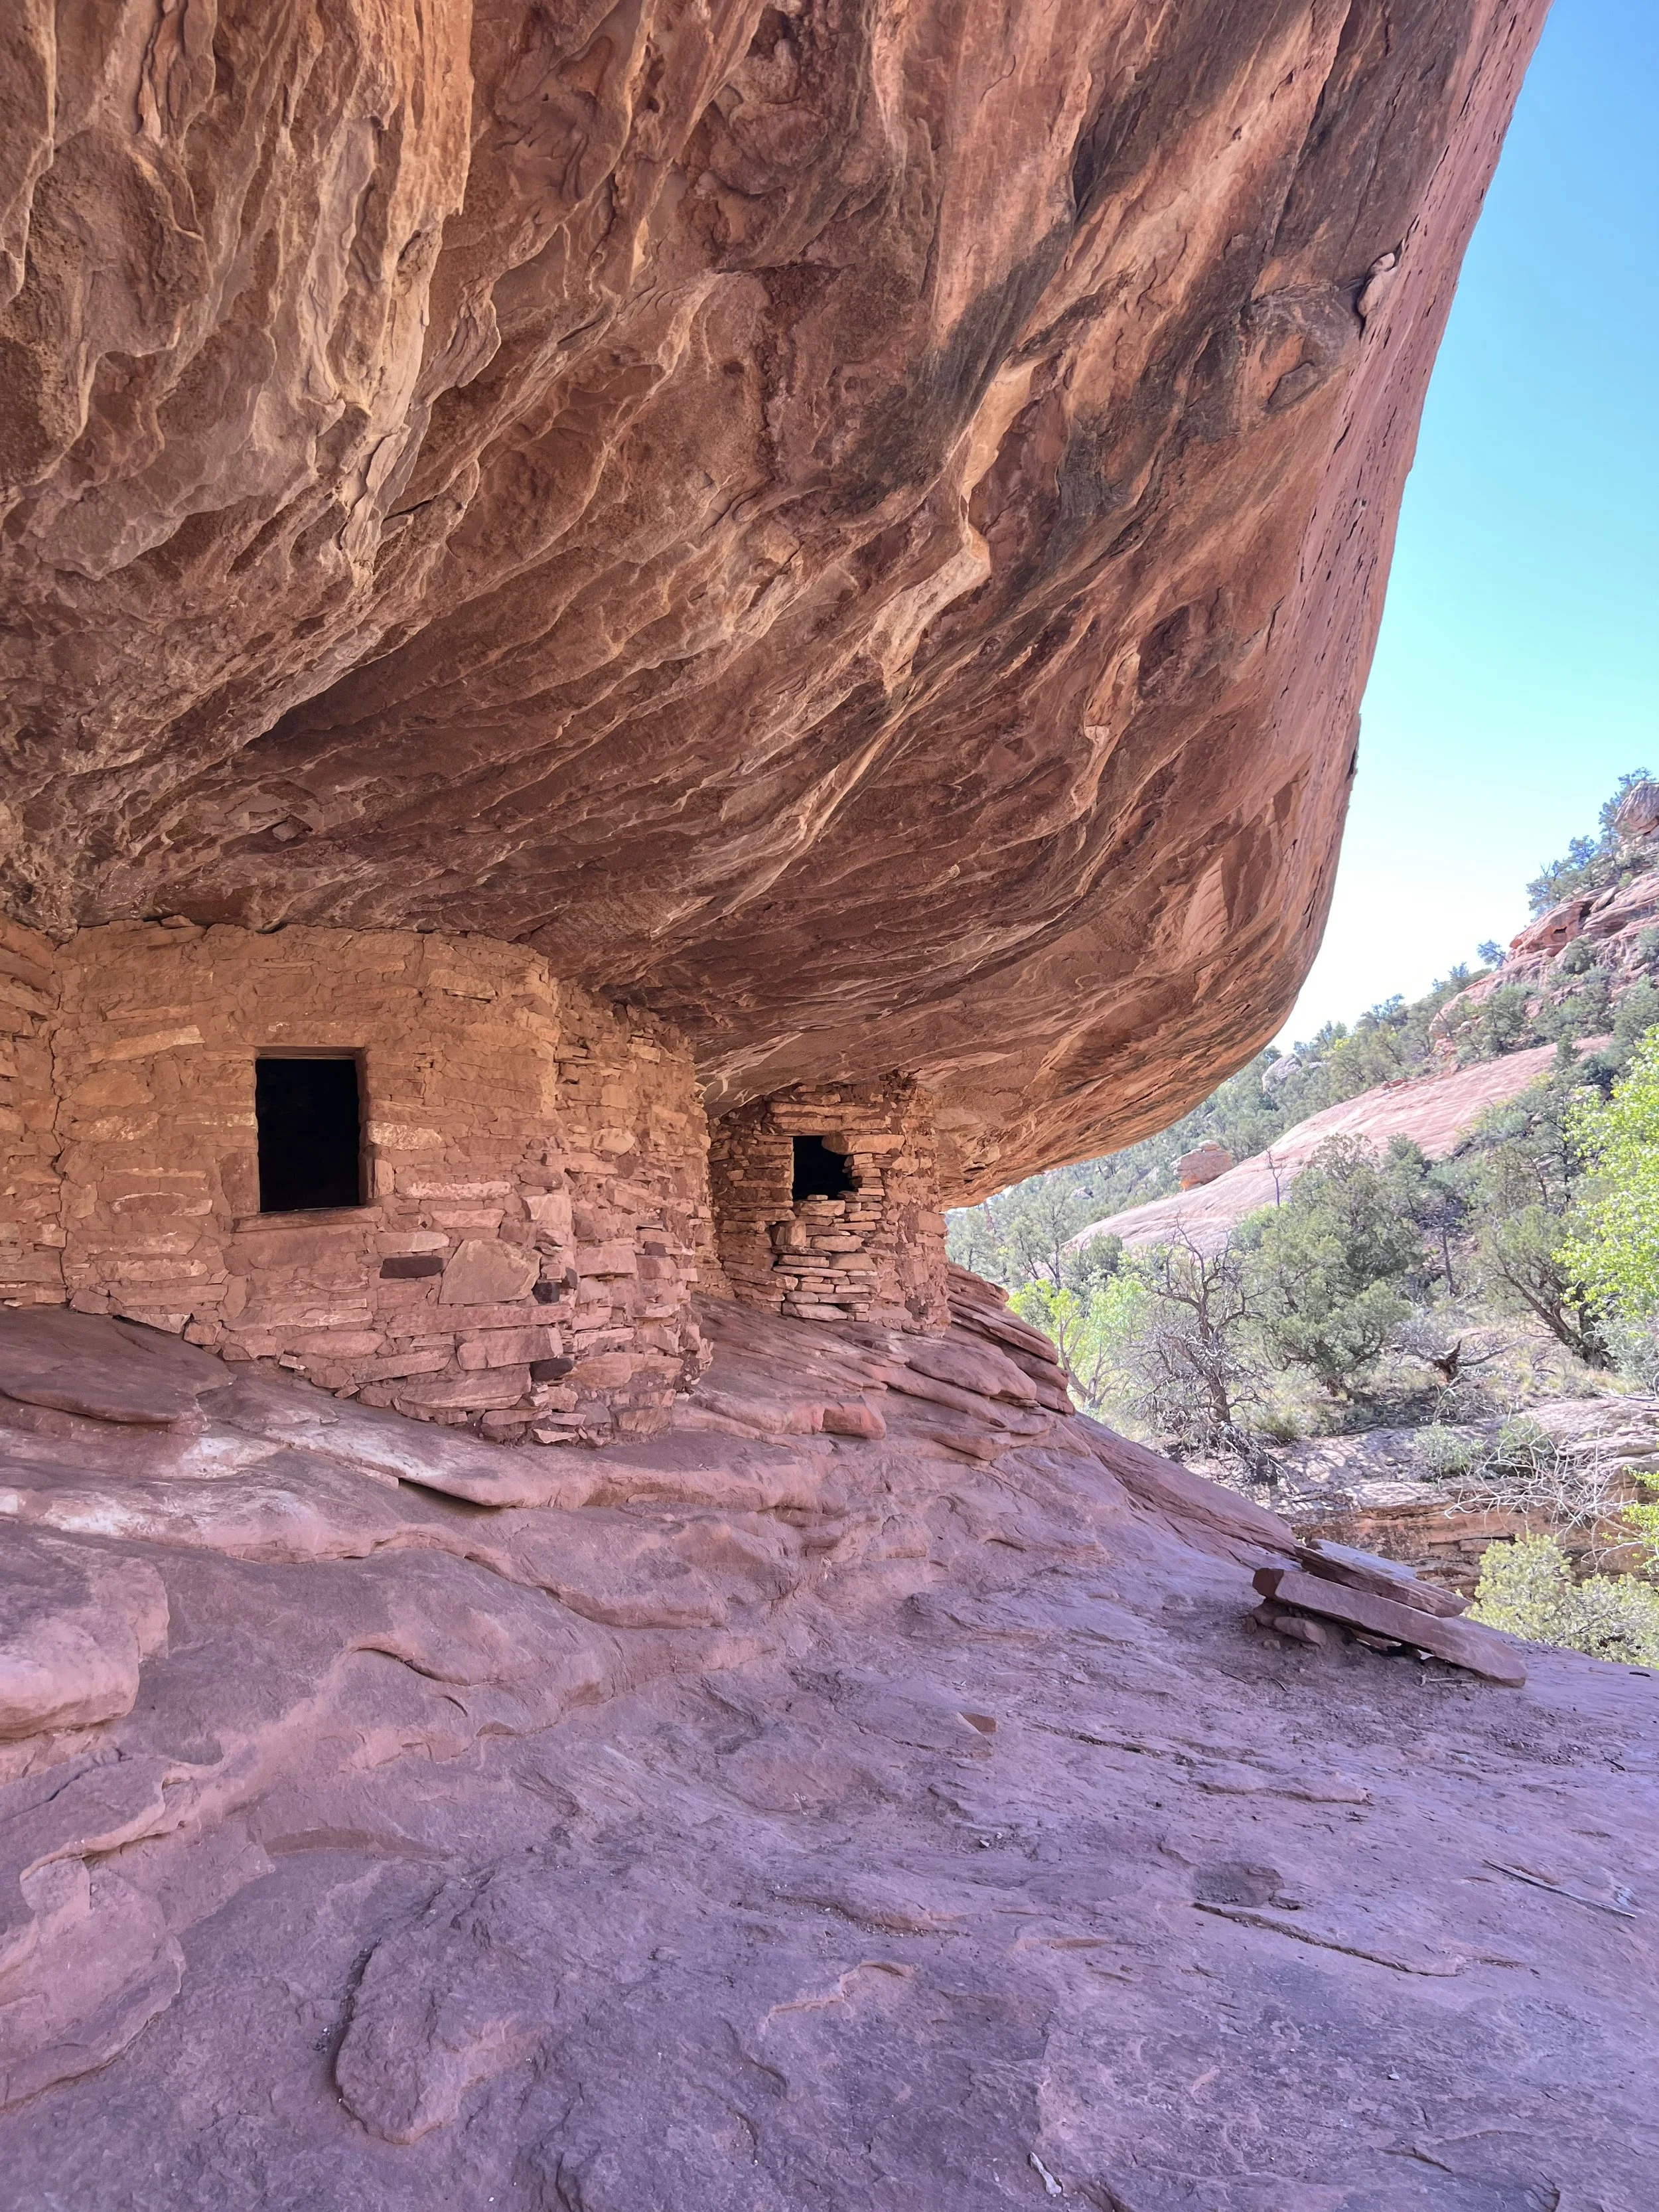
From Blanding, you will turn off on a small road towards Natural Bridges National Monument. You will enter Bears Ears Protected Area with a lot of Hope Indian ruins and sacred sites. On the way, stop to do a short 2-3 mile hike to see House on Fire, a Native American cultural site. You will need to purchase a $5 day use pass to hike in specific Bears Ears locations, which you can do online or at the trailhead.
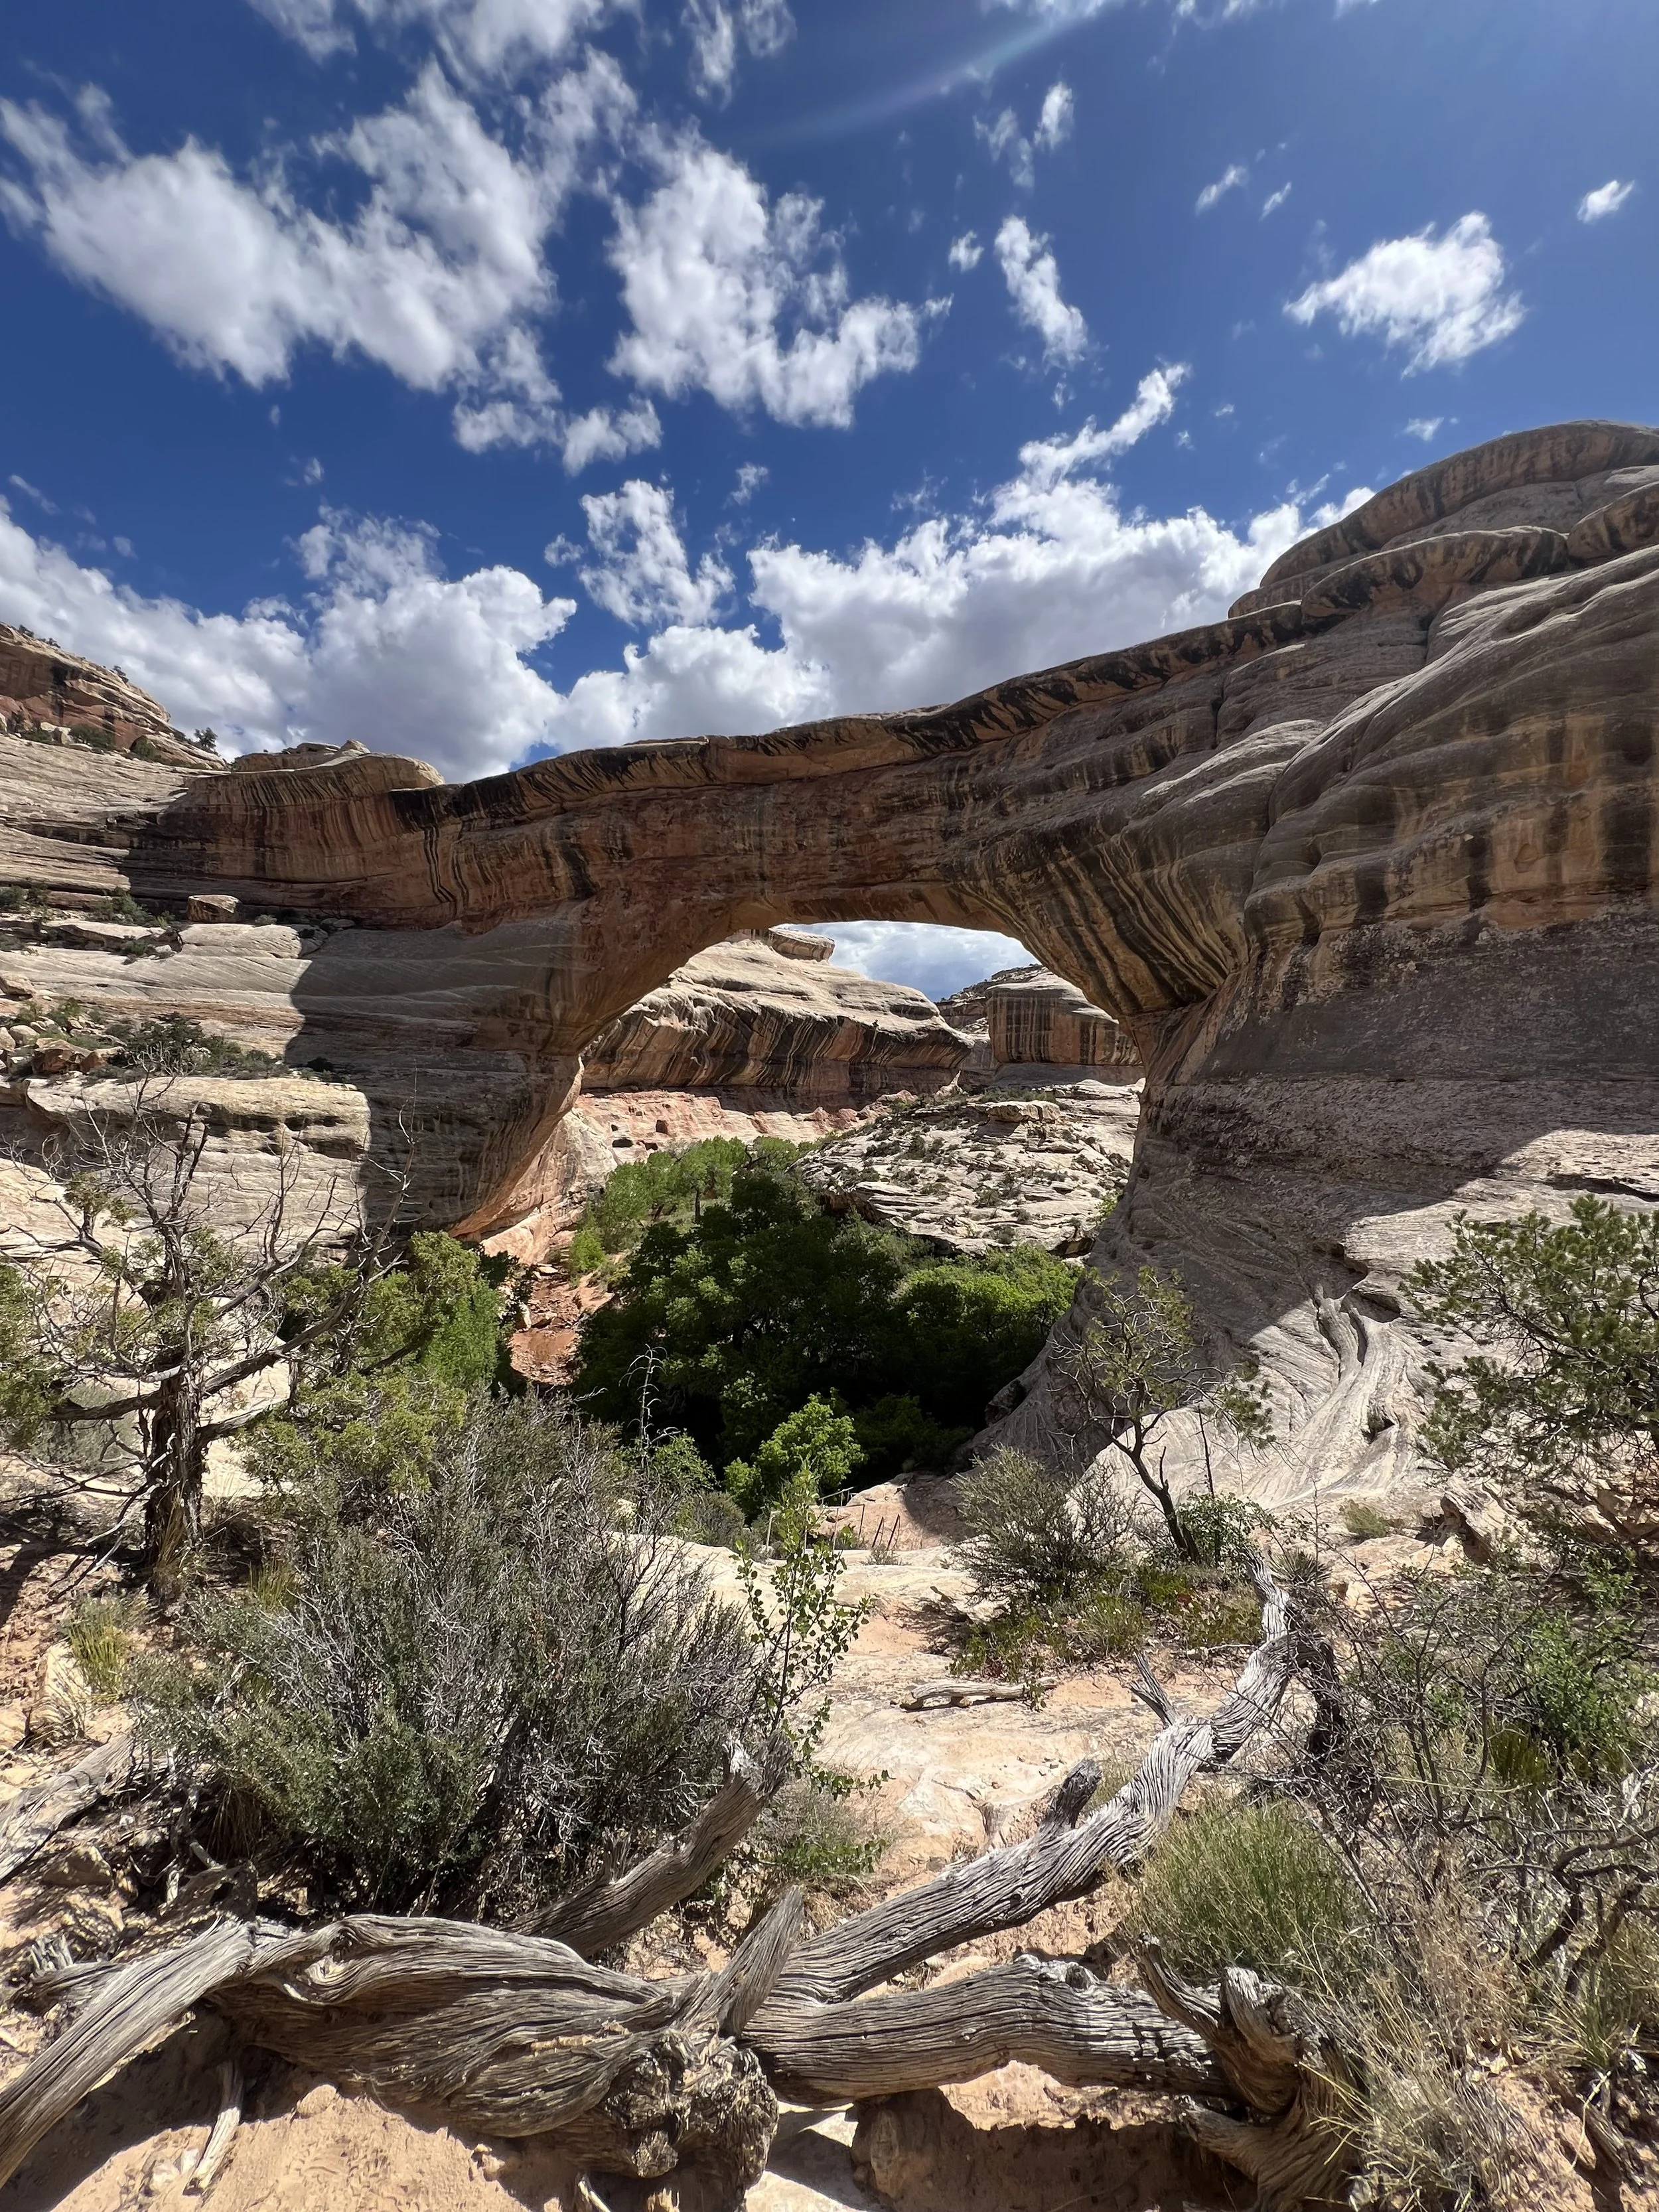
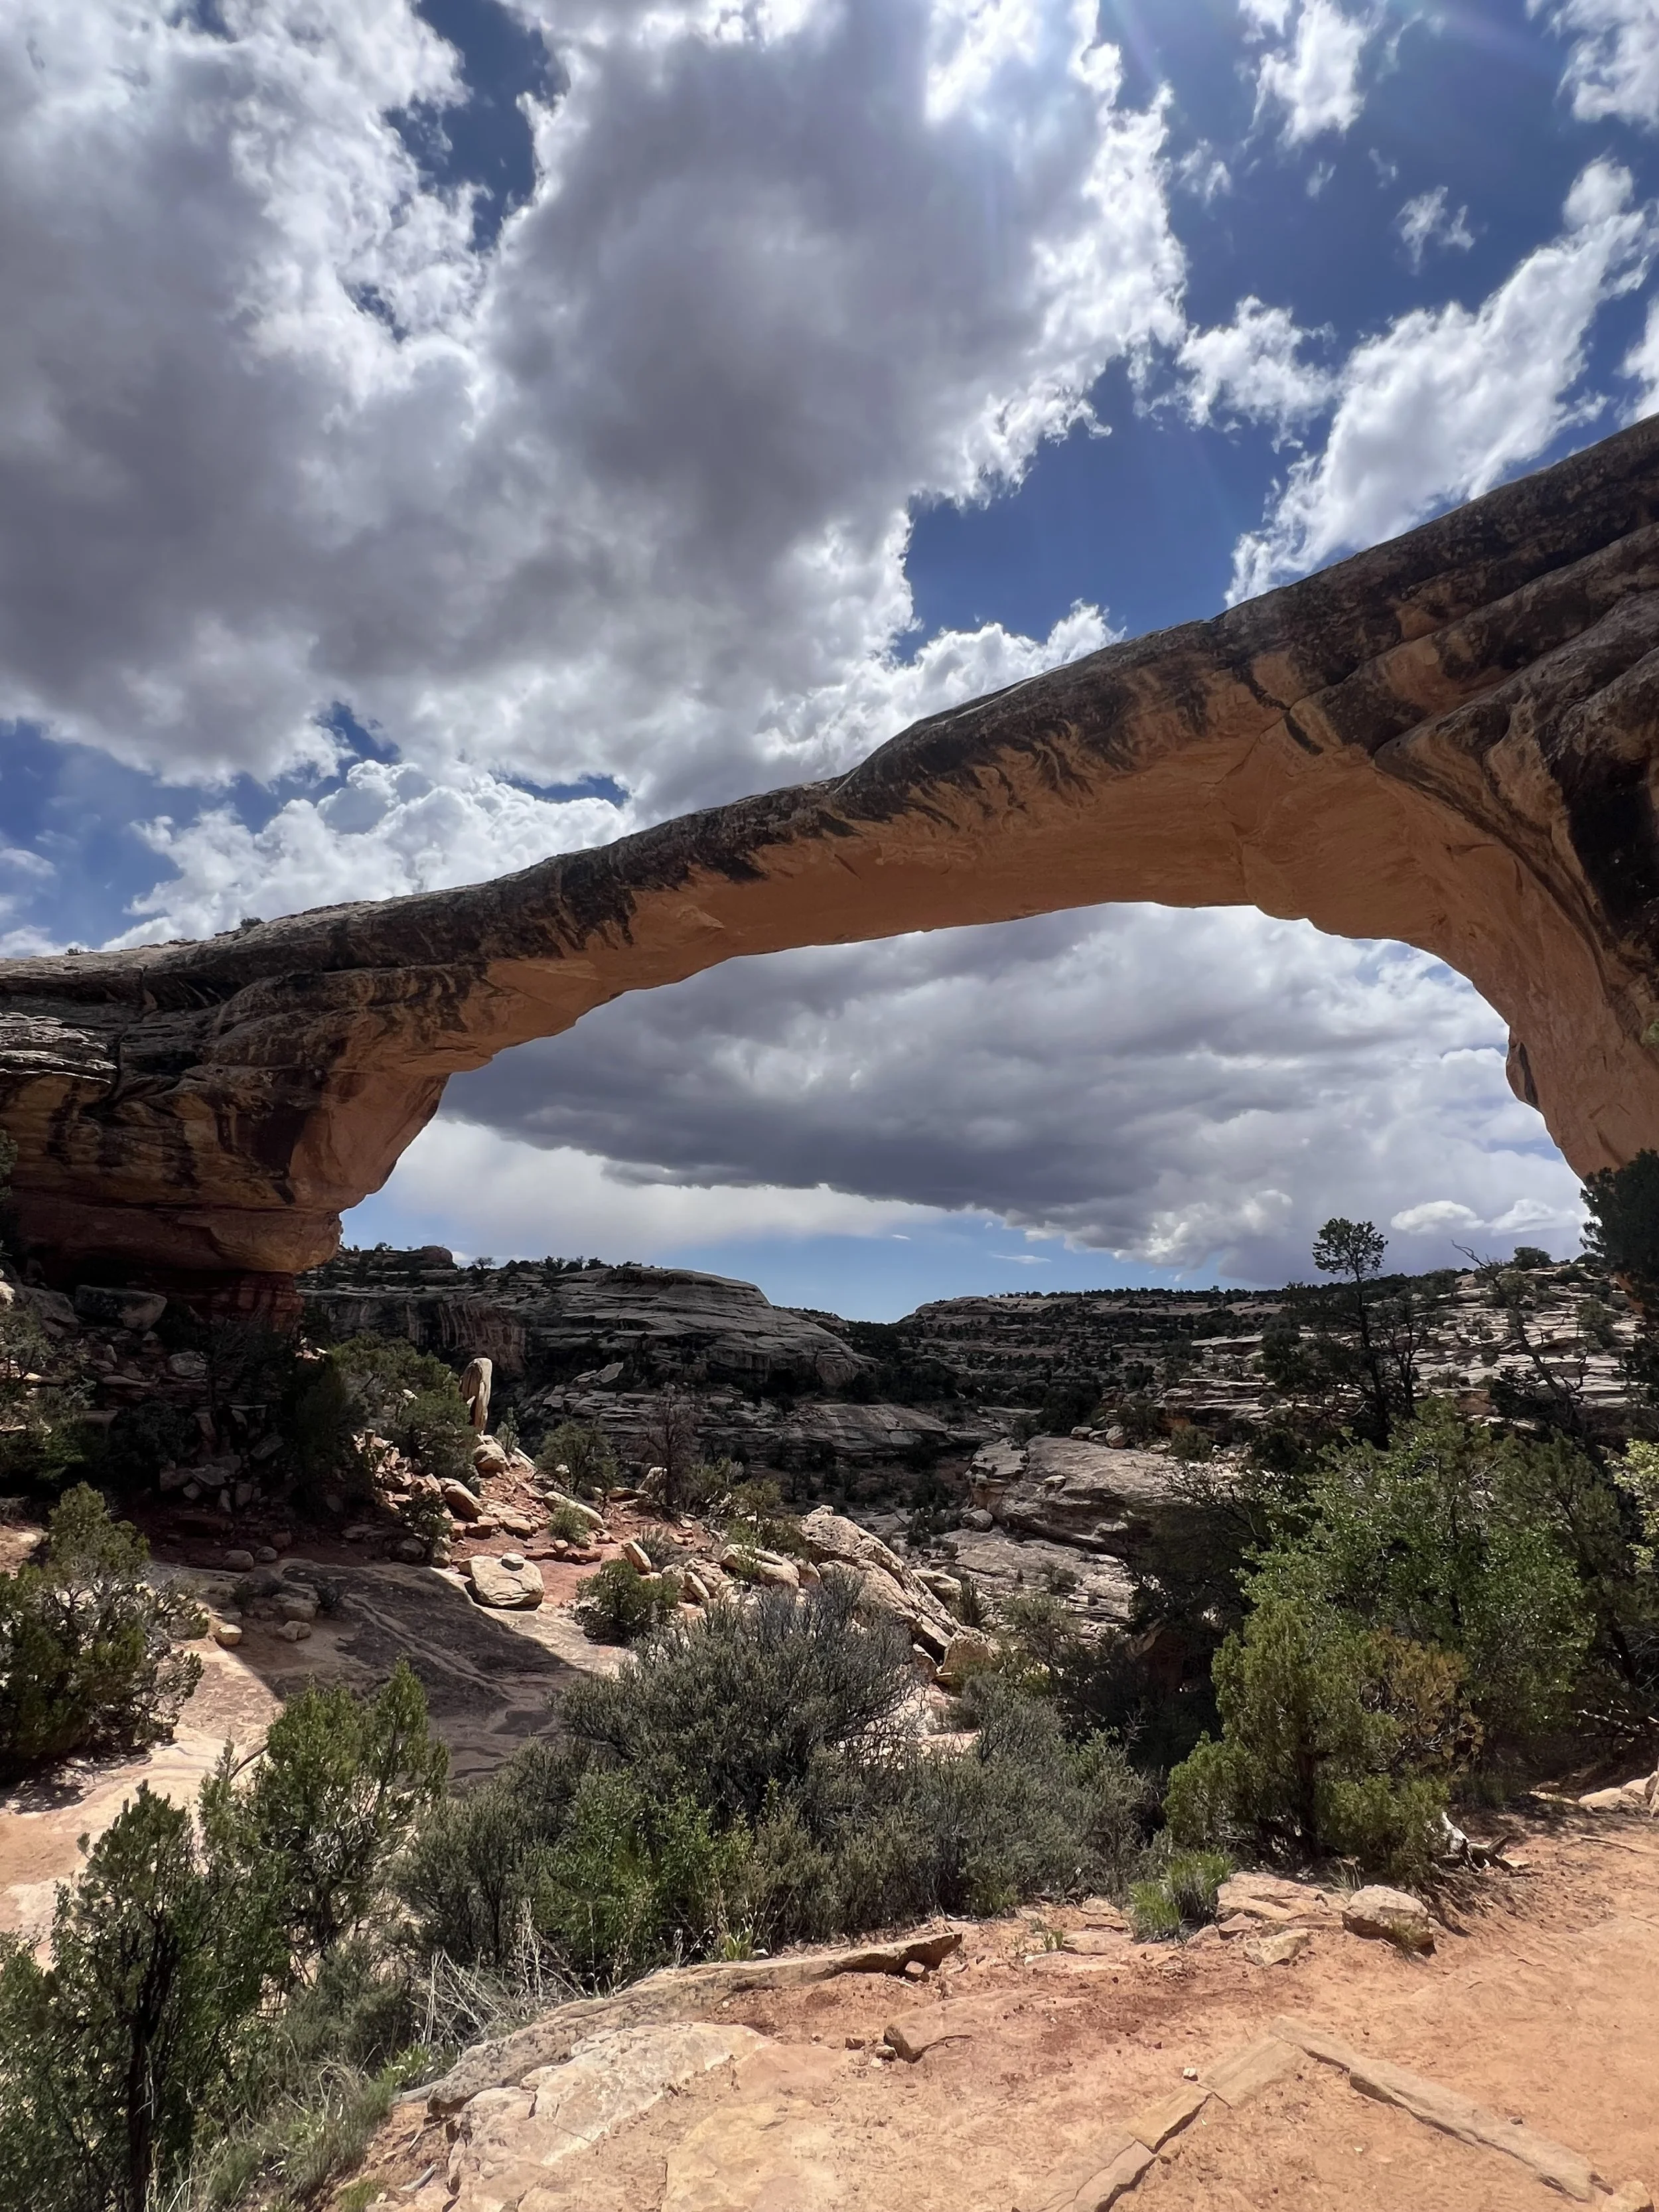
After your morning hike, drive to Natural Bridges National Monument. Good thing you have your national parks pass; otherwise, it would cost $20 to enter! There are 3 major bridges in this area and you can either drive the loop to each of them (and experience the bridges through viewpoints or a short 1-2 mile hike at each spot) or you can hike the whole area from the visitors center. I was blown away by this area! Make sure to fill up on water at the visitors center when you are done.
Depending on timing, you can camp at the campsite in Natural Bridges or find a free campsite nearby.
Day 7: The Cidatel, Moki Dugway, & Valley of the Gods
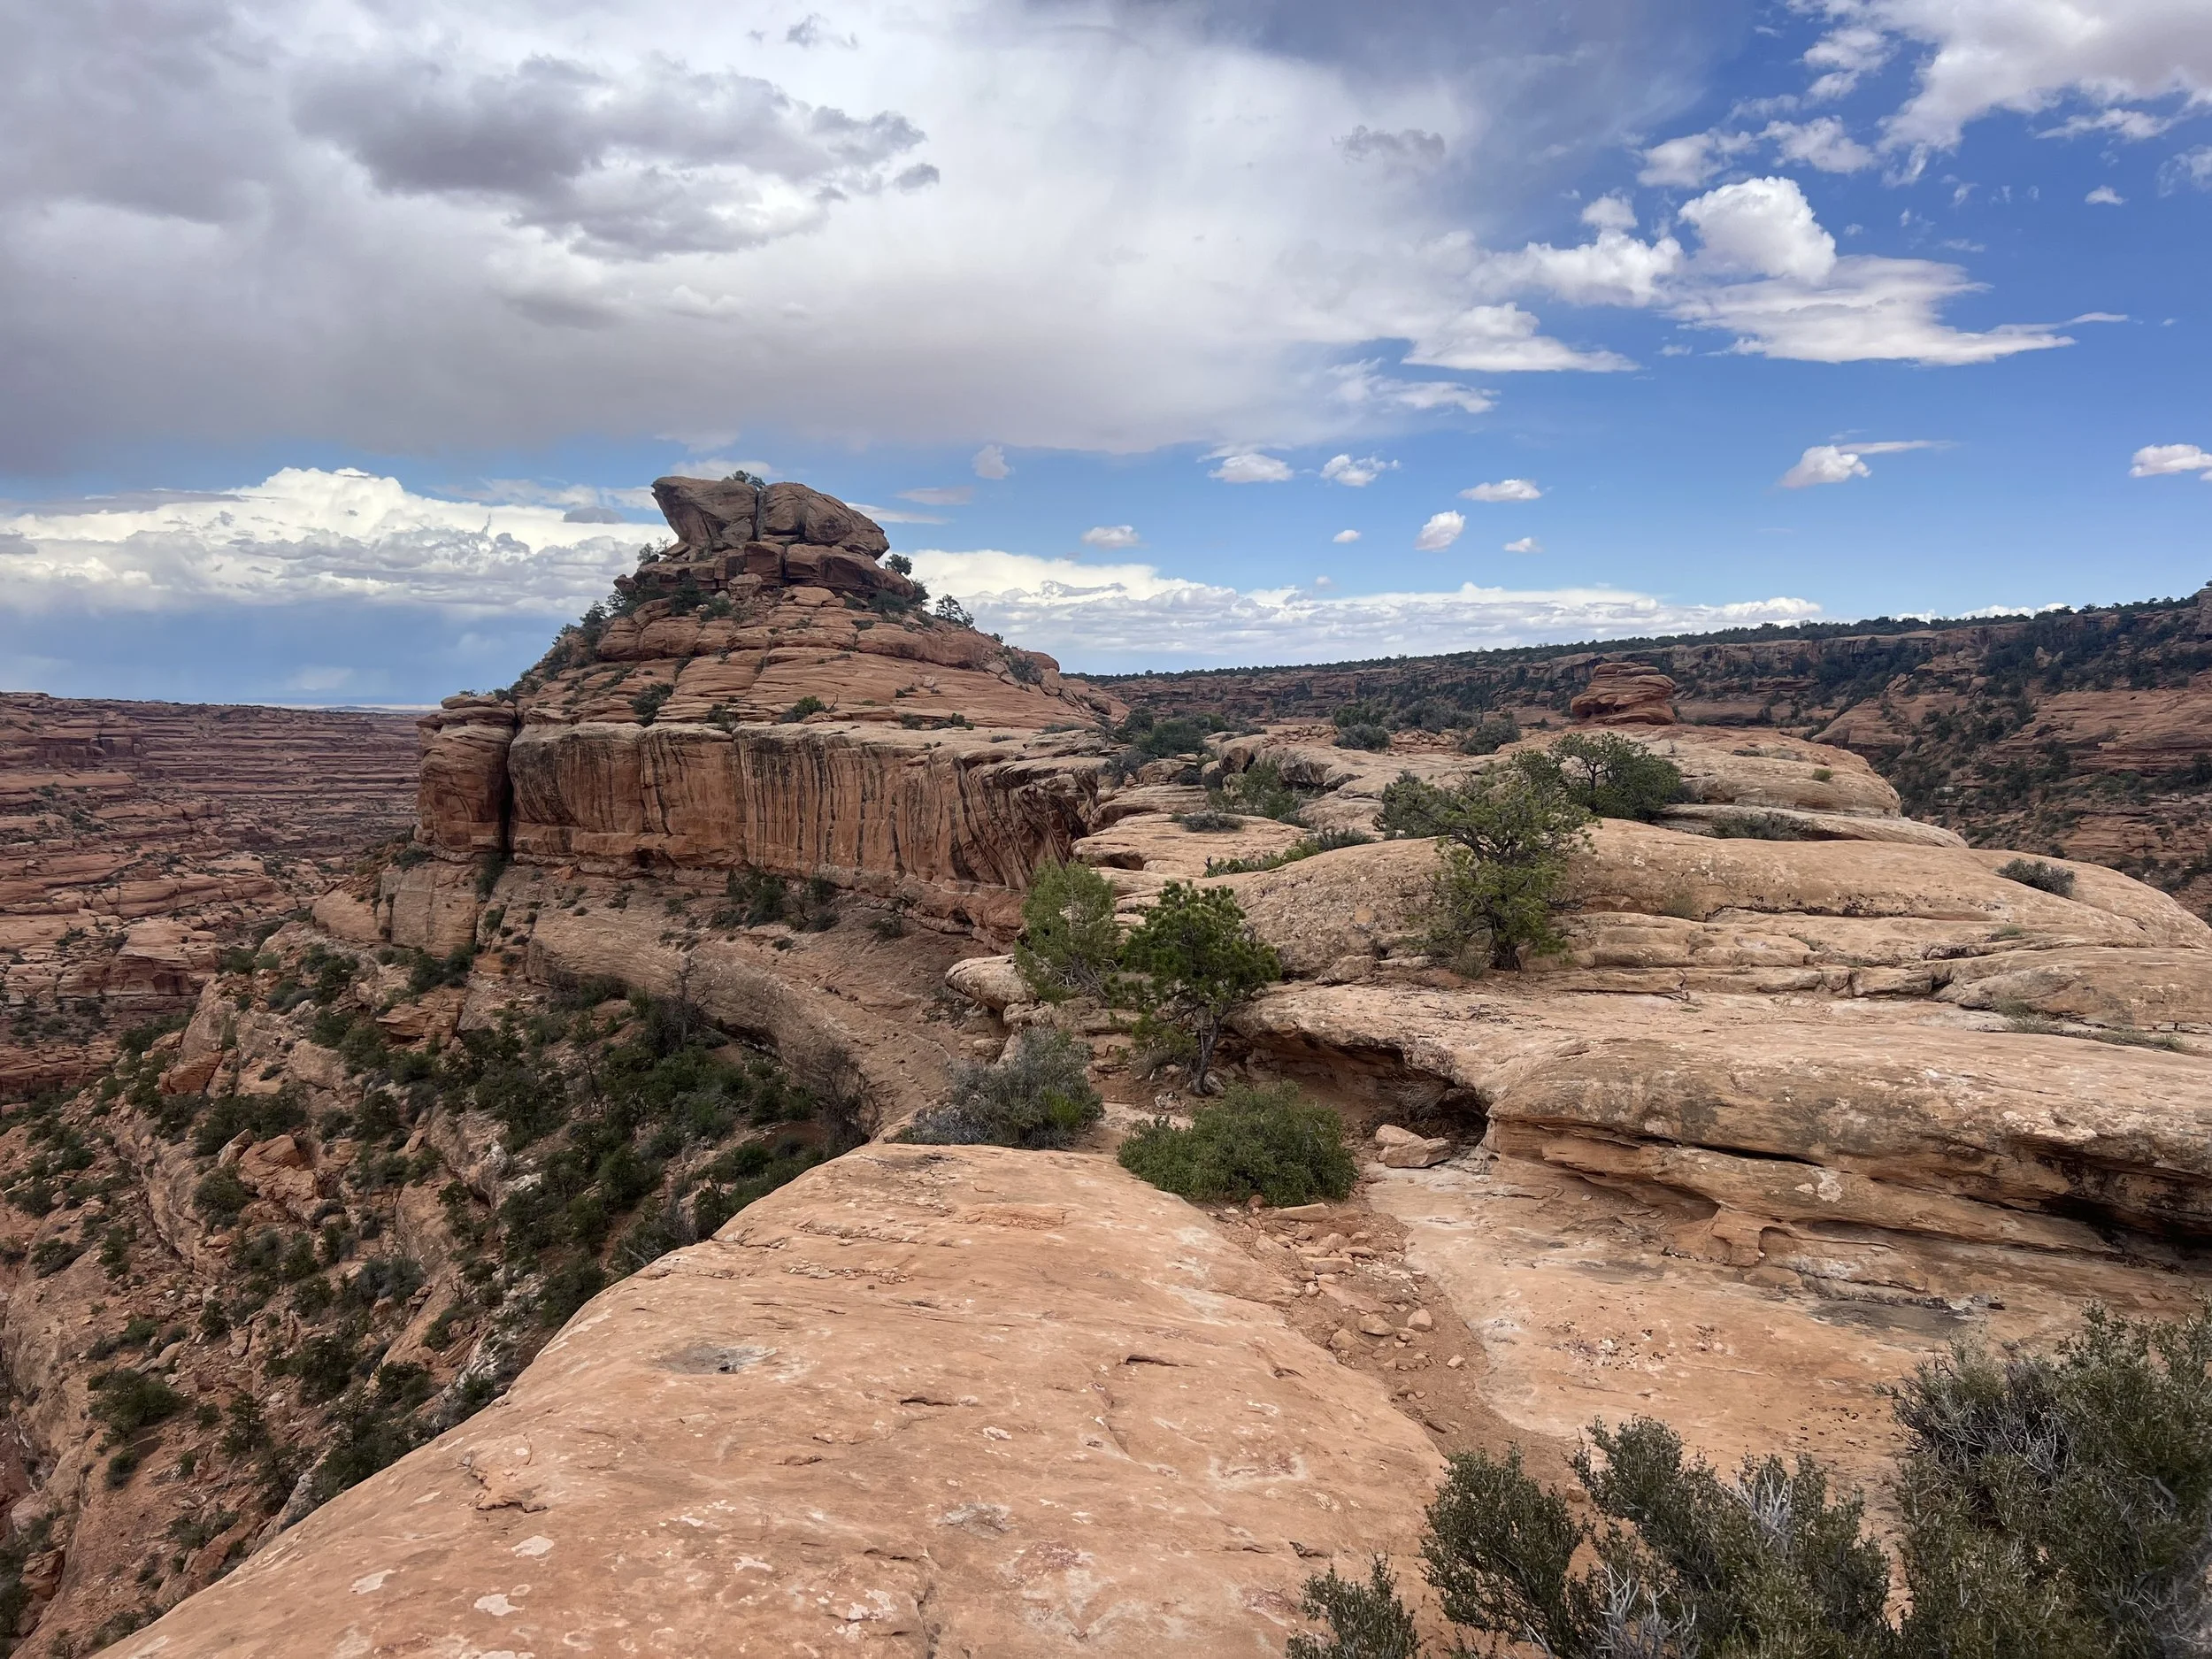
From Natural Bridges, you will head south back towards the main highway. Today is a day of adventure and some dirt roads, but I guarantee it will be your favorite day of the entire trip. Start off by hiking the Citadel - another hike in Bears Ears where you will need a day permit. To get to the trailhead, you will need to drive on a dirt road for almost 45mins each way. The hike itself goes across a beautiful plain before overlooking a massive canyon. You’ll see a large pillar in the middle of the canyon, and yes, you are going up there! Cairns lead the way across a rocky bridge between 2 canyons, and there is a bit of bouldering to reach the final monument. This was 100% my favorite hike I did this whole road trip. Do not skip it!


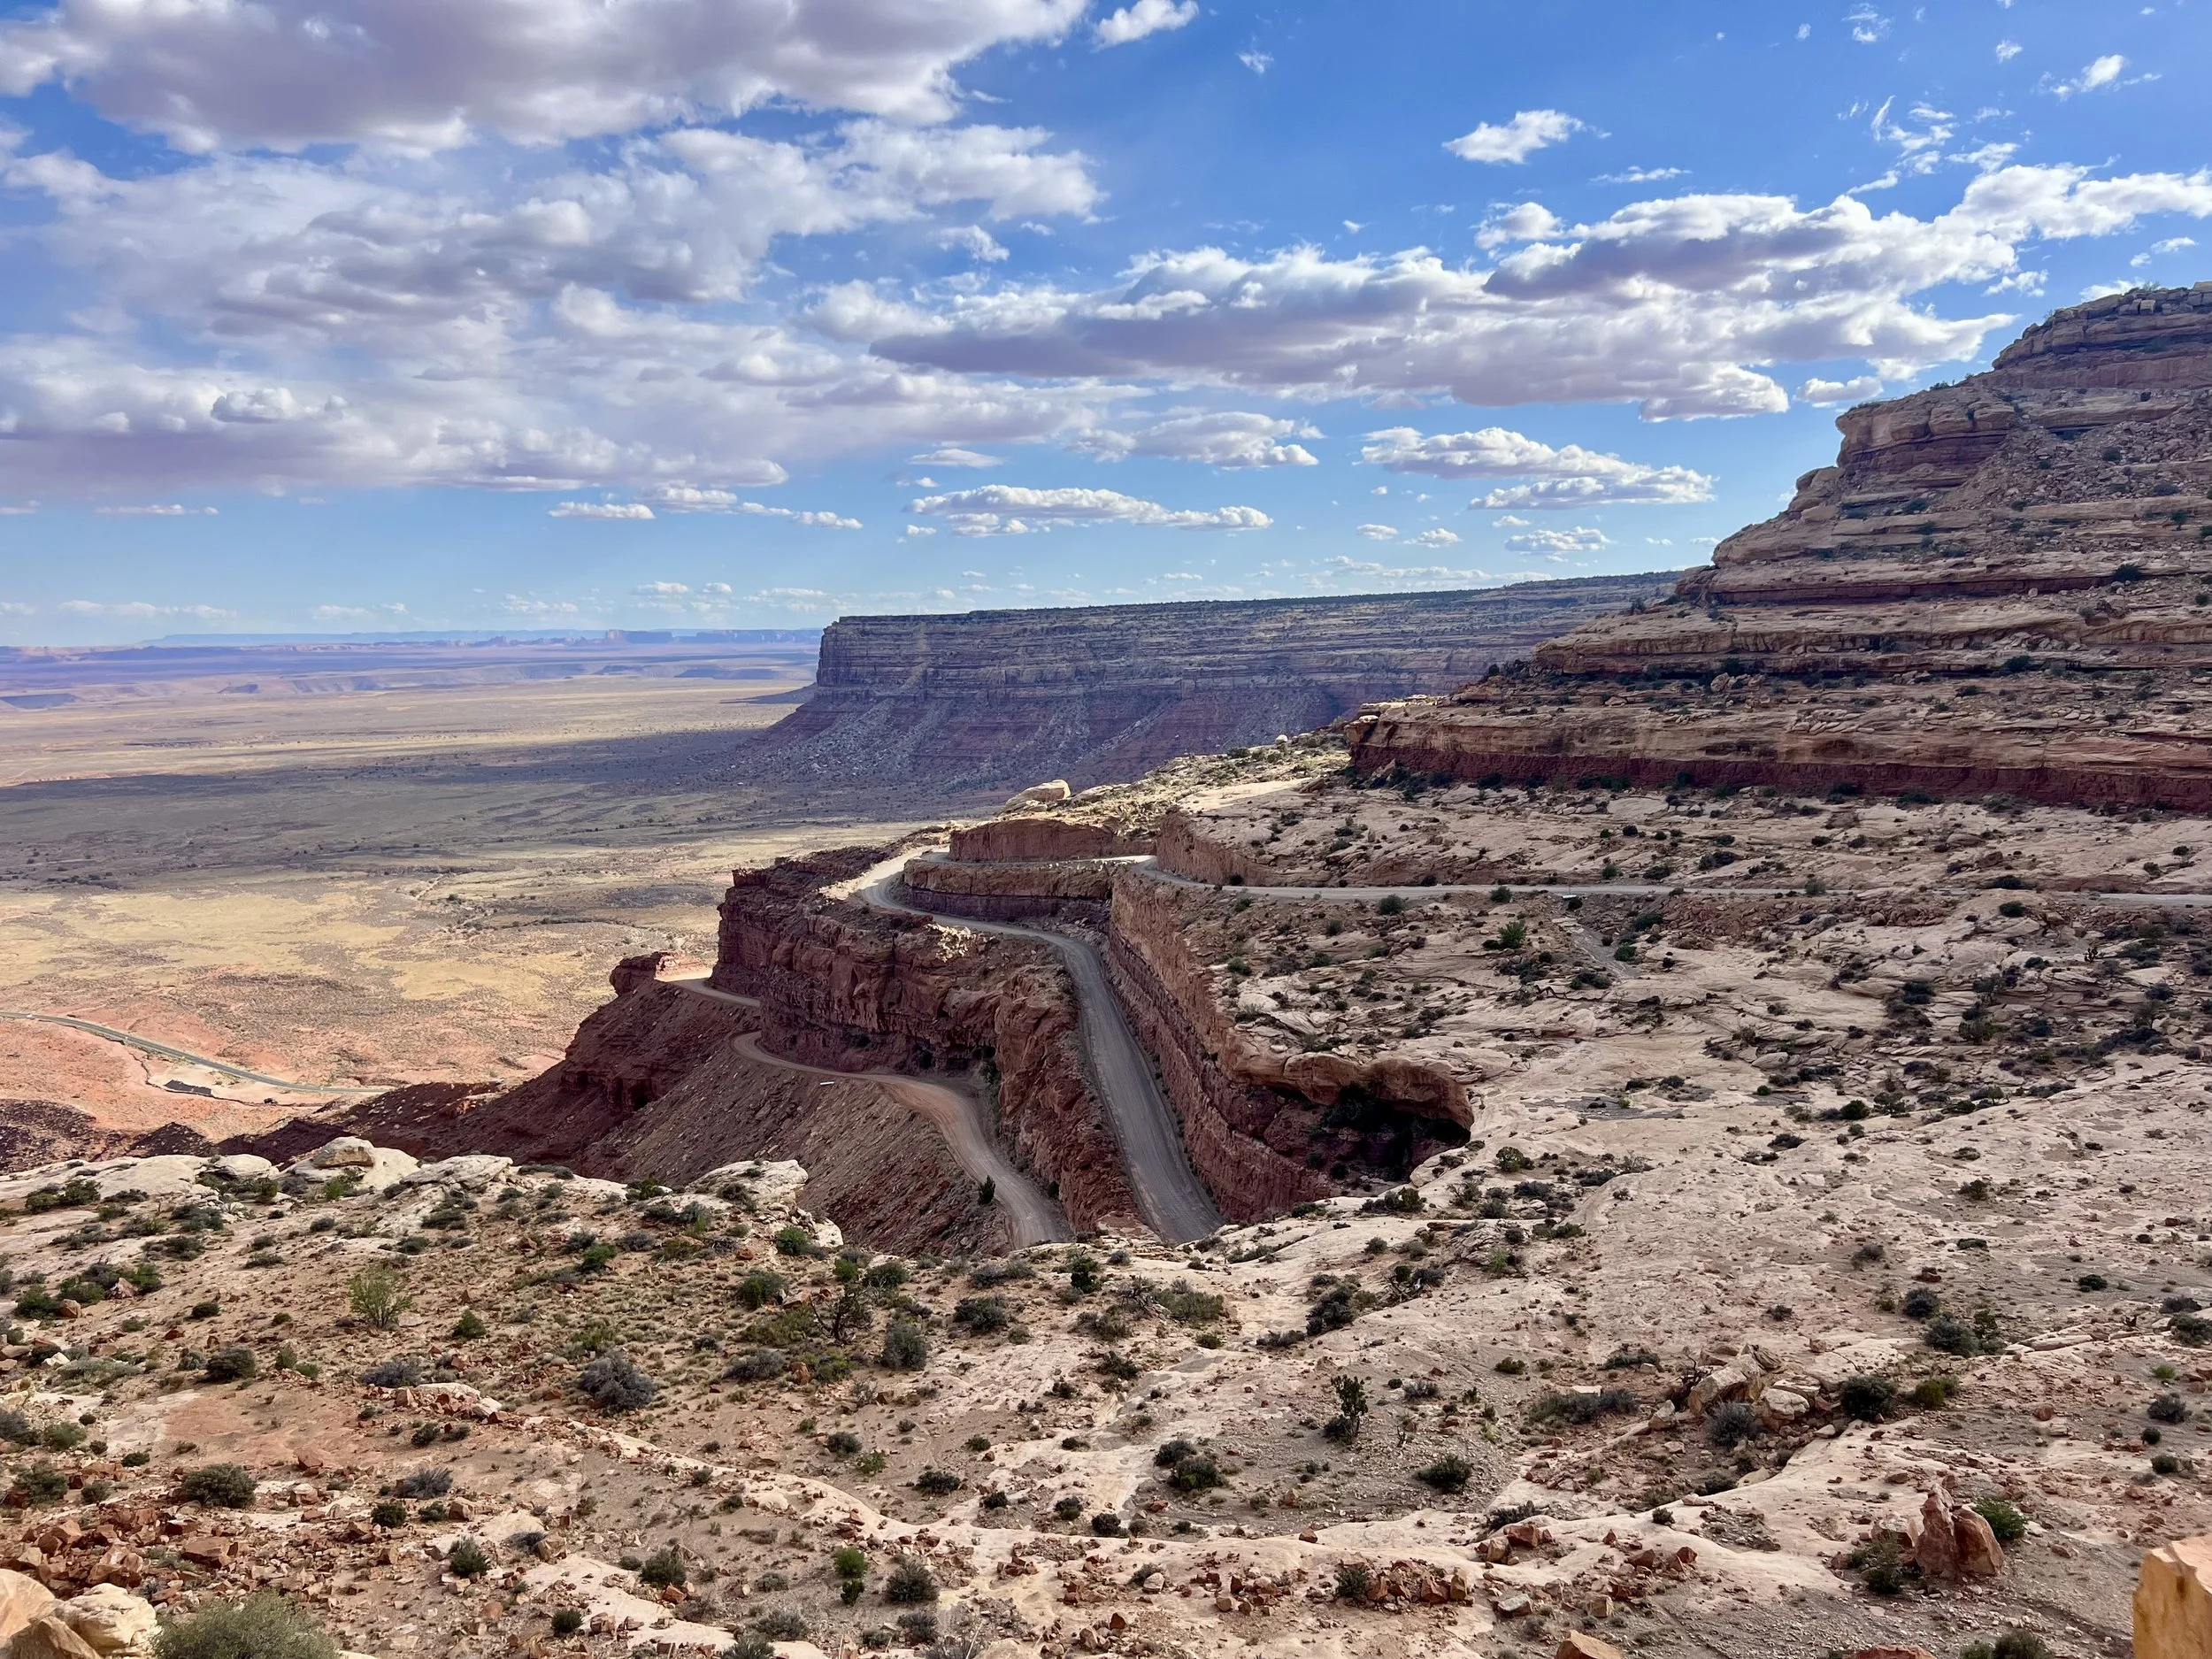
You’ll continue driving south and you will hit the Moki Dugway. This is a massive 3,000ft cliff with switchbacks going down the face of it. It is entirely shocking, because as you are driving up, you would have no idea it was there! There’s a couple turn offs on the switch backs but it’s hard to get a good photo of the expanse below.
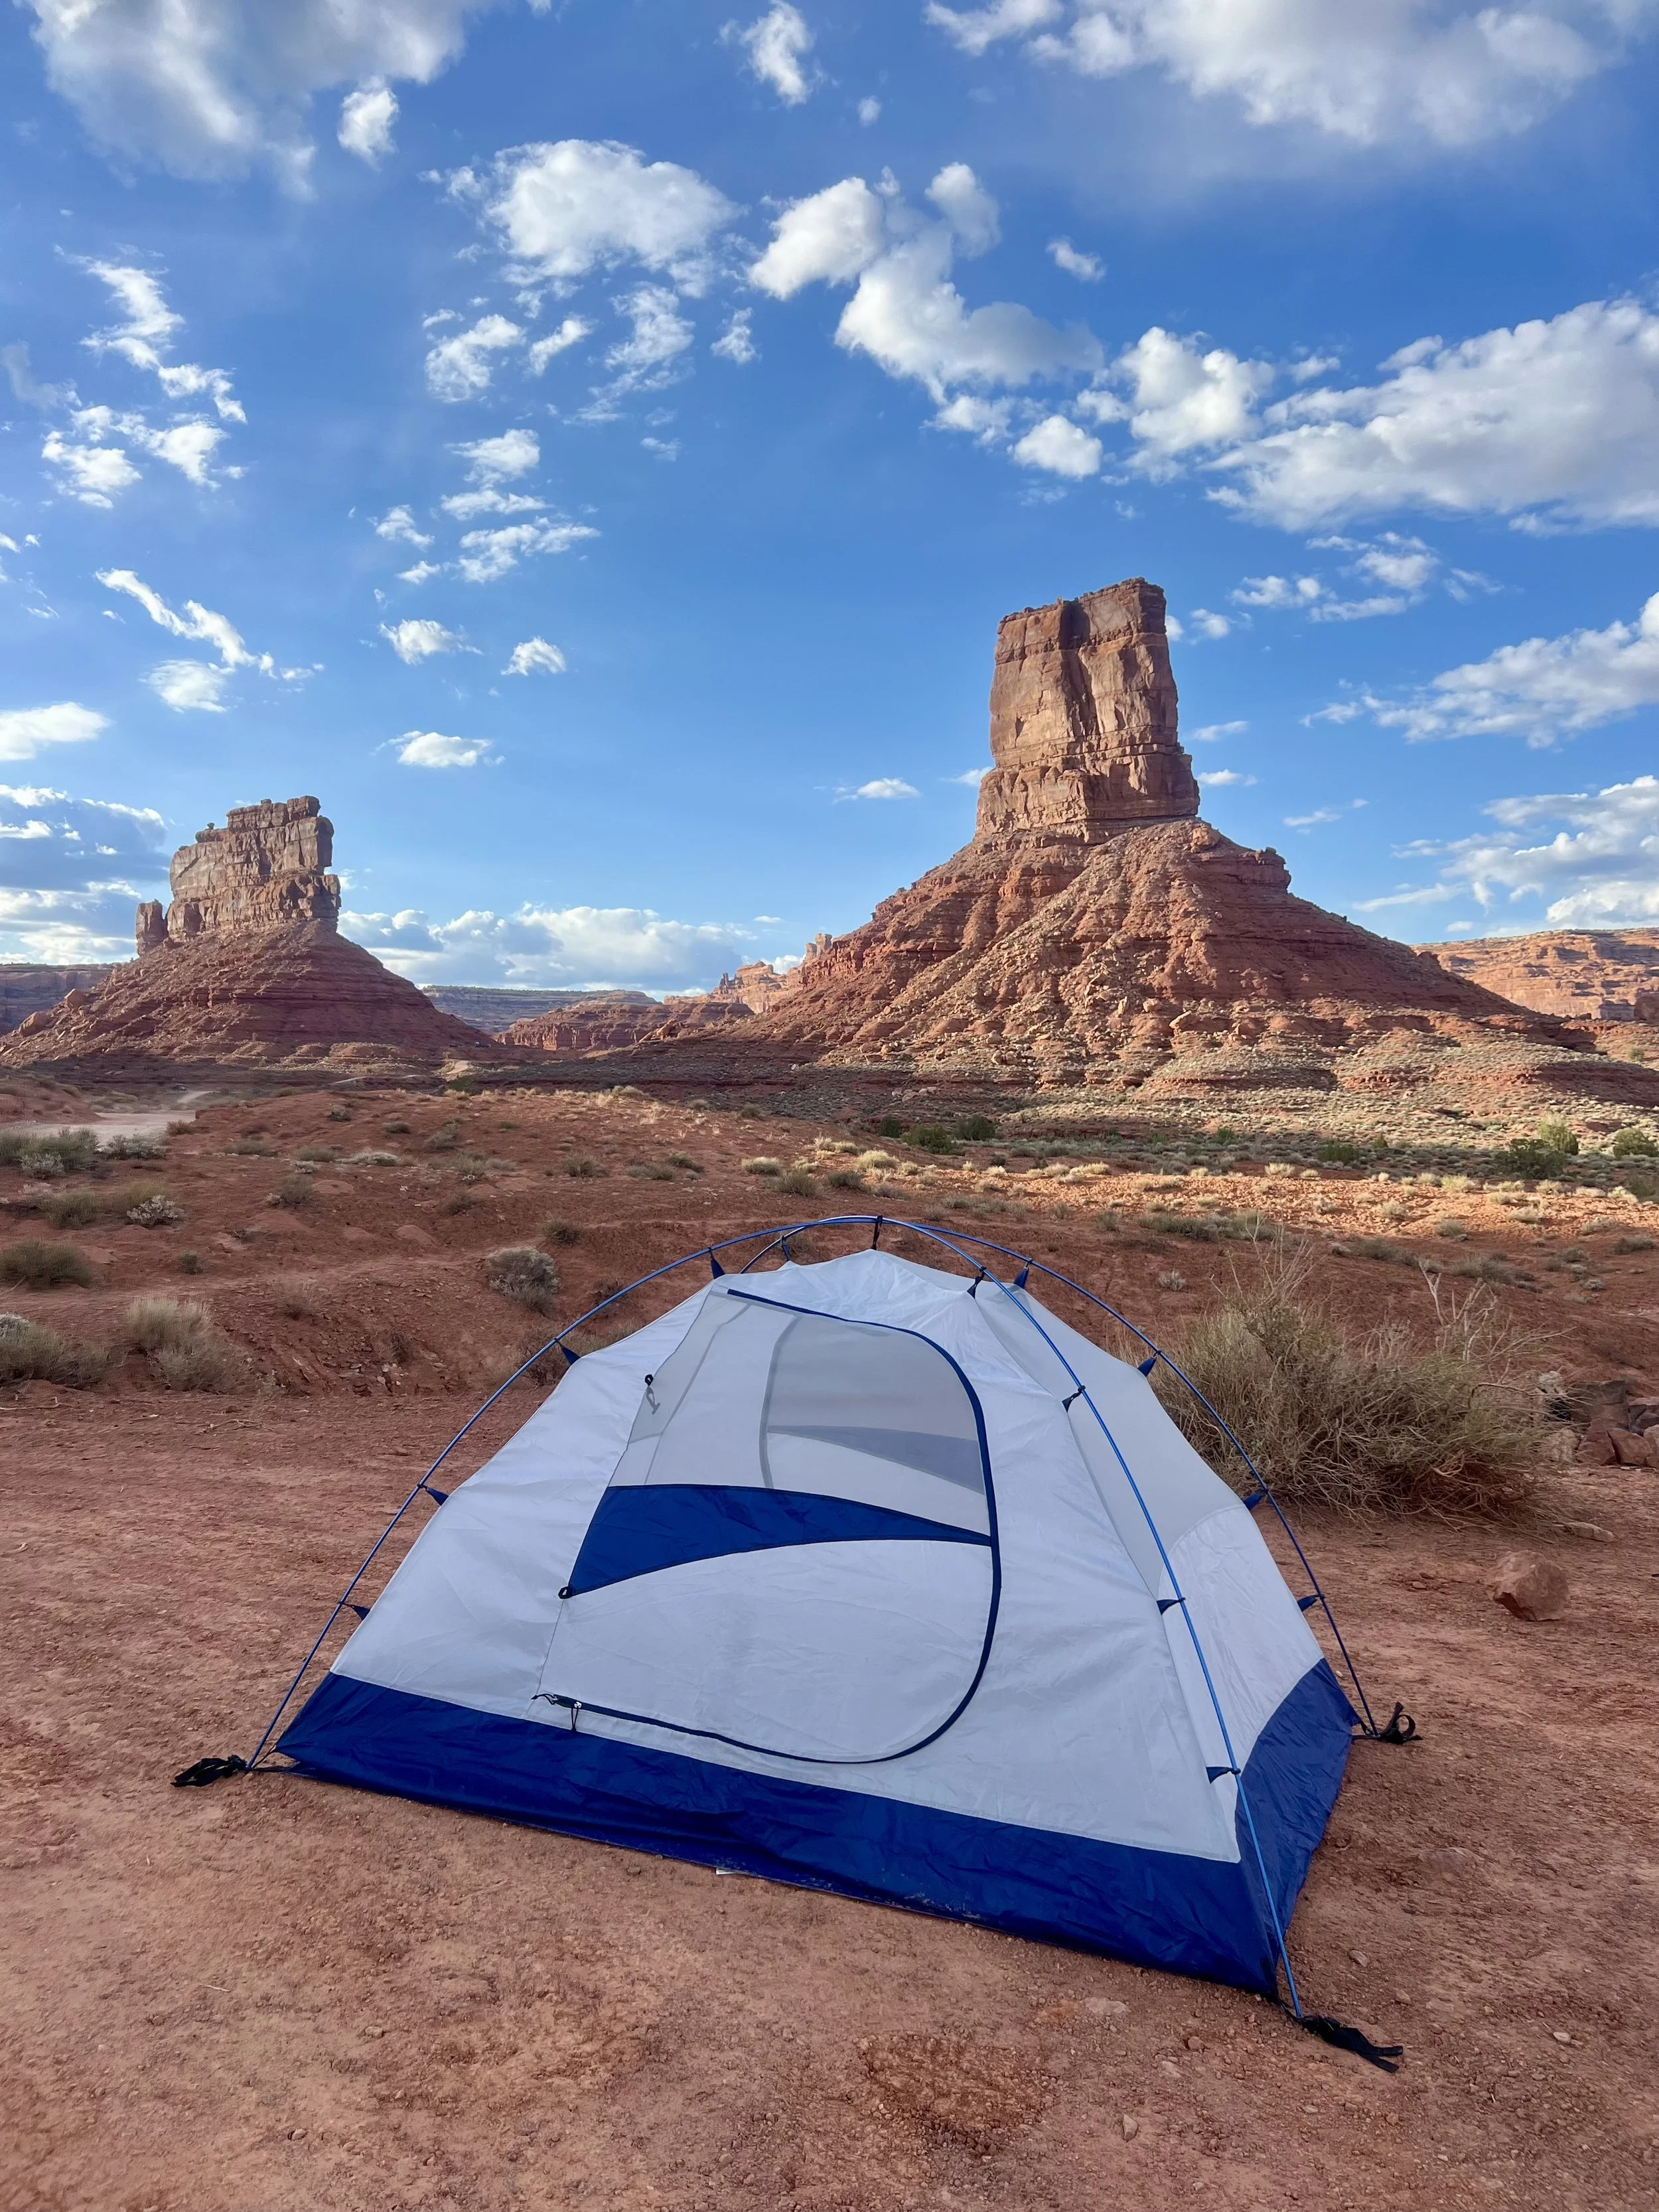
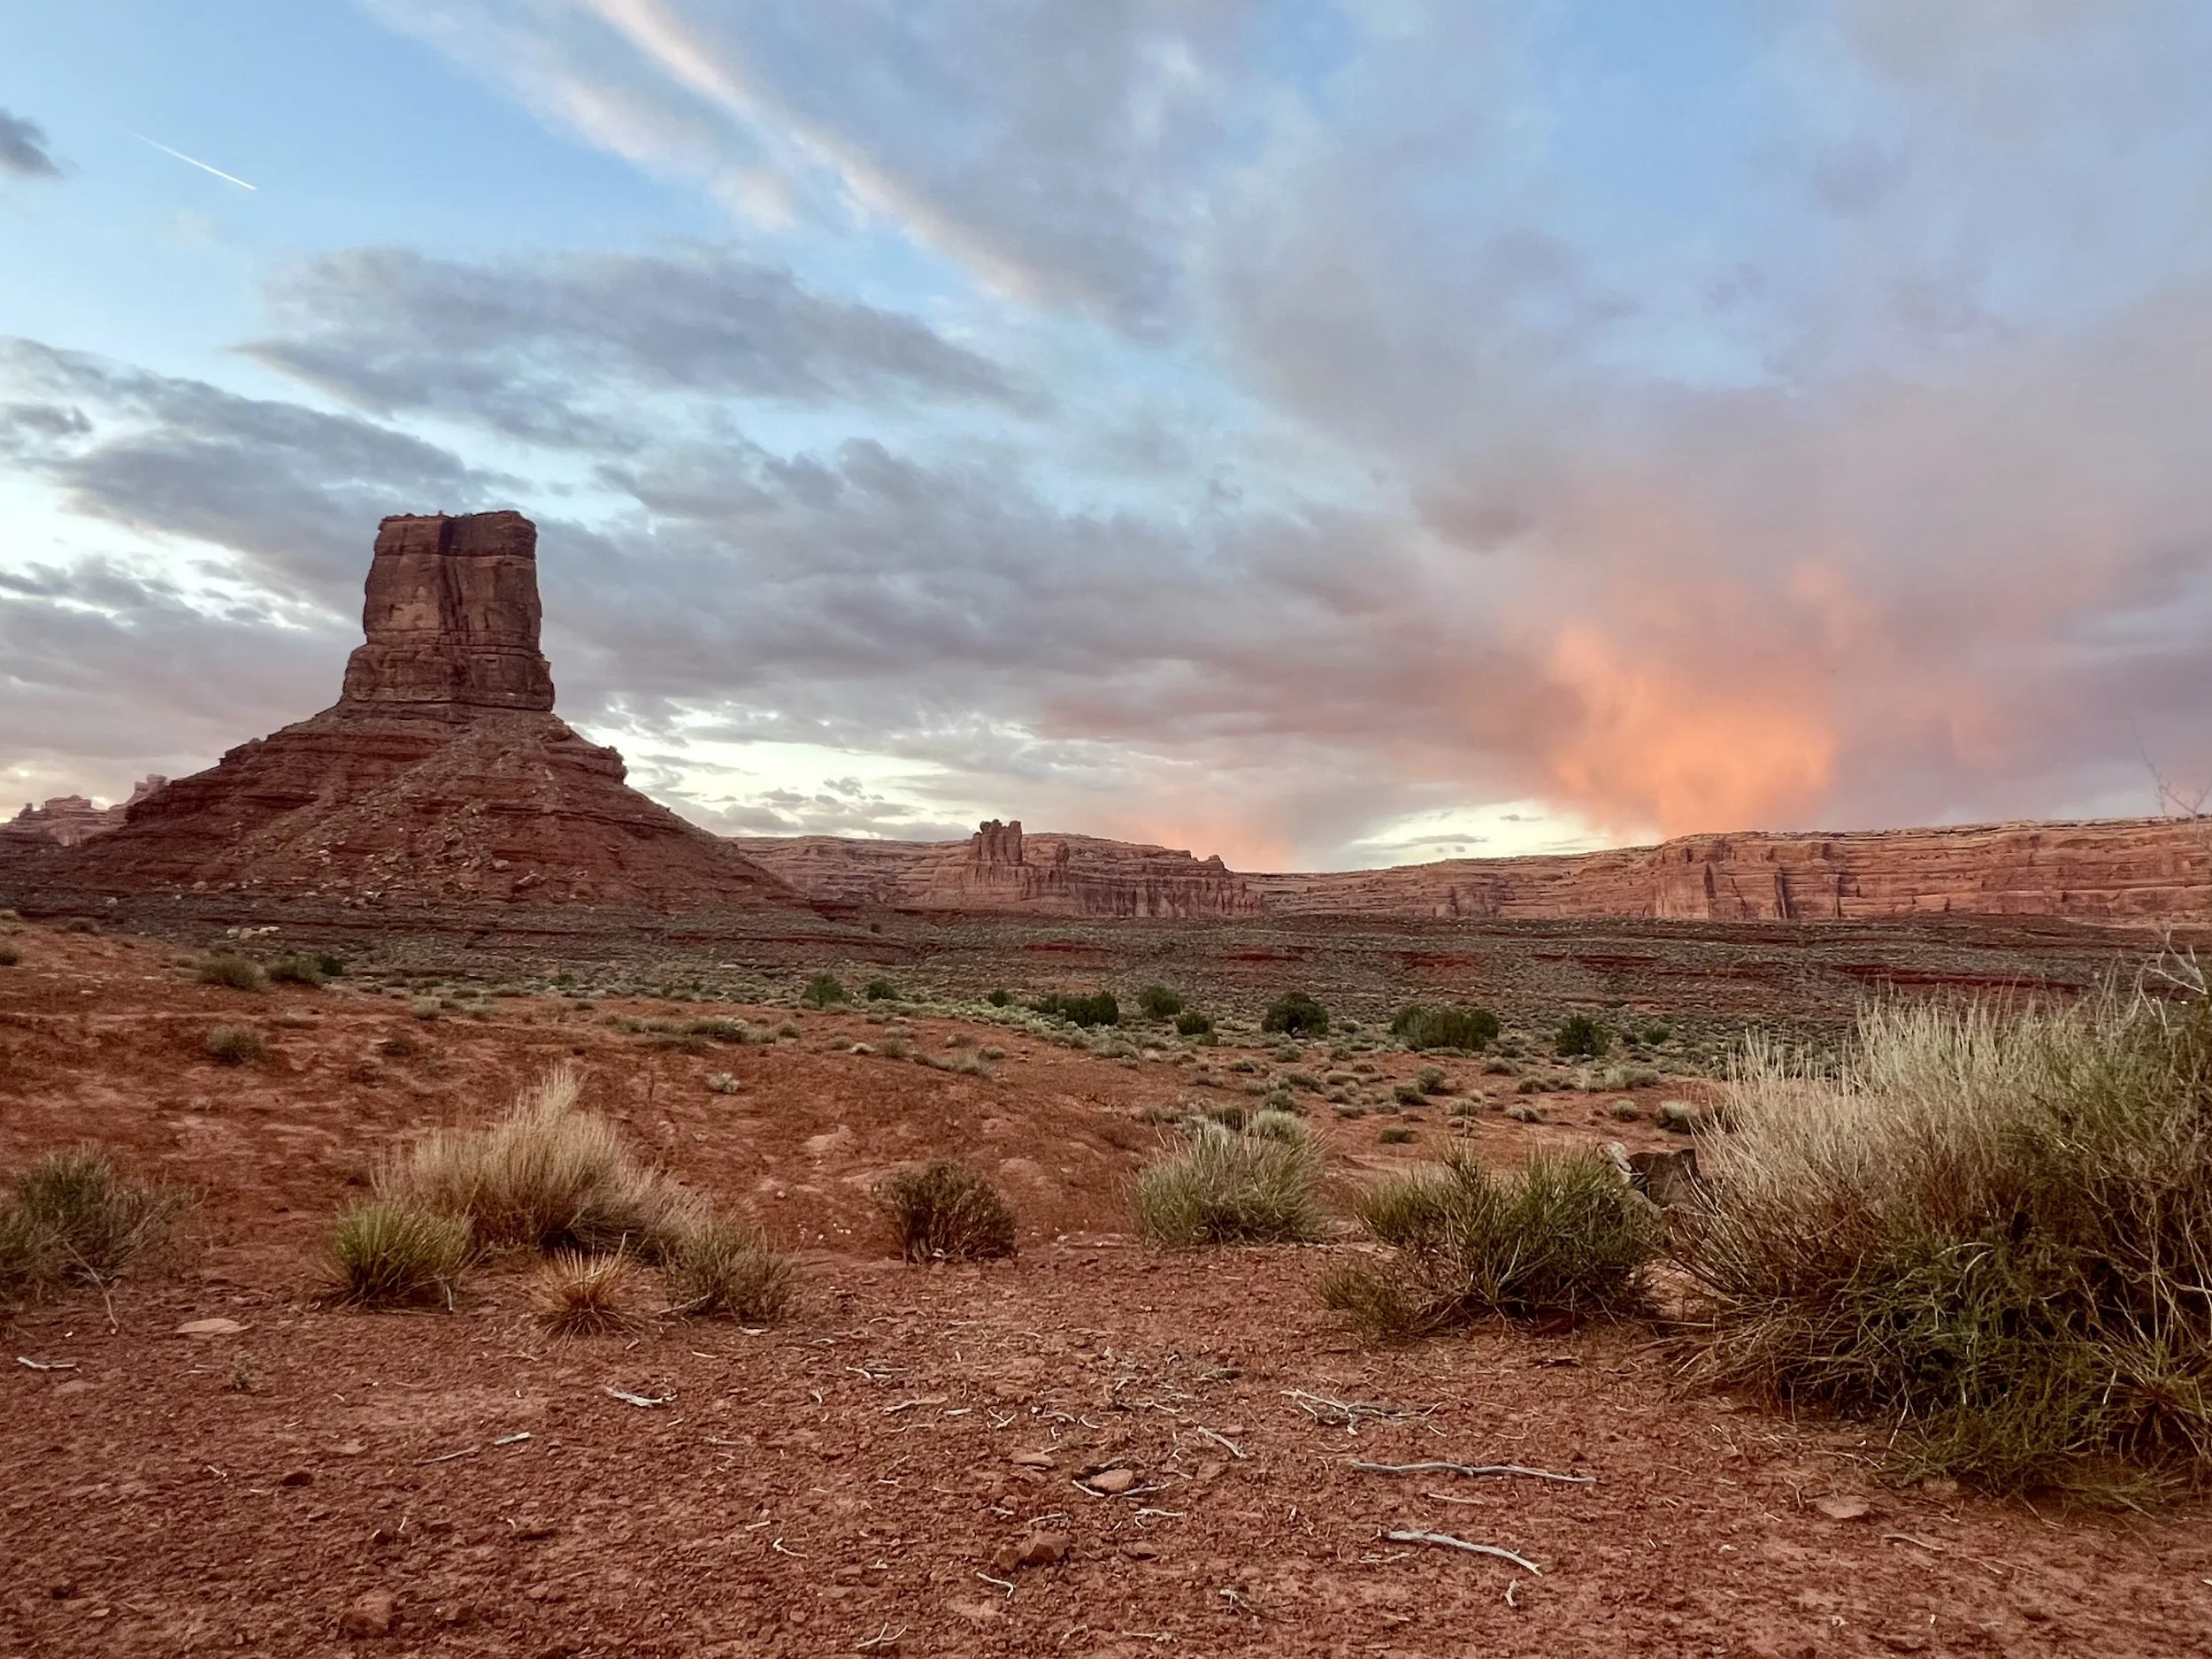
As you come down, you will reach the Valley of the Gods, also referred to as Little Monument Valley. Take a left onto the dirt road “Valley of the Gods, West Entrance”. This road weaves through the large rocks and you can camp anywhere in this space! The whole dirt road from start to finish may take 1.5 hours, so enjoy the view.
Camp in Valley of the Gods for the night (any turn off will do!) In my opinion, the best campsites are near “Castle Butte Viewpoint” about 45mins or half way through the dirt road.
Day 8: Monument Valley
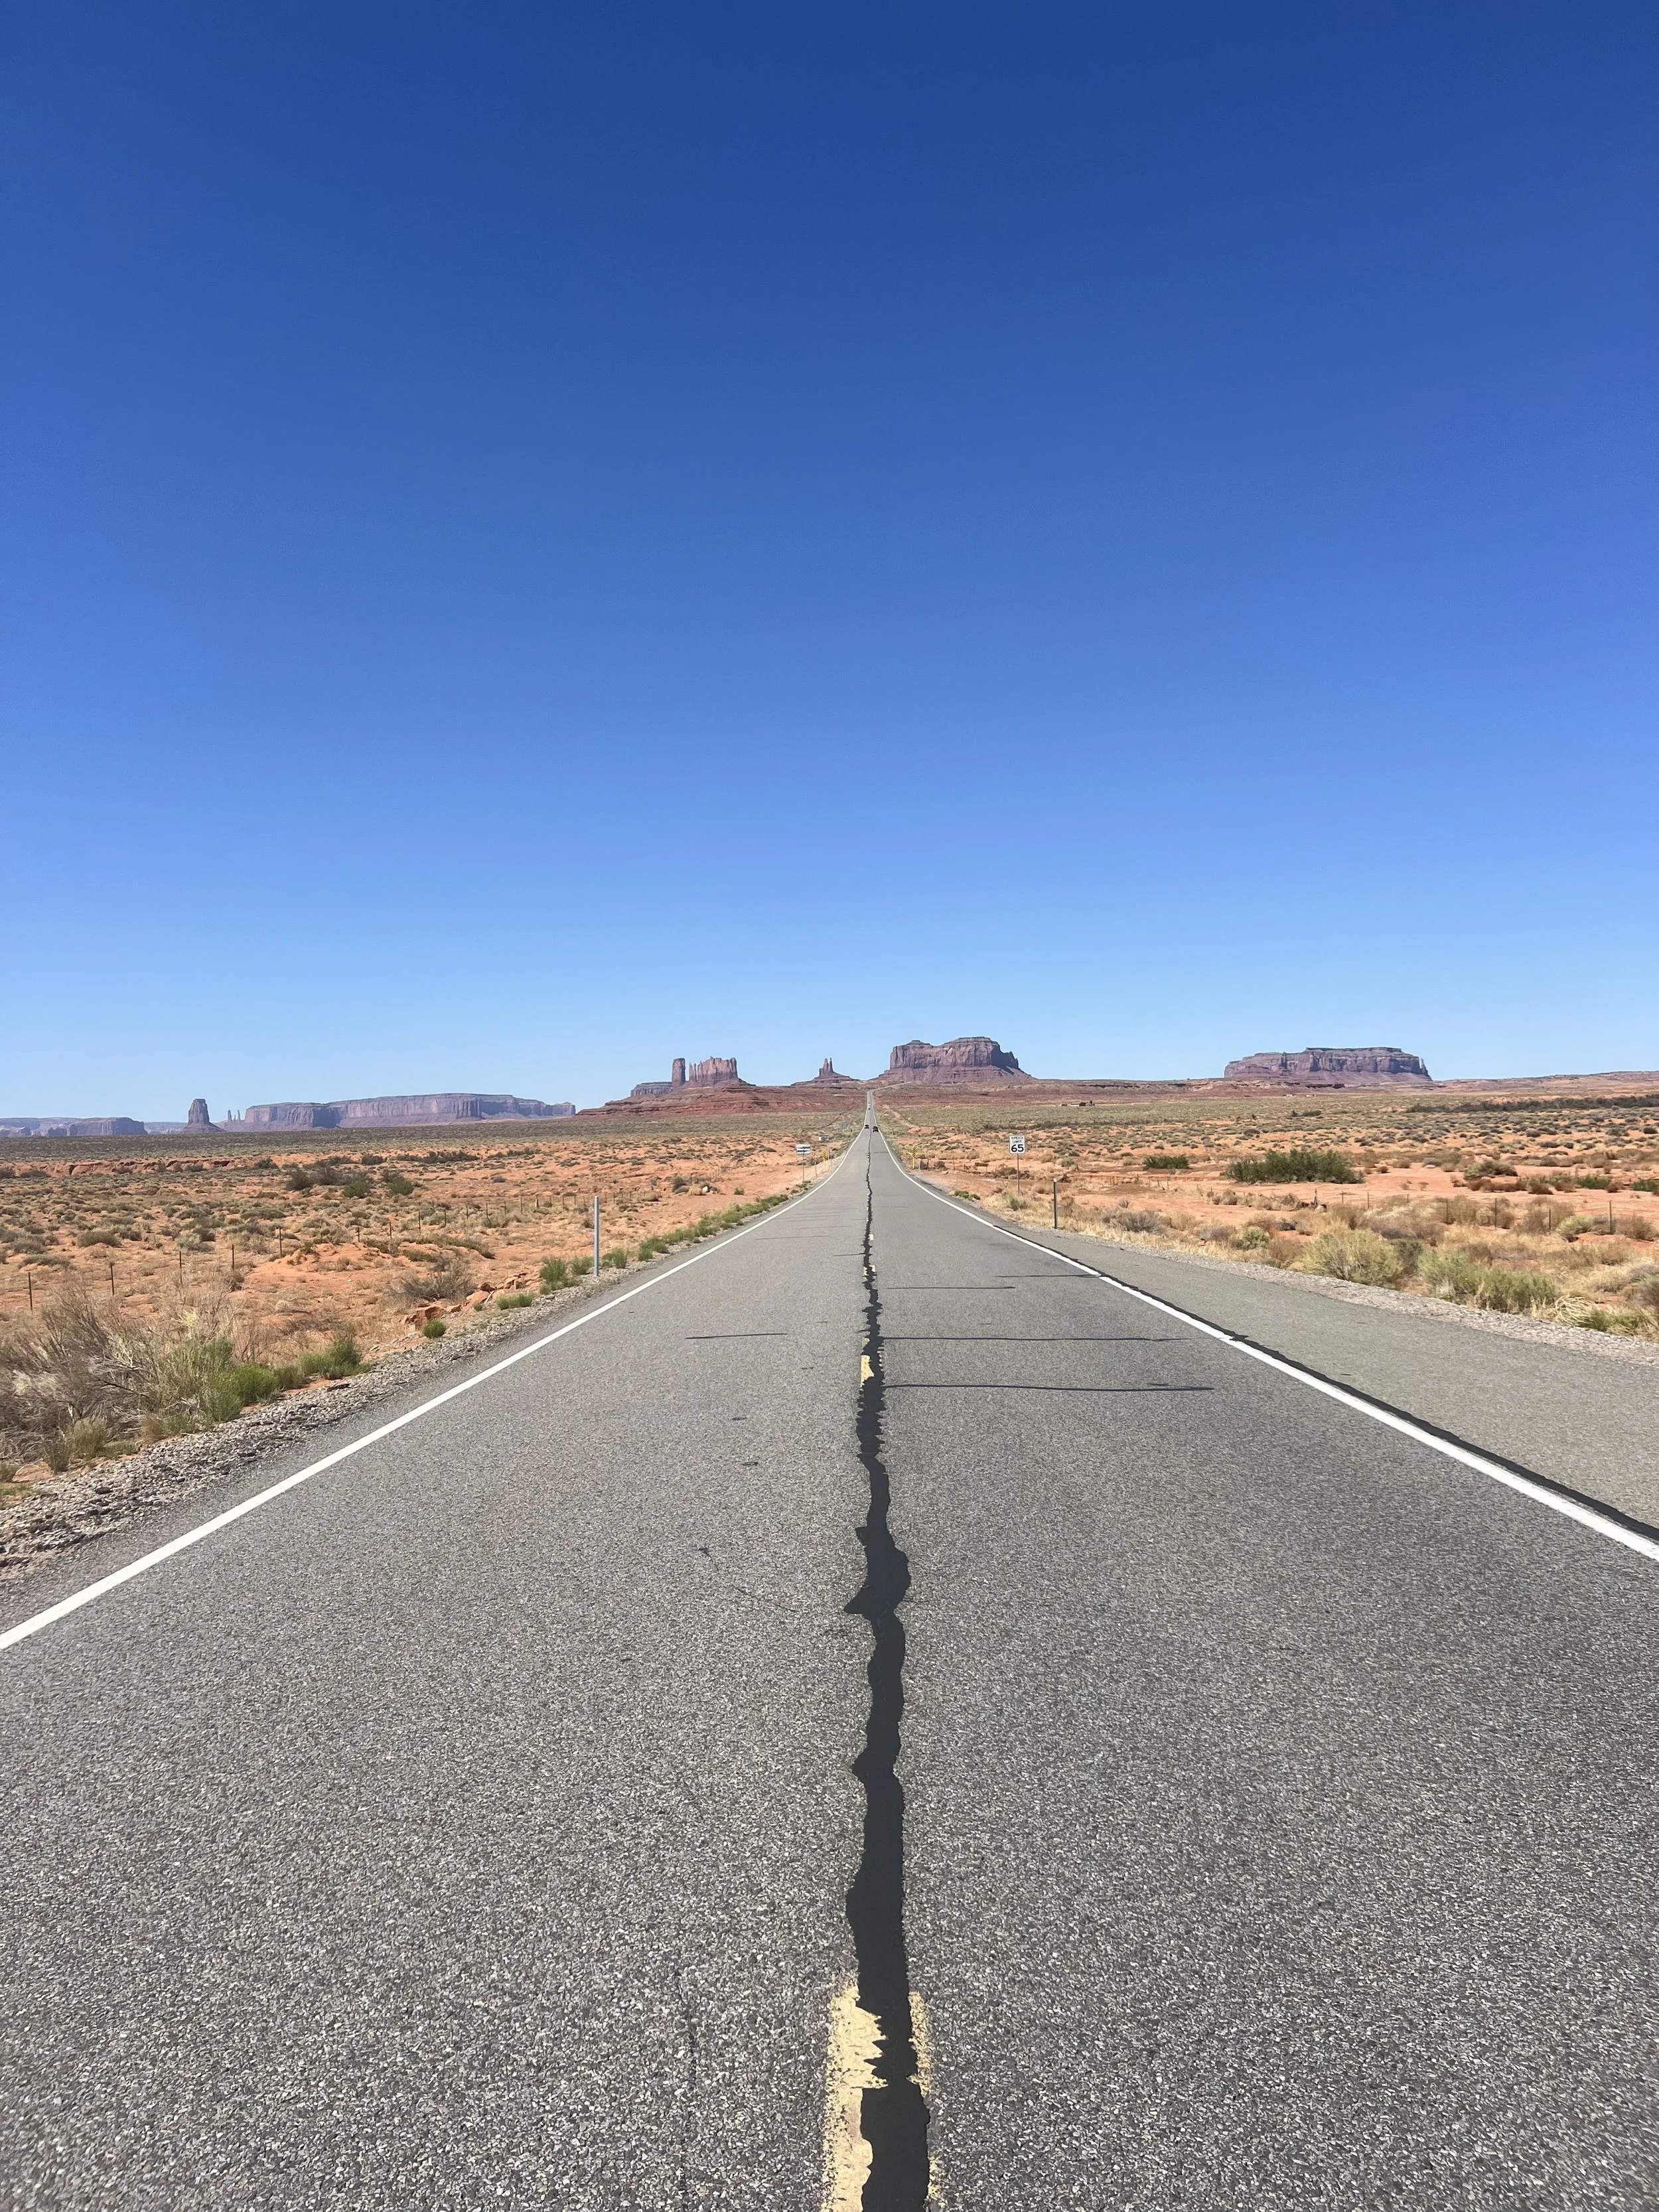
After a morning camping and waking up in Valley of the Gods, continue your drive through the dirt road (another 30+ minutes) to hit the main paved road and head South. You may see people painting on canvas and easels from their camp. Stop at Forrest Gump Point for an iconic picture before entering Monument Valley.
If you are hungry or need a top up on food, stop in either Mexican Hat or at Gouldings Lodge. This will be your last food before Monument Valley. The next food will be in the Indian reservation at Kayenta.
I don’t have any suggested hikes for the day - most of the area is scenic and you will stop a ton for the views! Option to camp at the many campsites in Monument Valley (The View, Goulding’s), Sunset View Campground (within the Hopi reservation). You will need to pay for all of these. Otherwise, you can continue on to Page and stay the night there.
(Optional 2-3 night addition): Backpack Rainbow Bridge - read about my experience on my blog page!

Day 9-10: Page
Page is famous as the gateway to Lake Powell and Antelope Canyon! There are a lot of activities to do here, depending on your energy levels and interest.
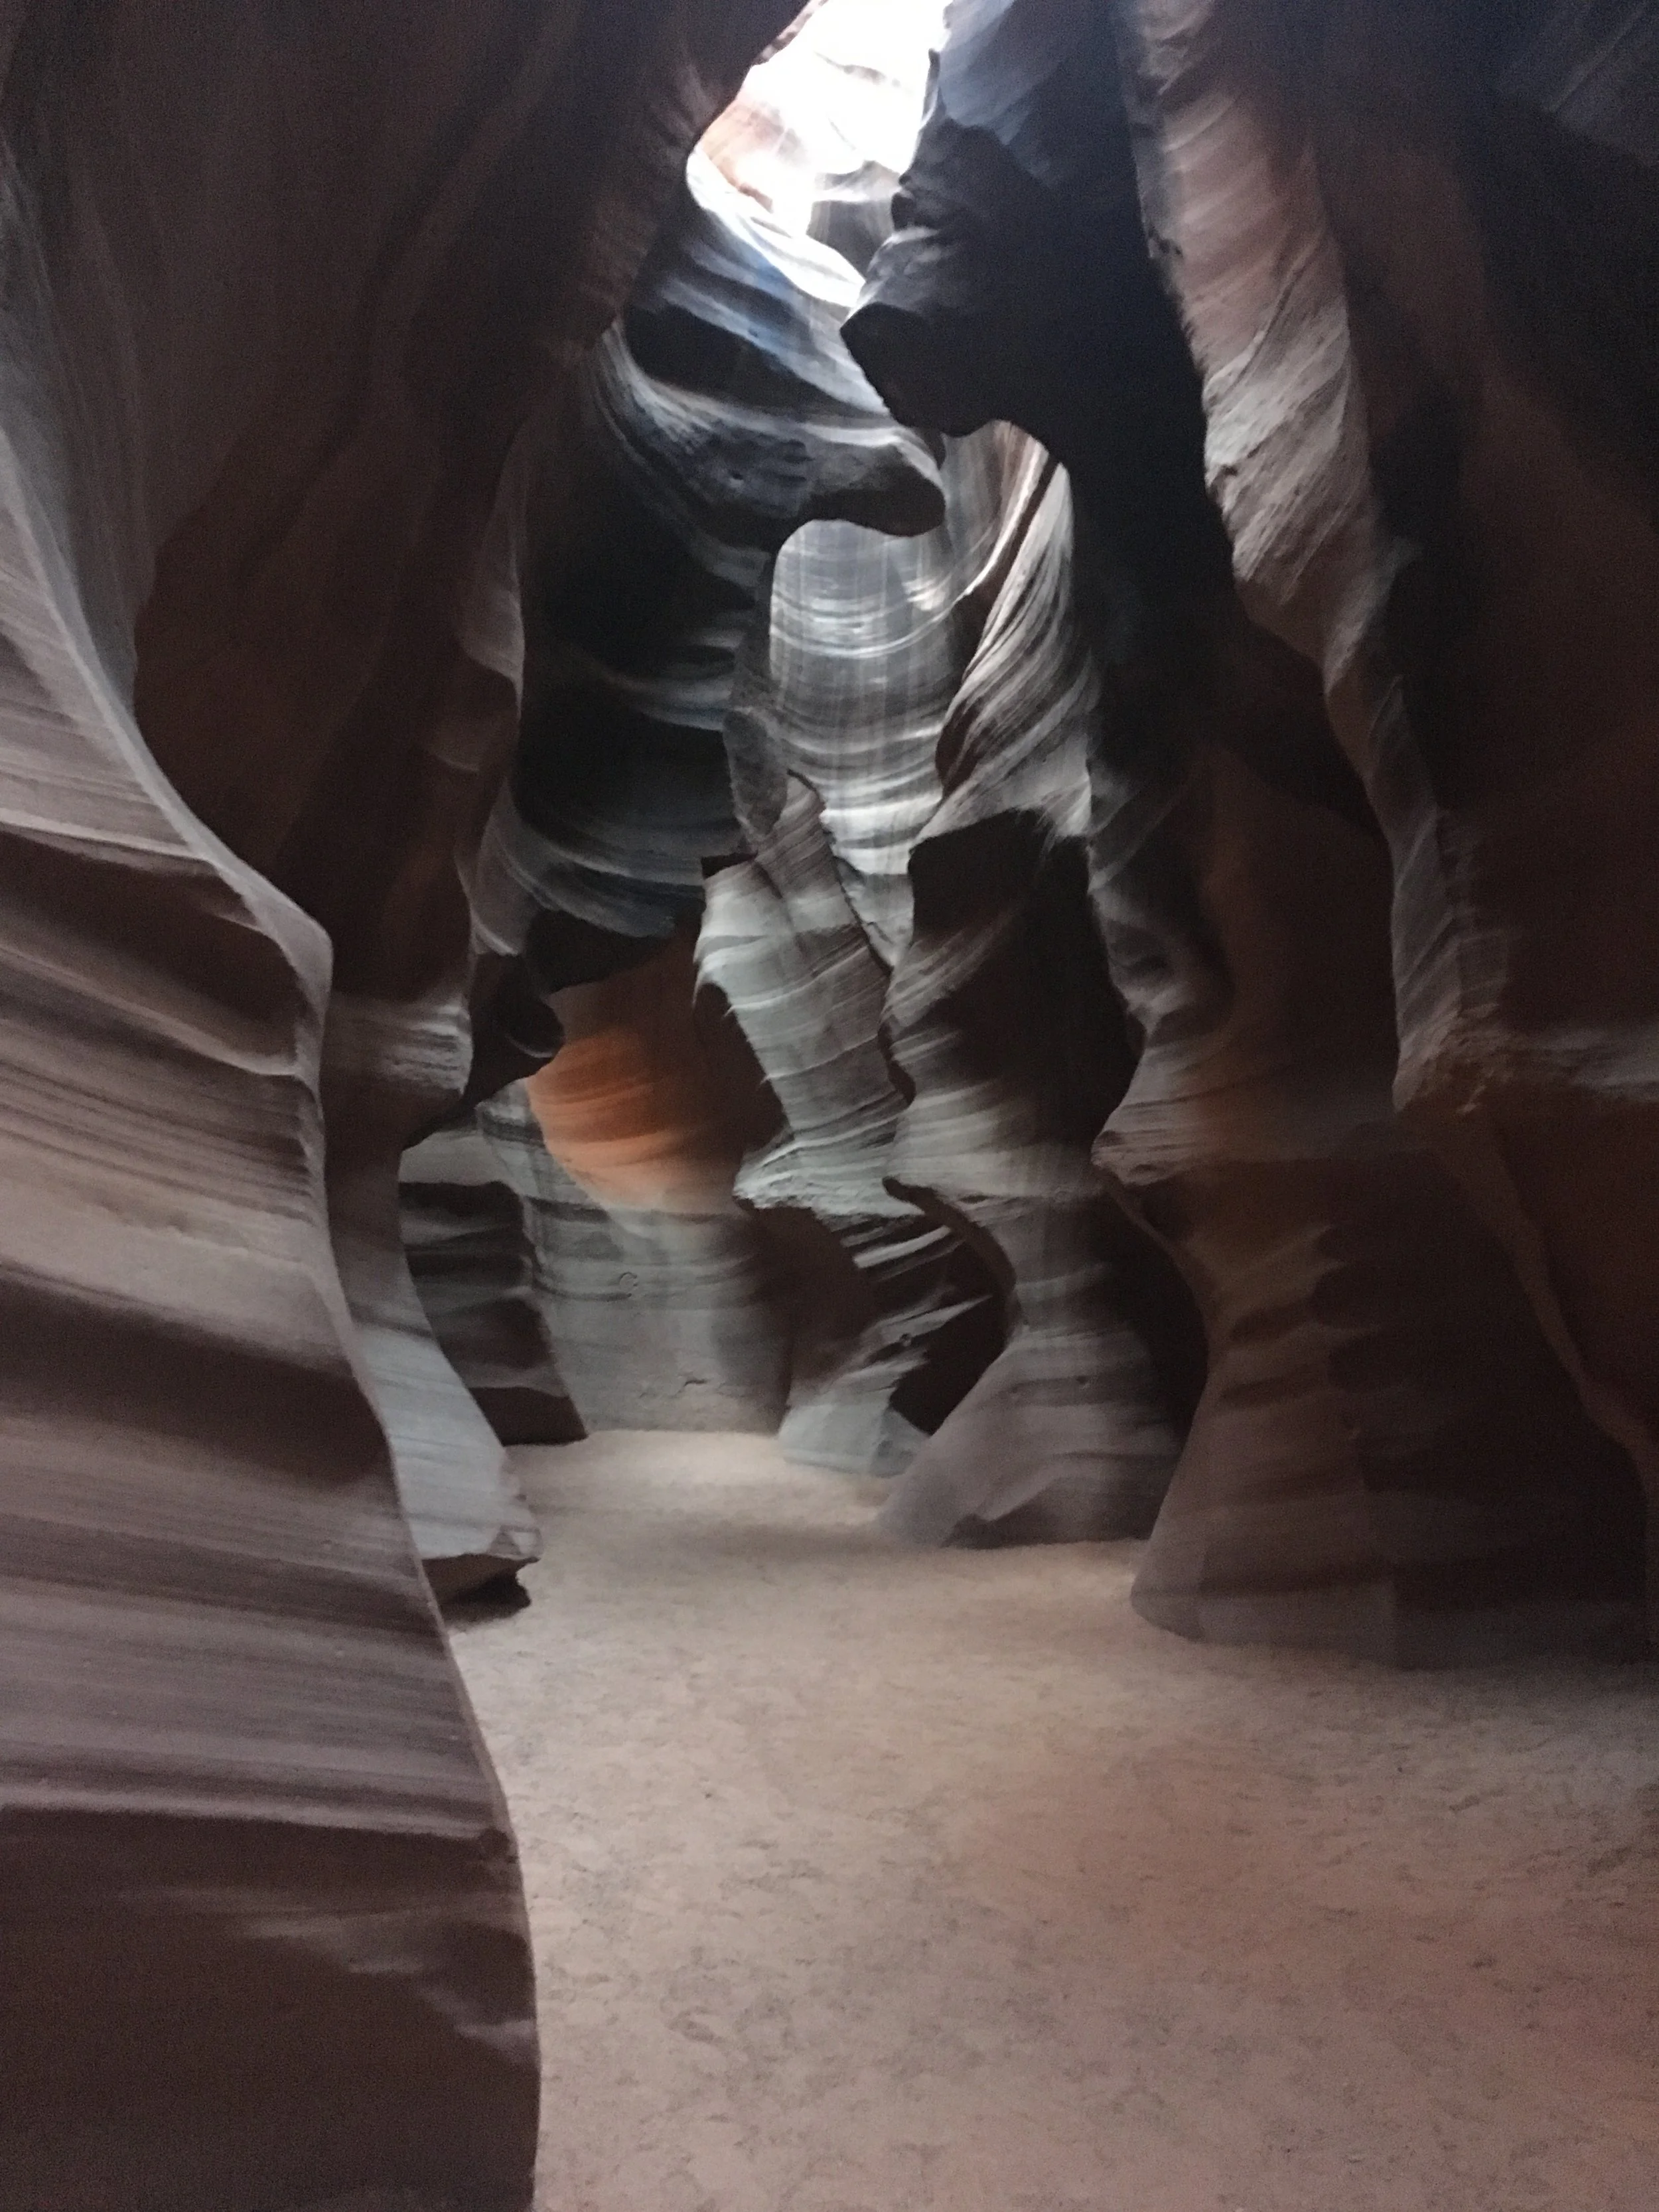
I absolutely recommend doing a half-day guided hike of Lower Antelope Canyon. This is on the Indian reservation, so unfortunately there are no ways to do this without going through an organization. There is no major difference between the companies available. Sign up in advance for a time slot, keeping in mind where the sun is to get the best colors in the canyon.
If you’re a water person, take a kayak out or boat cruise on Lake Powell!
If you’re feeling lucky, you can try to get into the lottery to see The Wave (a famous hike and rock structure about 2 hours outside Page in Vermillion Hills). I have tried over 10 times to get a permit, both in the advanced permit lottery and the last minute 2-day before lottery and have not been successful. Note that the last minute lottery has a geo location requirement so you need to be in the city or Page to apply for it. If you apply that day, you will find out at 7pm local time, pick up your permit the next morning, and visit the wave the day after. So the actual hike is 2 days after application. Best of luck if you go this route!
Day 11: Flagstaff
From Page, take a drive down to Flagstaff and stop by some less visited but gorgeous national monuments!
Wupatki National Monument: This area has many ruins from native Americans and Hopi nomadic villages. Drive along the road further to connect to Sunset Crater.

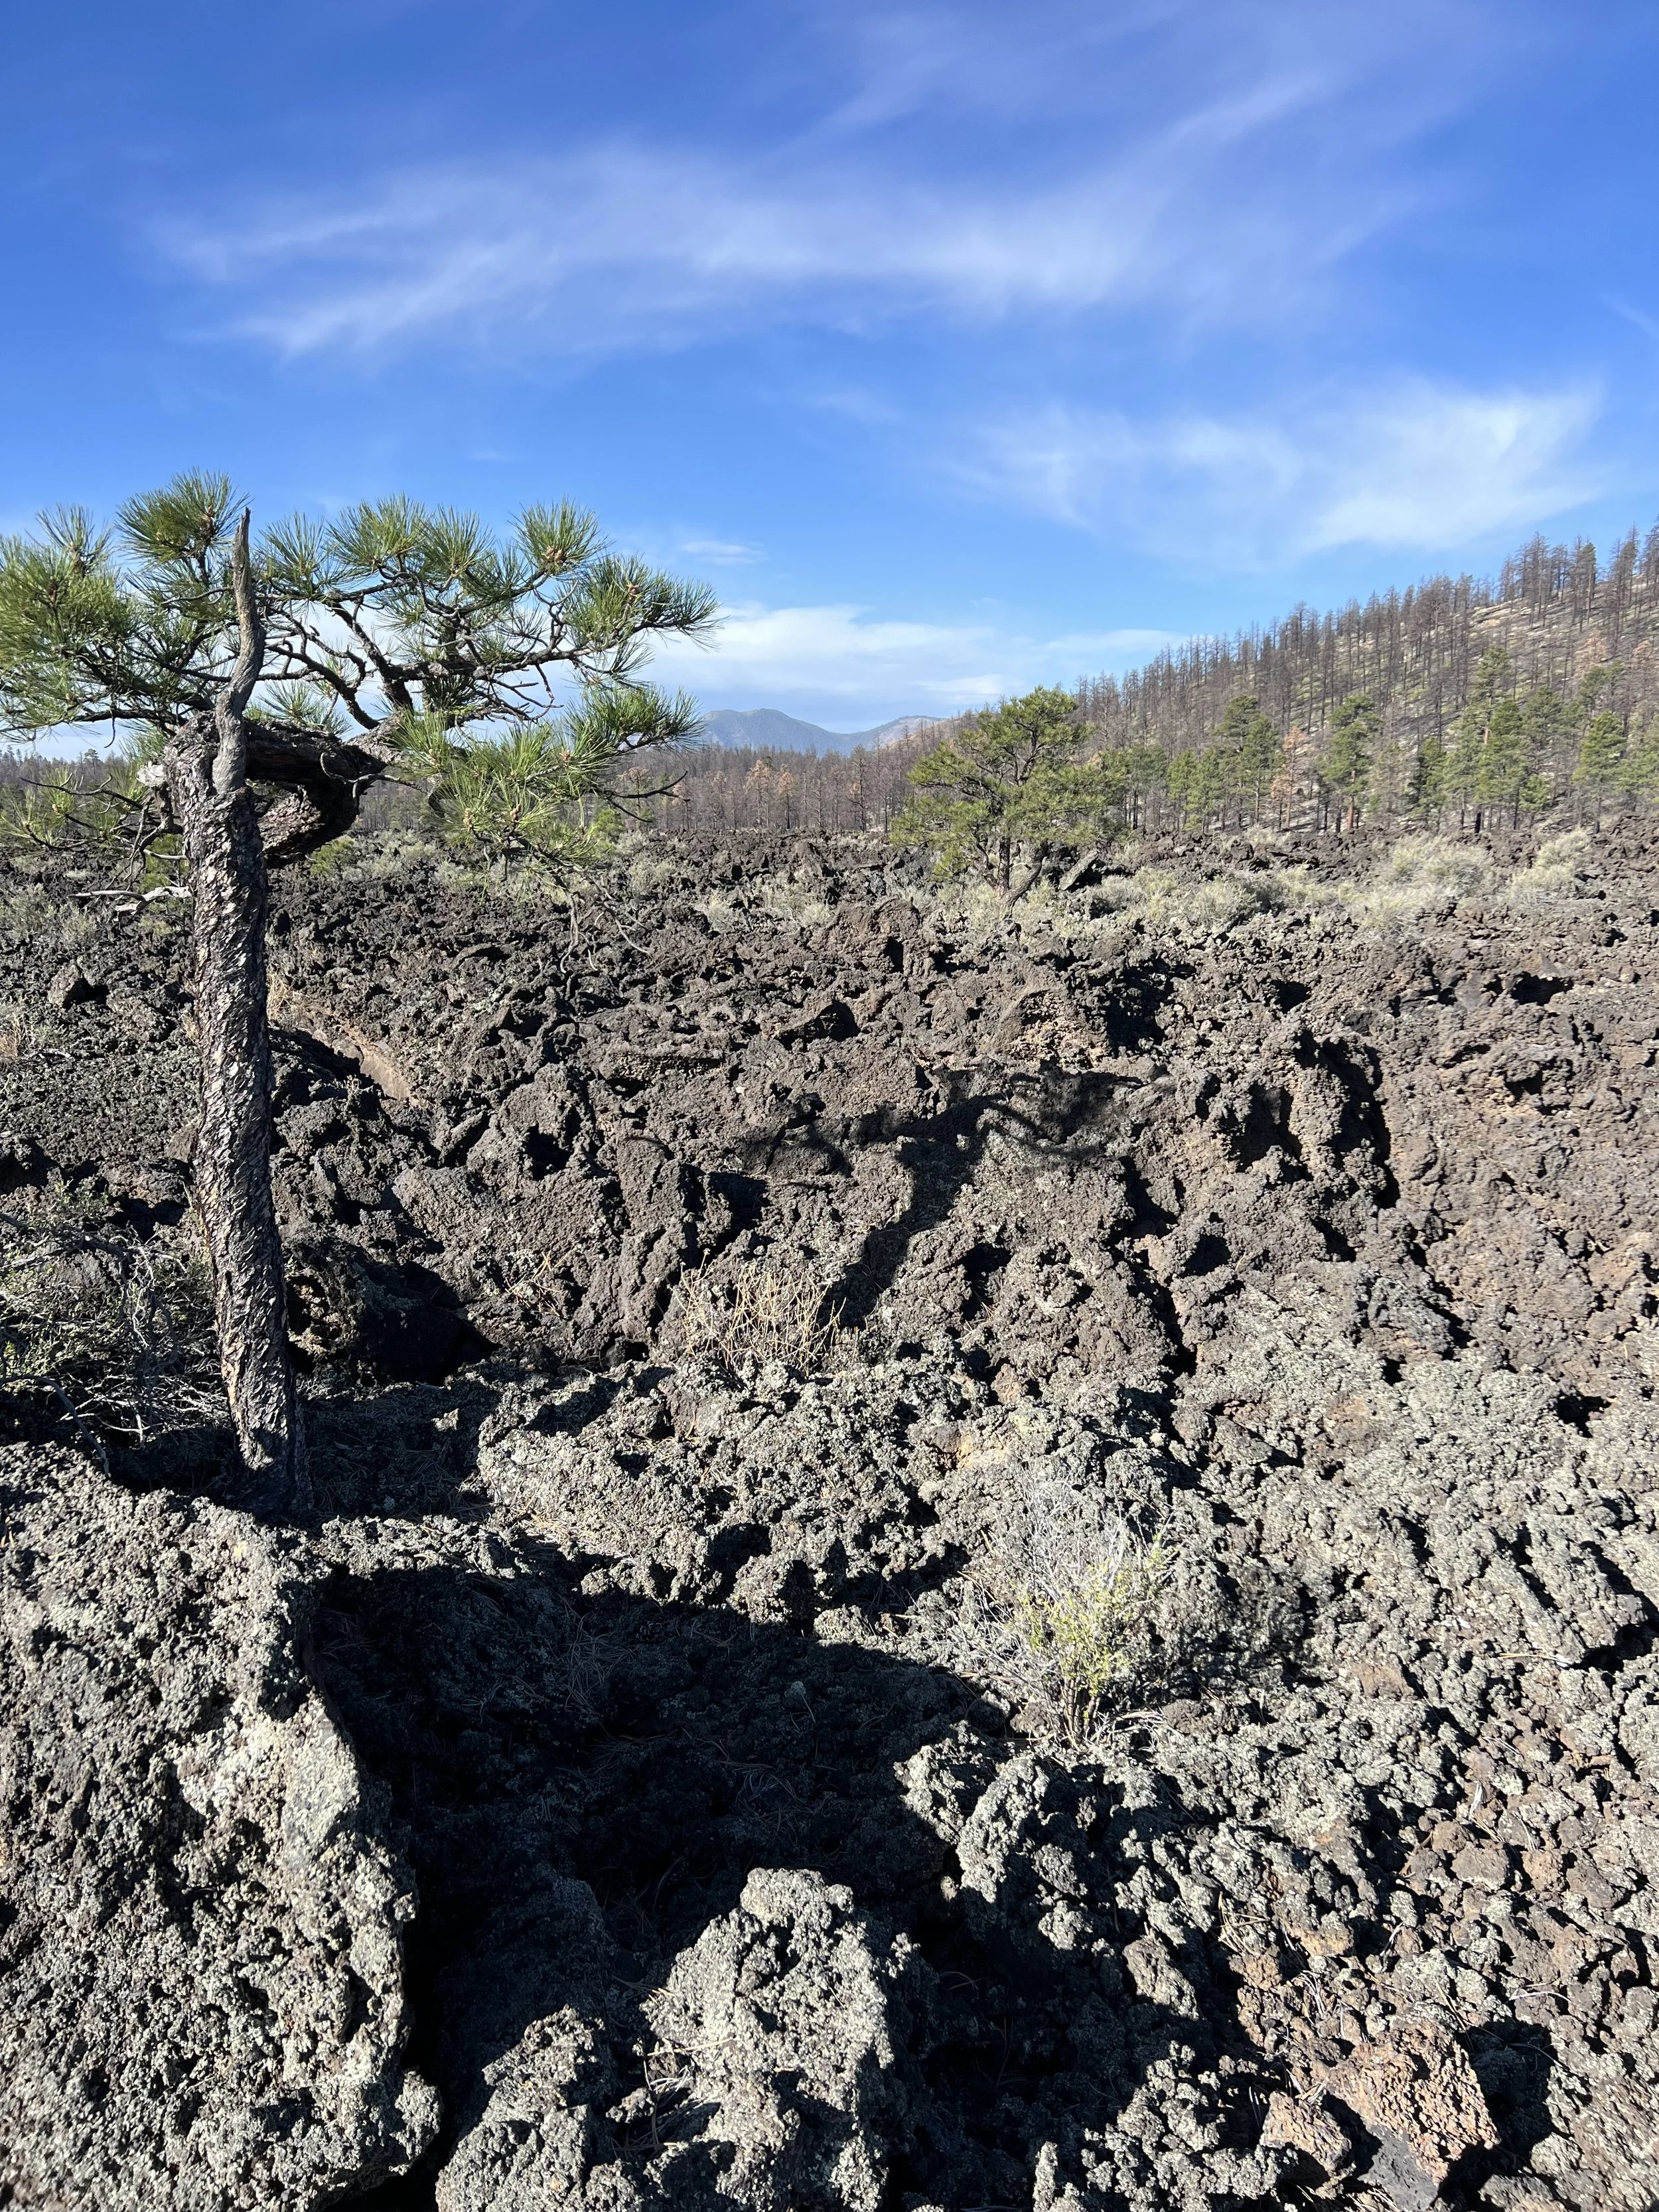
Sunset Crater Volcano: Take a 3-4 mile walk through lava fields from this erupted volcano. This terrain was used to train Apollo Astronauts and test rovers in 1964-1972.
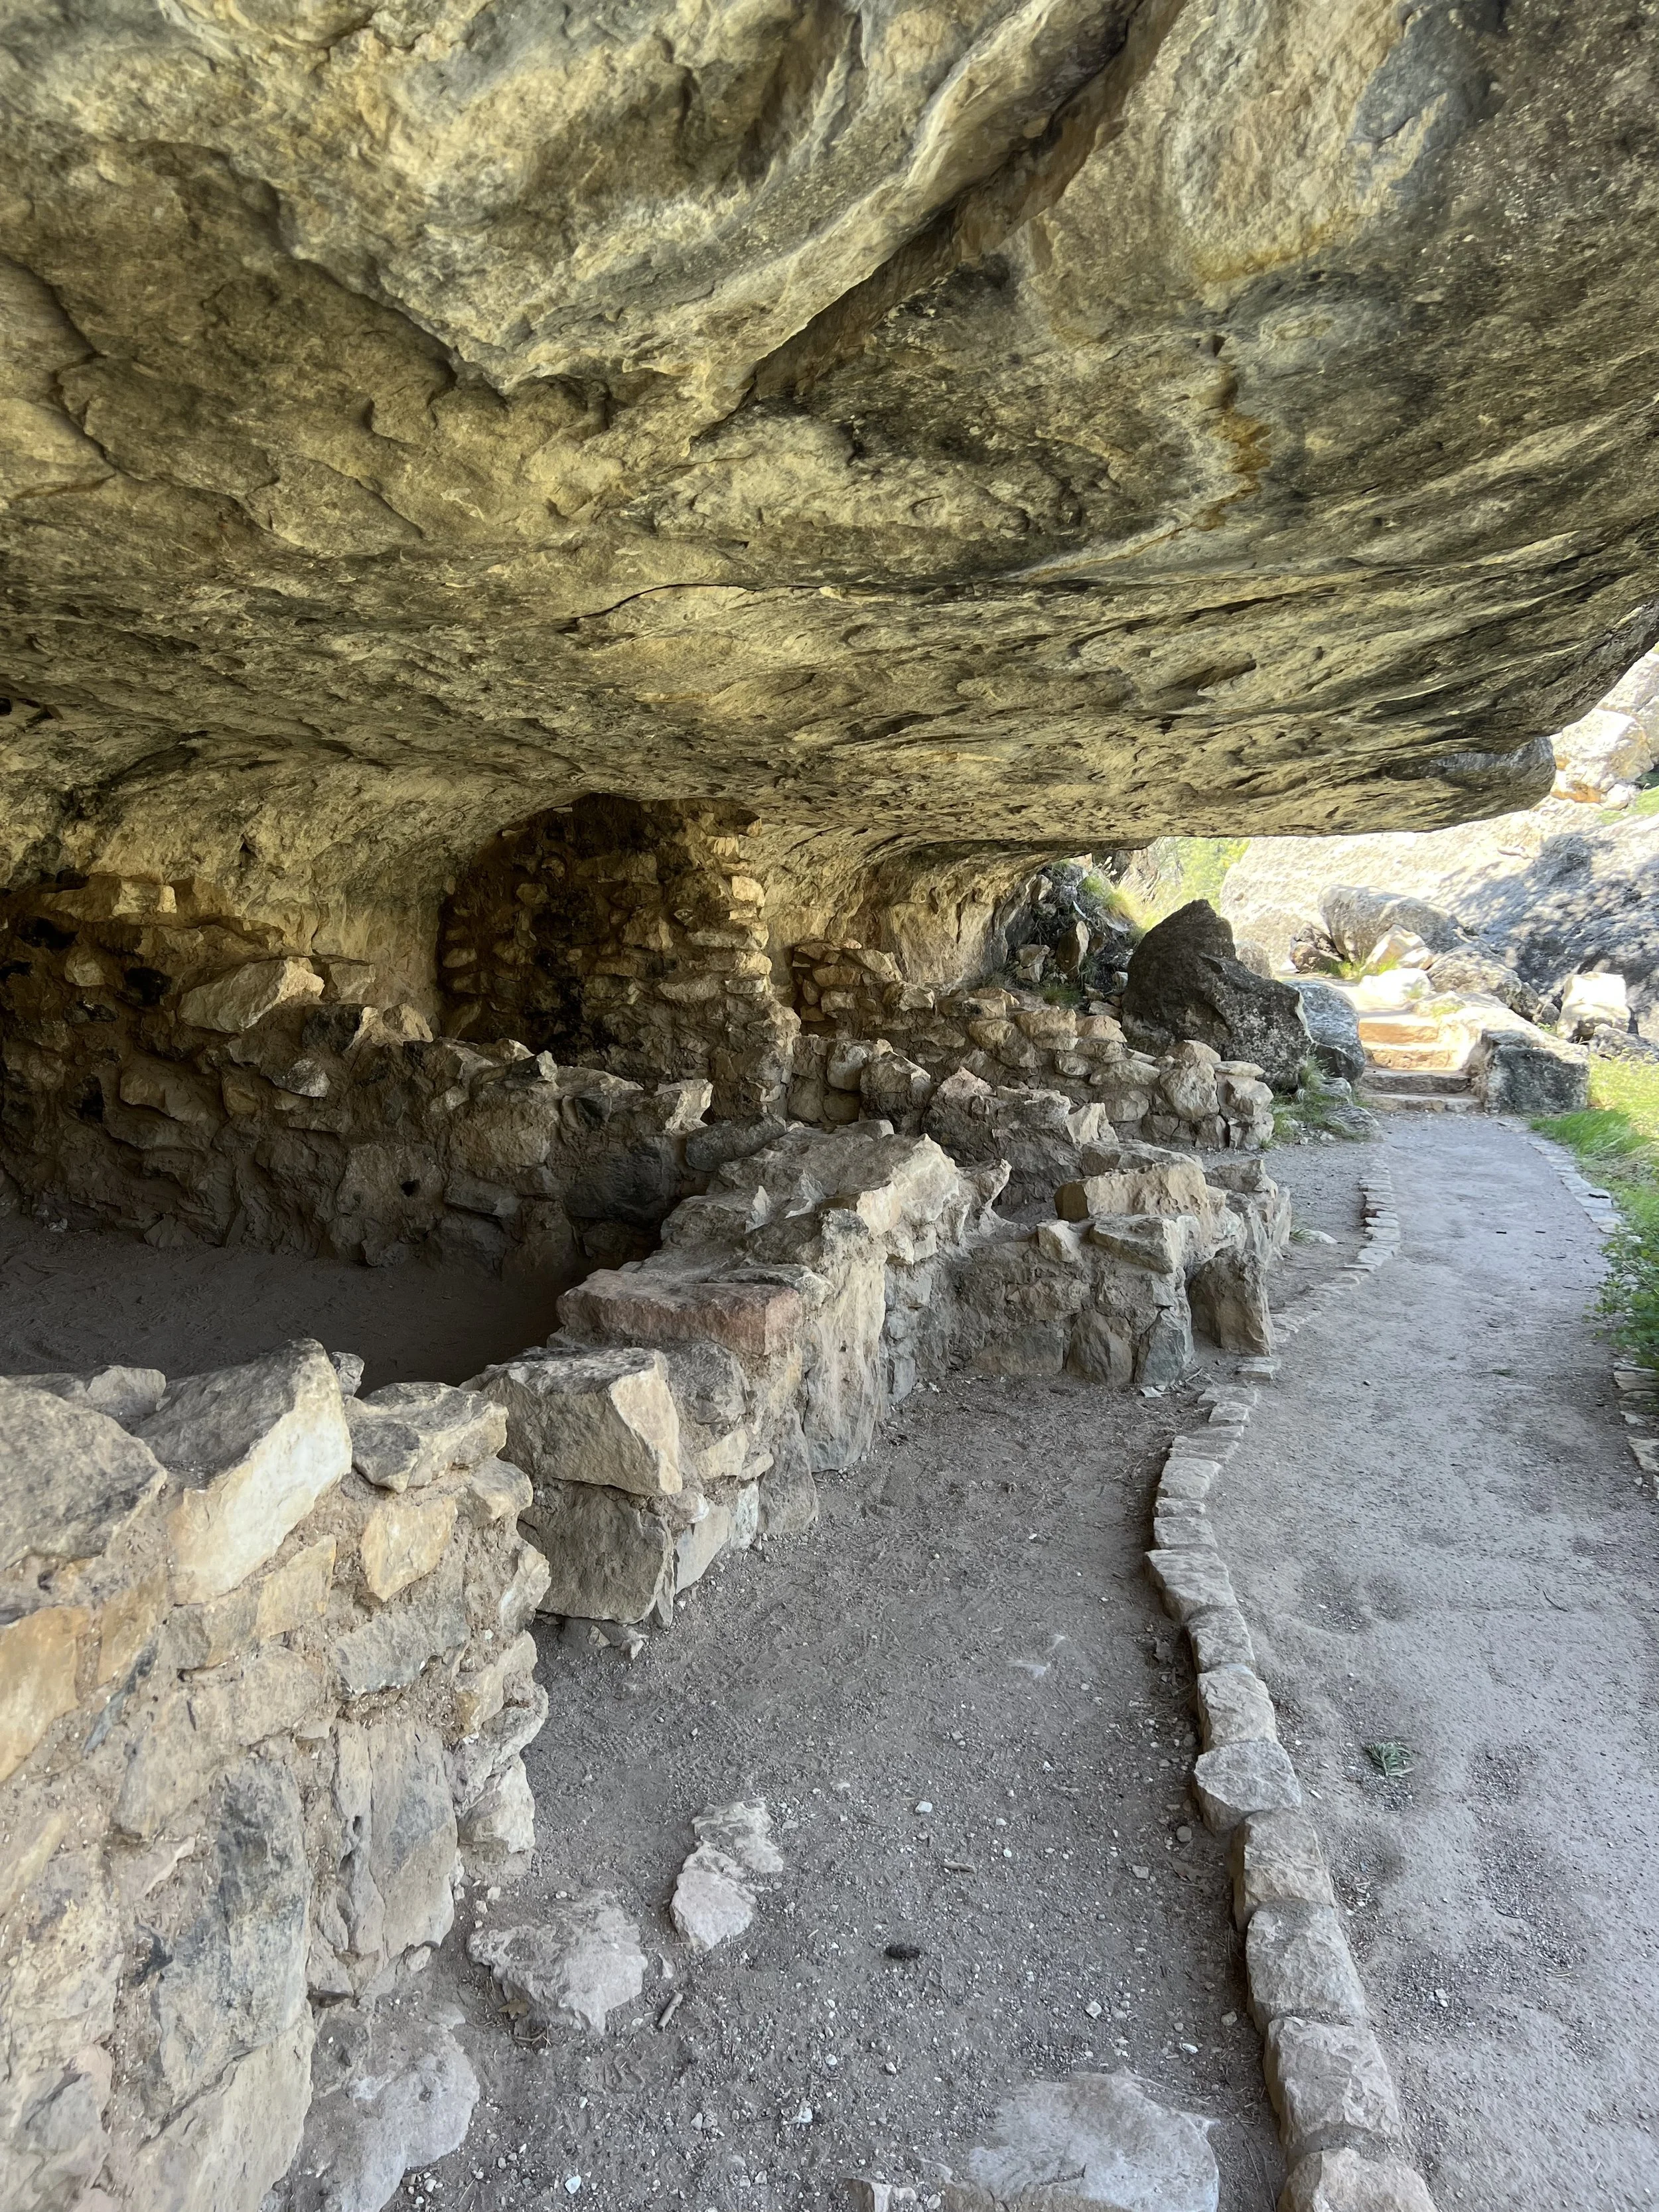
Walnut Canyon National Monument: This was such a hidden gem and also a big highlight on my road trip! Located in a beautiful canyon, there are ruins from the Hope in the ~1200s with structures located under large overhangs. I found this place very untouched and beautiful, plus it’s a great way to stay away from the crowds!
If you decide to stay the night in Flagstaff, there is a cool walking tour you can do:
(Optional 1-3 day diversion: Grand Canyon National Park, North Rim)
The turnoff for the North Rim of the Grand Canyon is about half way between Page and Flagstaff. There are yearly closures for the North Rim - it doesn’t open until May 15th in the summer, which is why I didn’t visit! But it is worth a stop if you have an extra day.
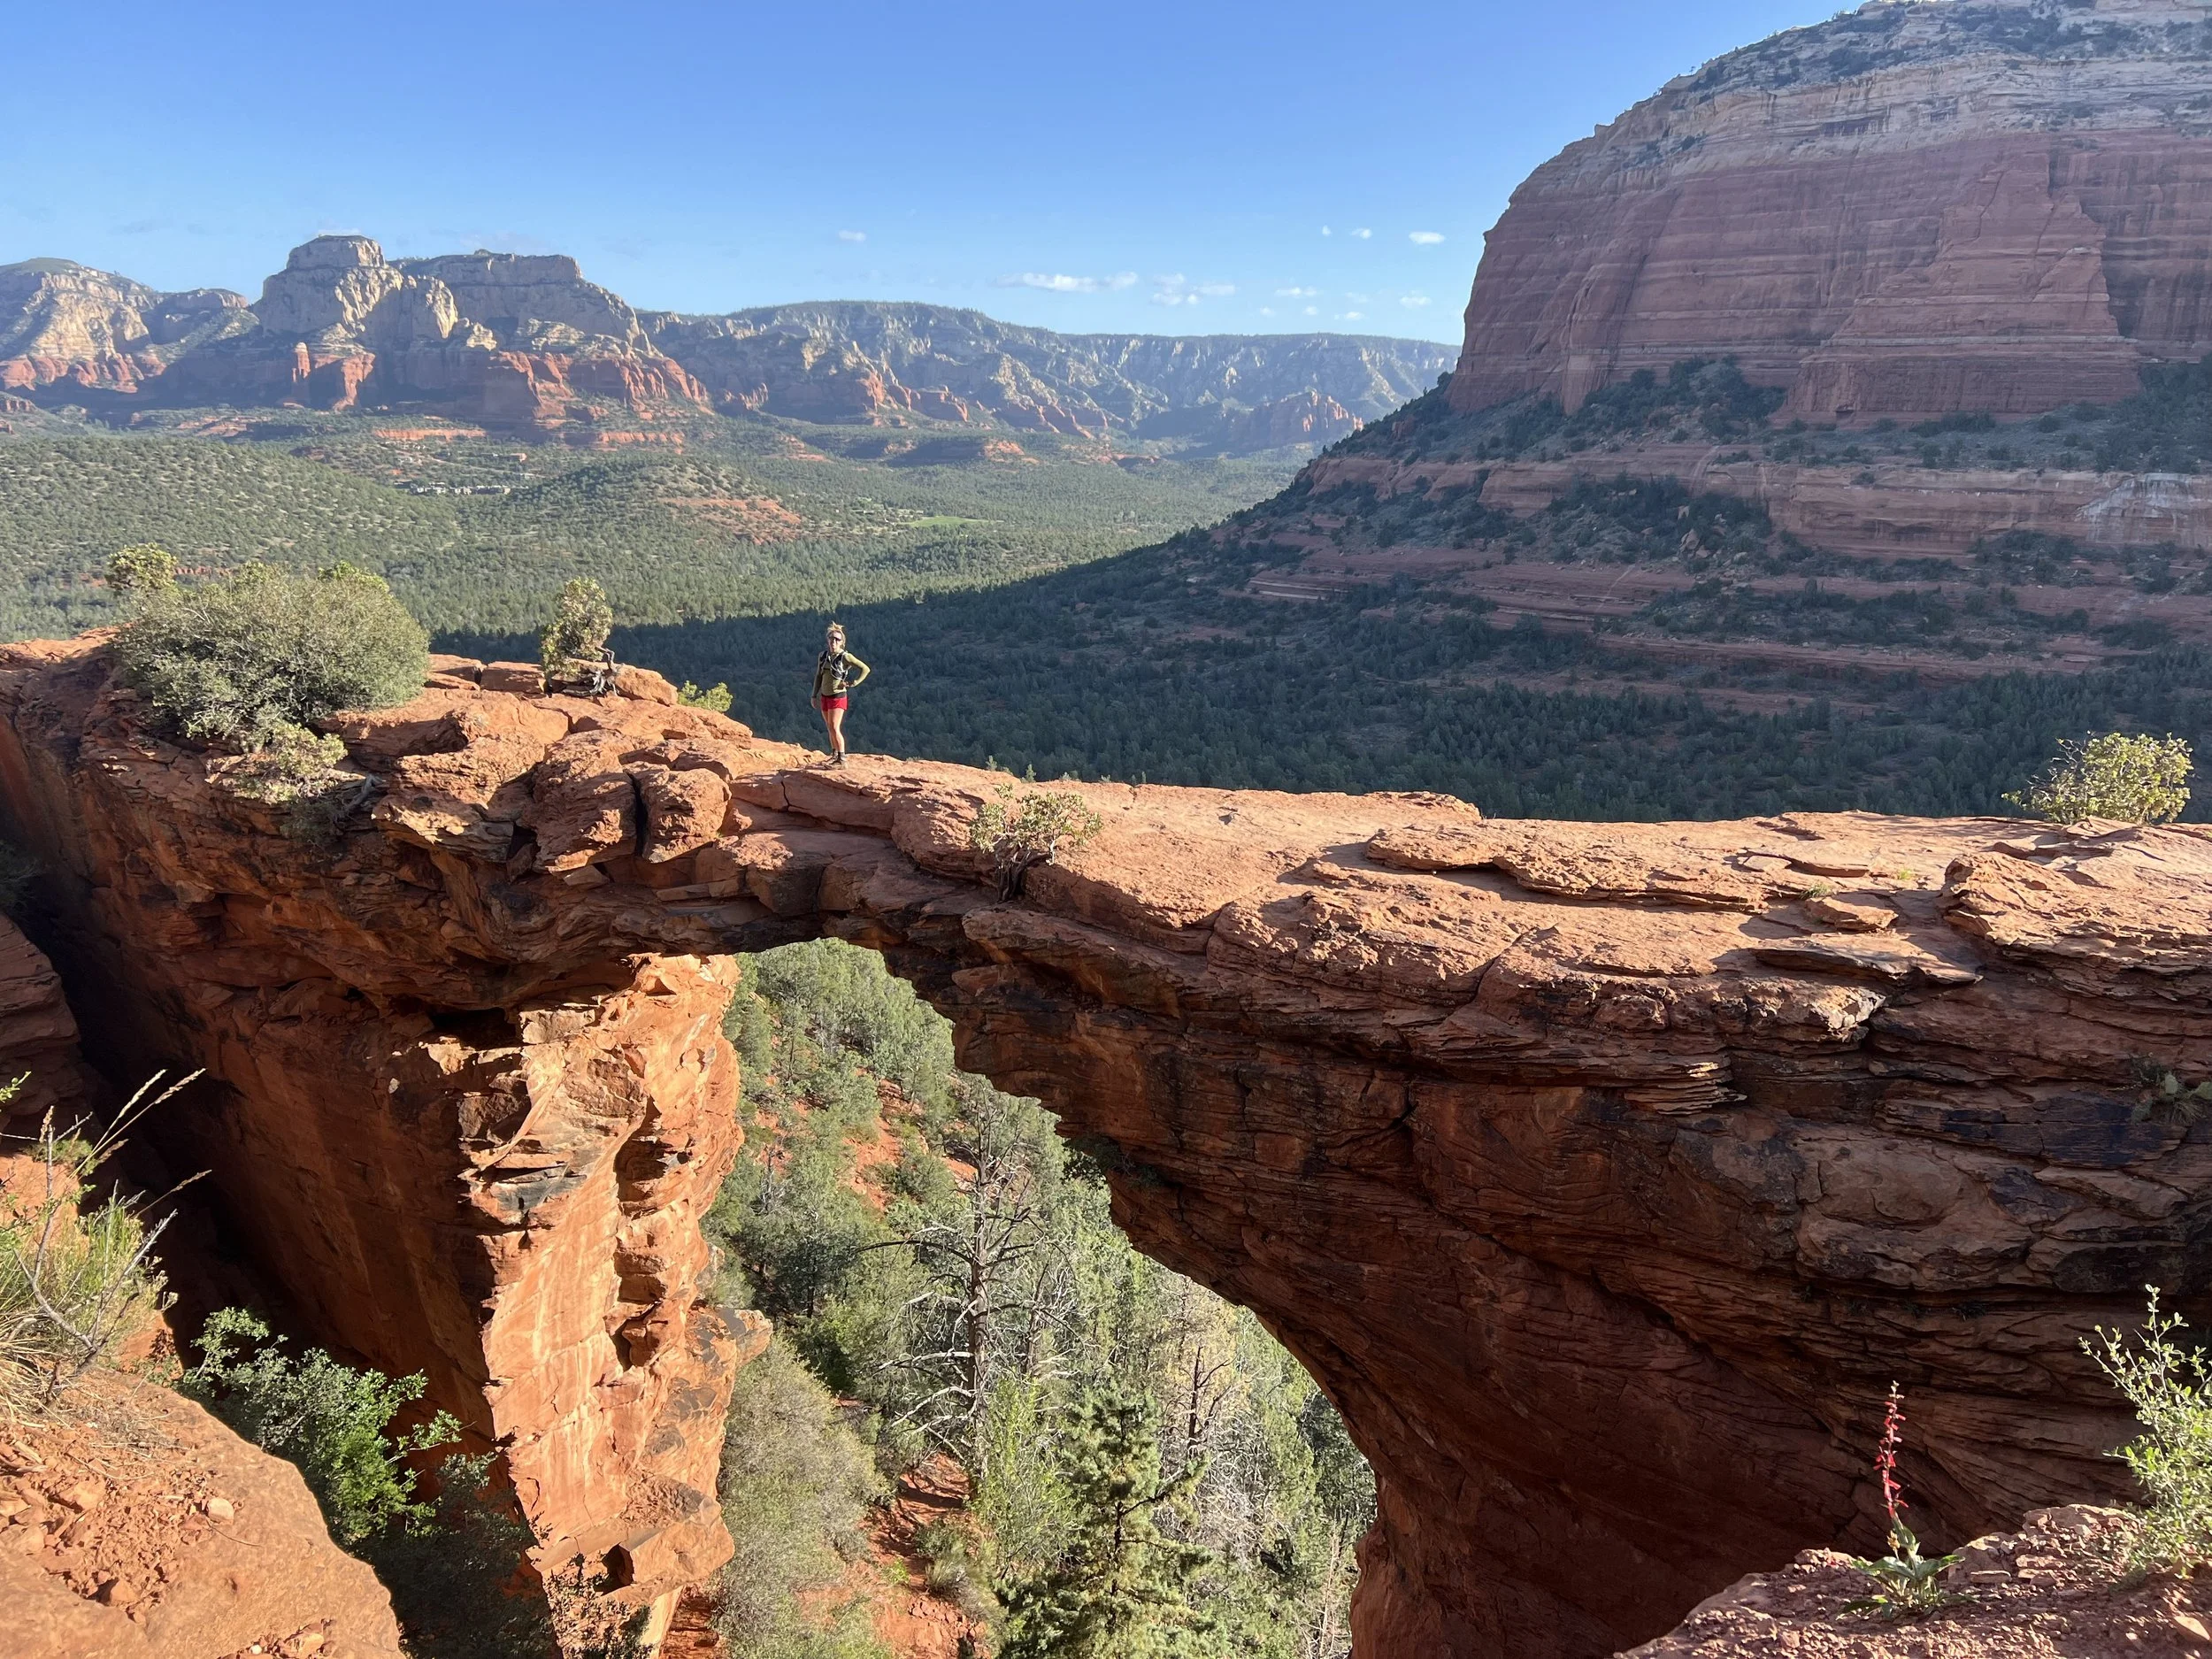
(Optional 1-2 day diversion: Sedona)
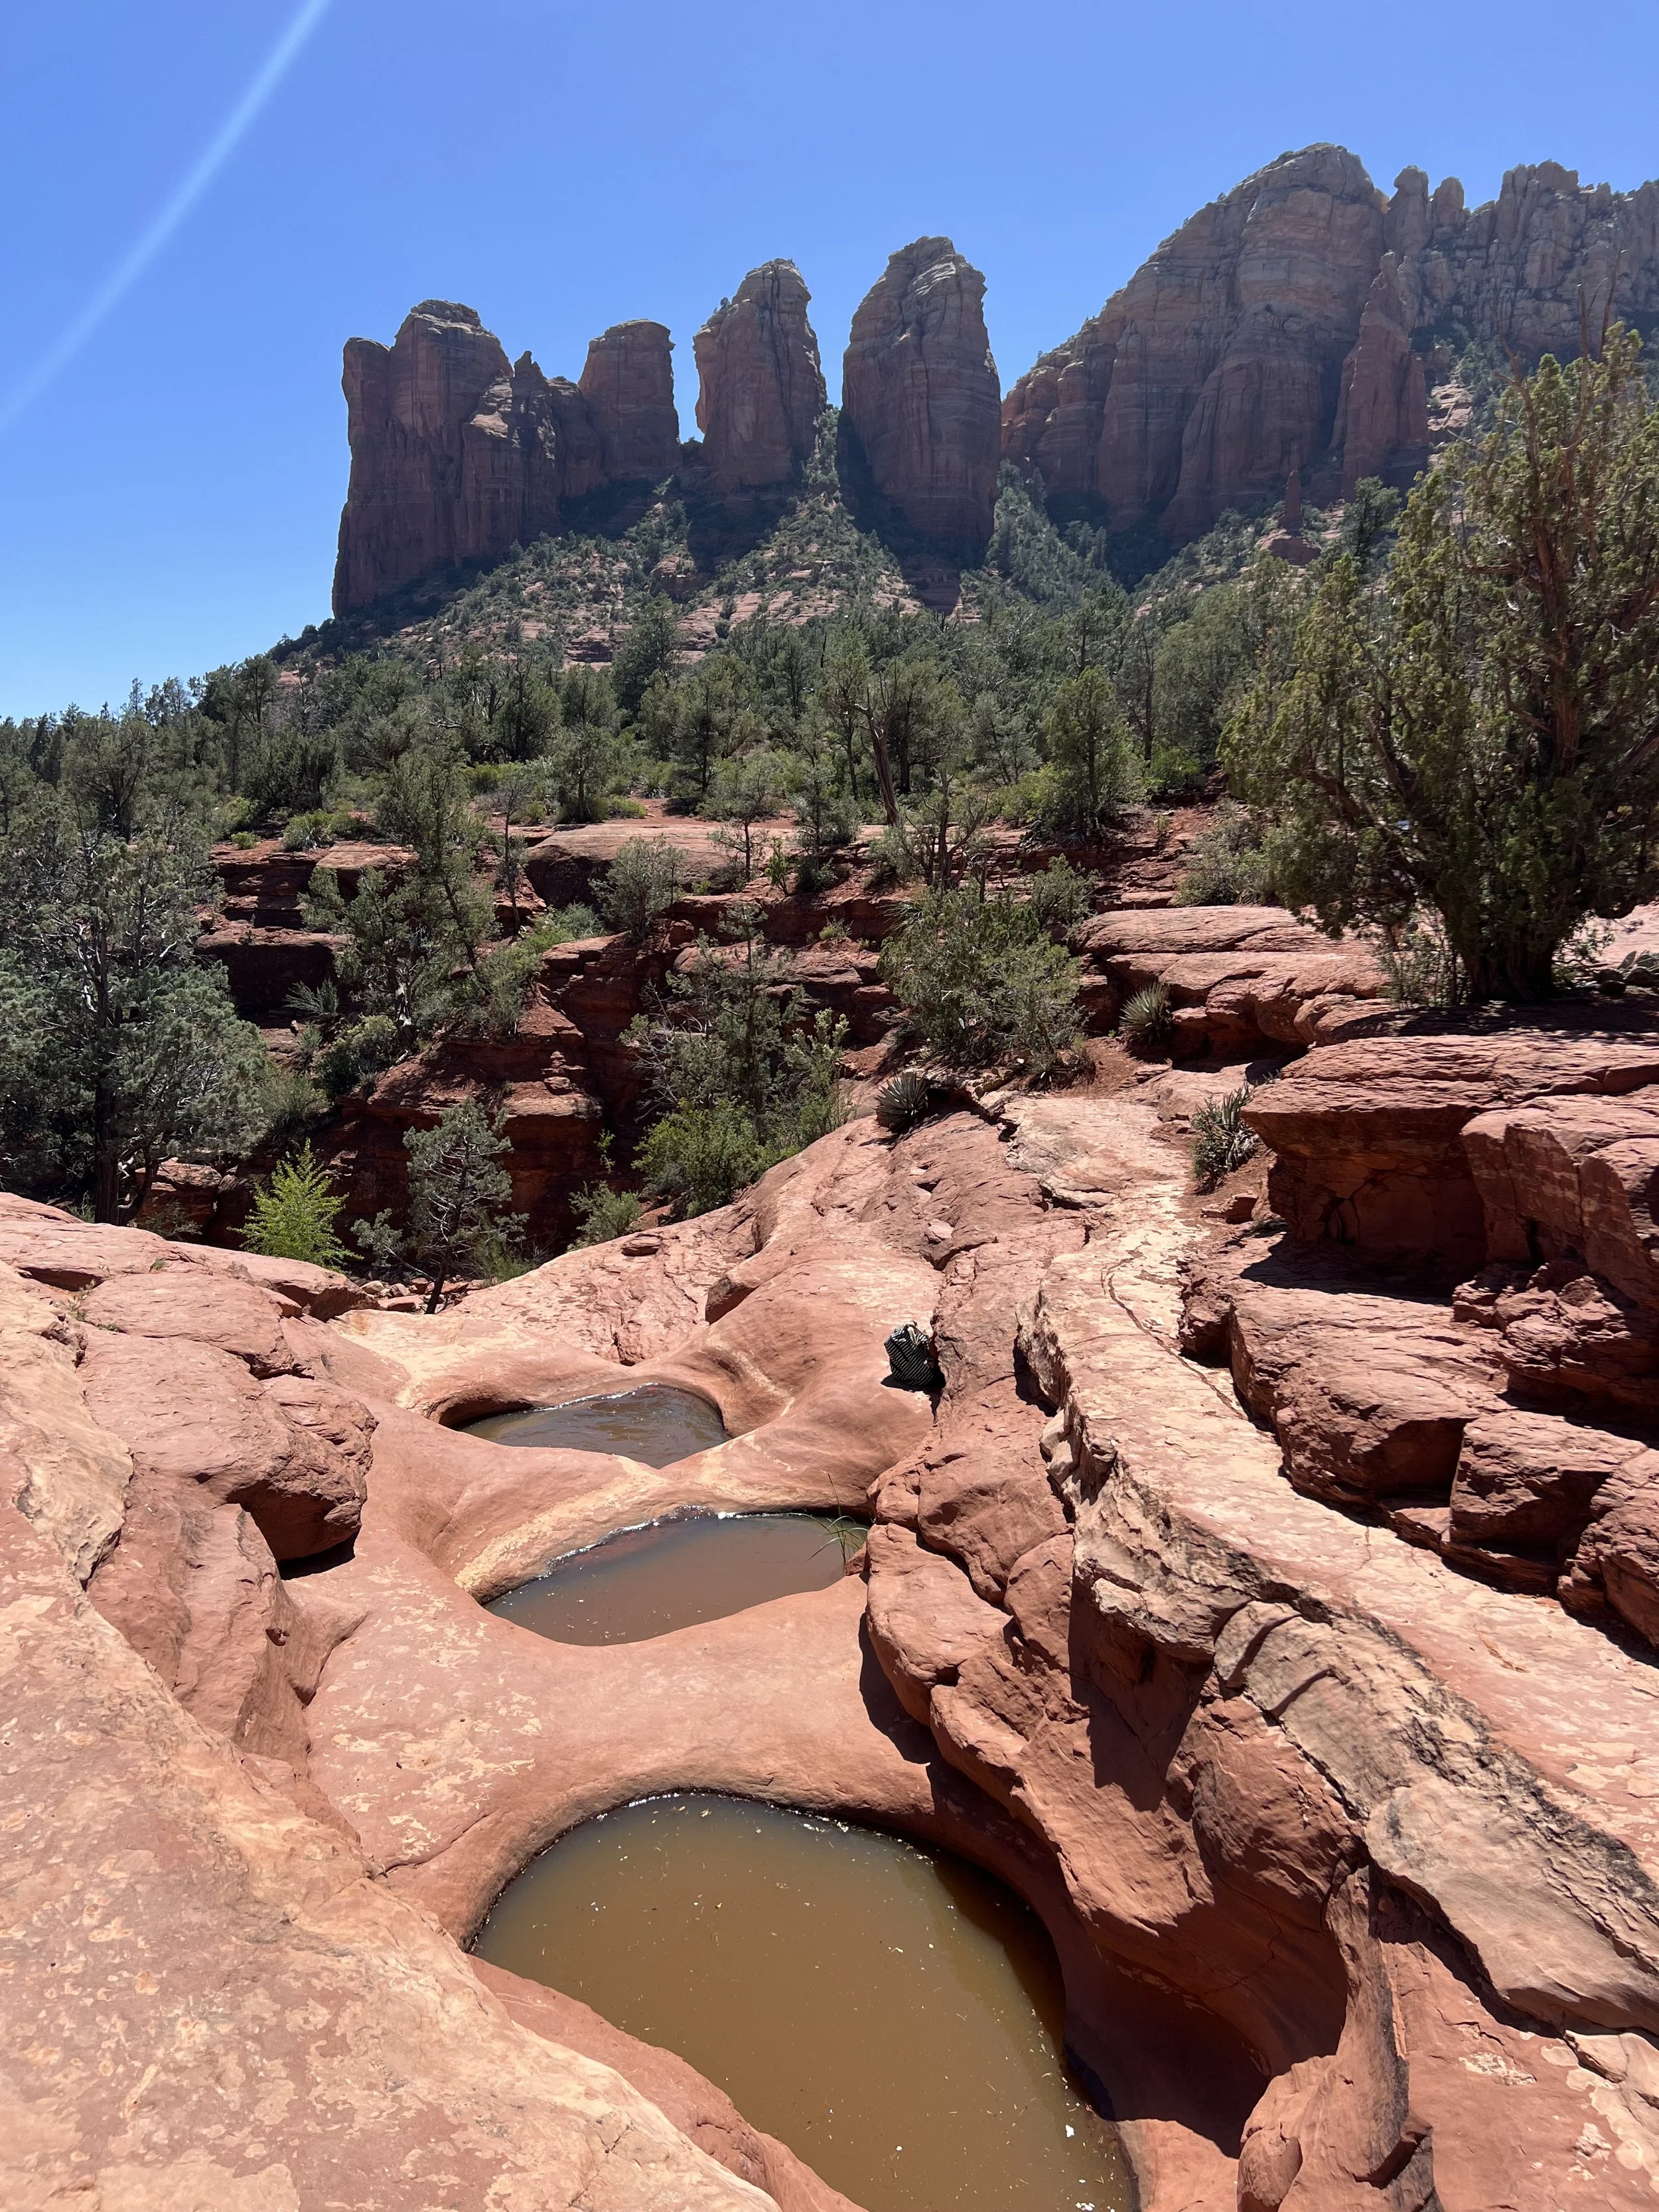
About 1 hour south of Flagstaff is Sedona. Sedona is a beautiful, famous city filled with hiking, mountain biking, and retirees! You can read more about my tips in my Sedona guide.
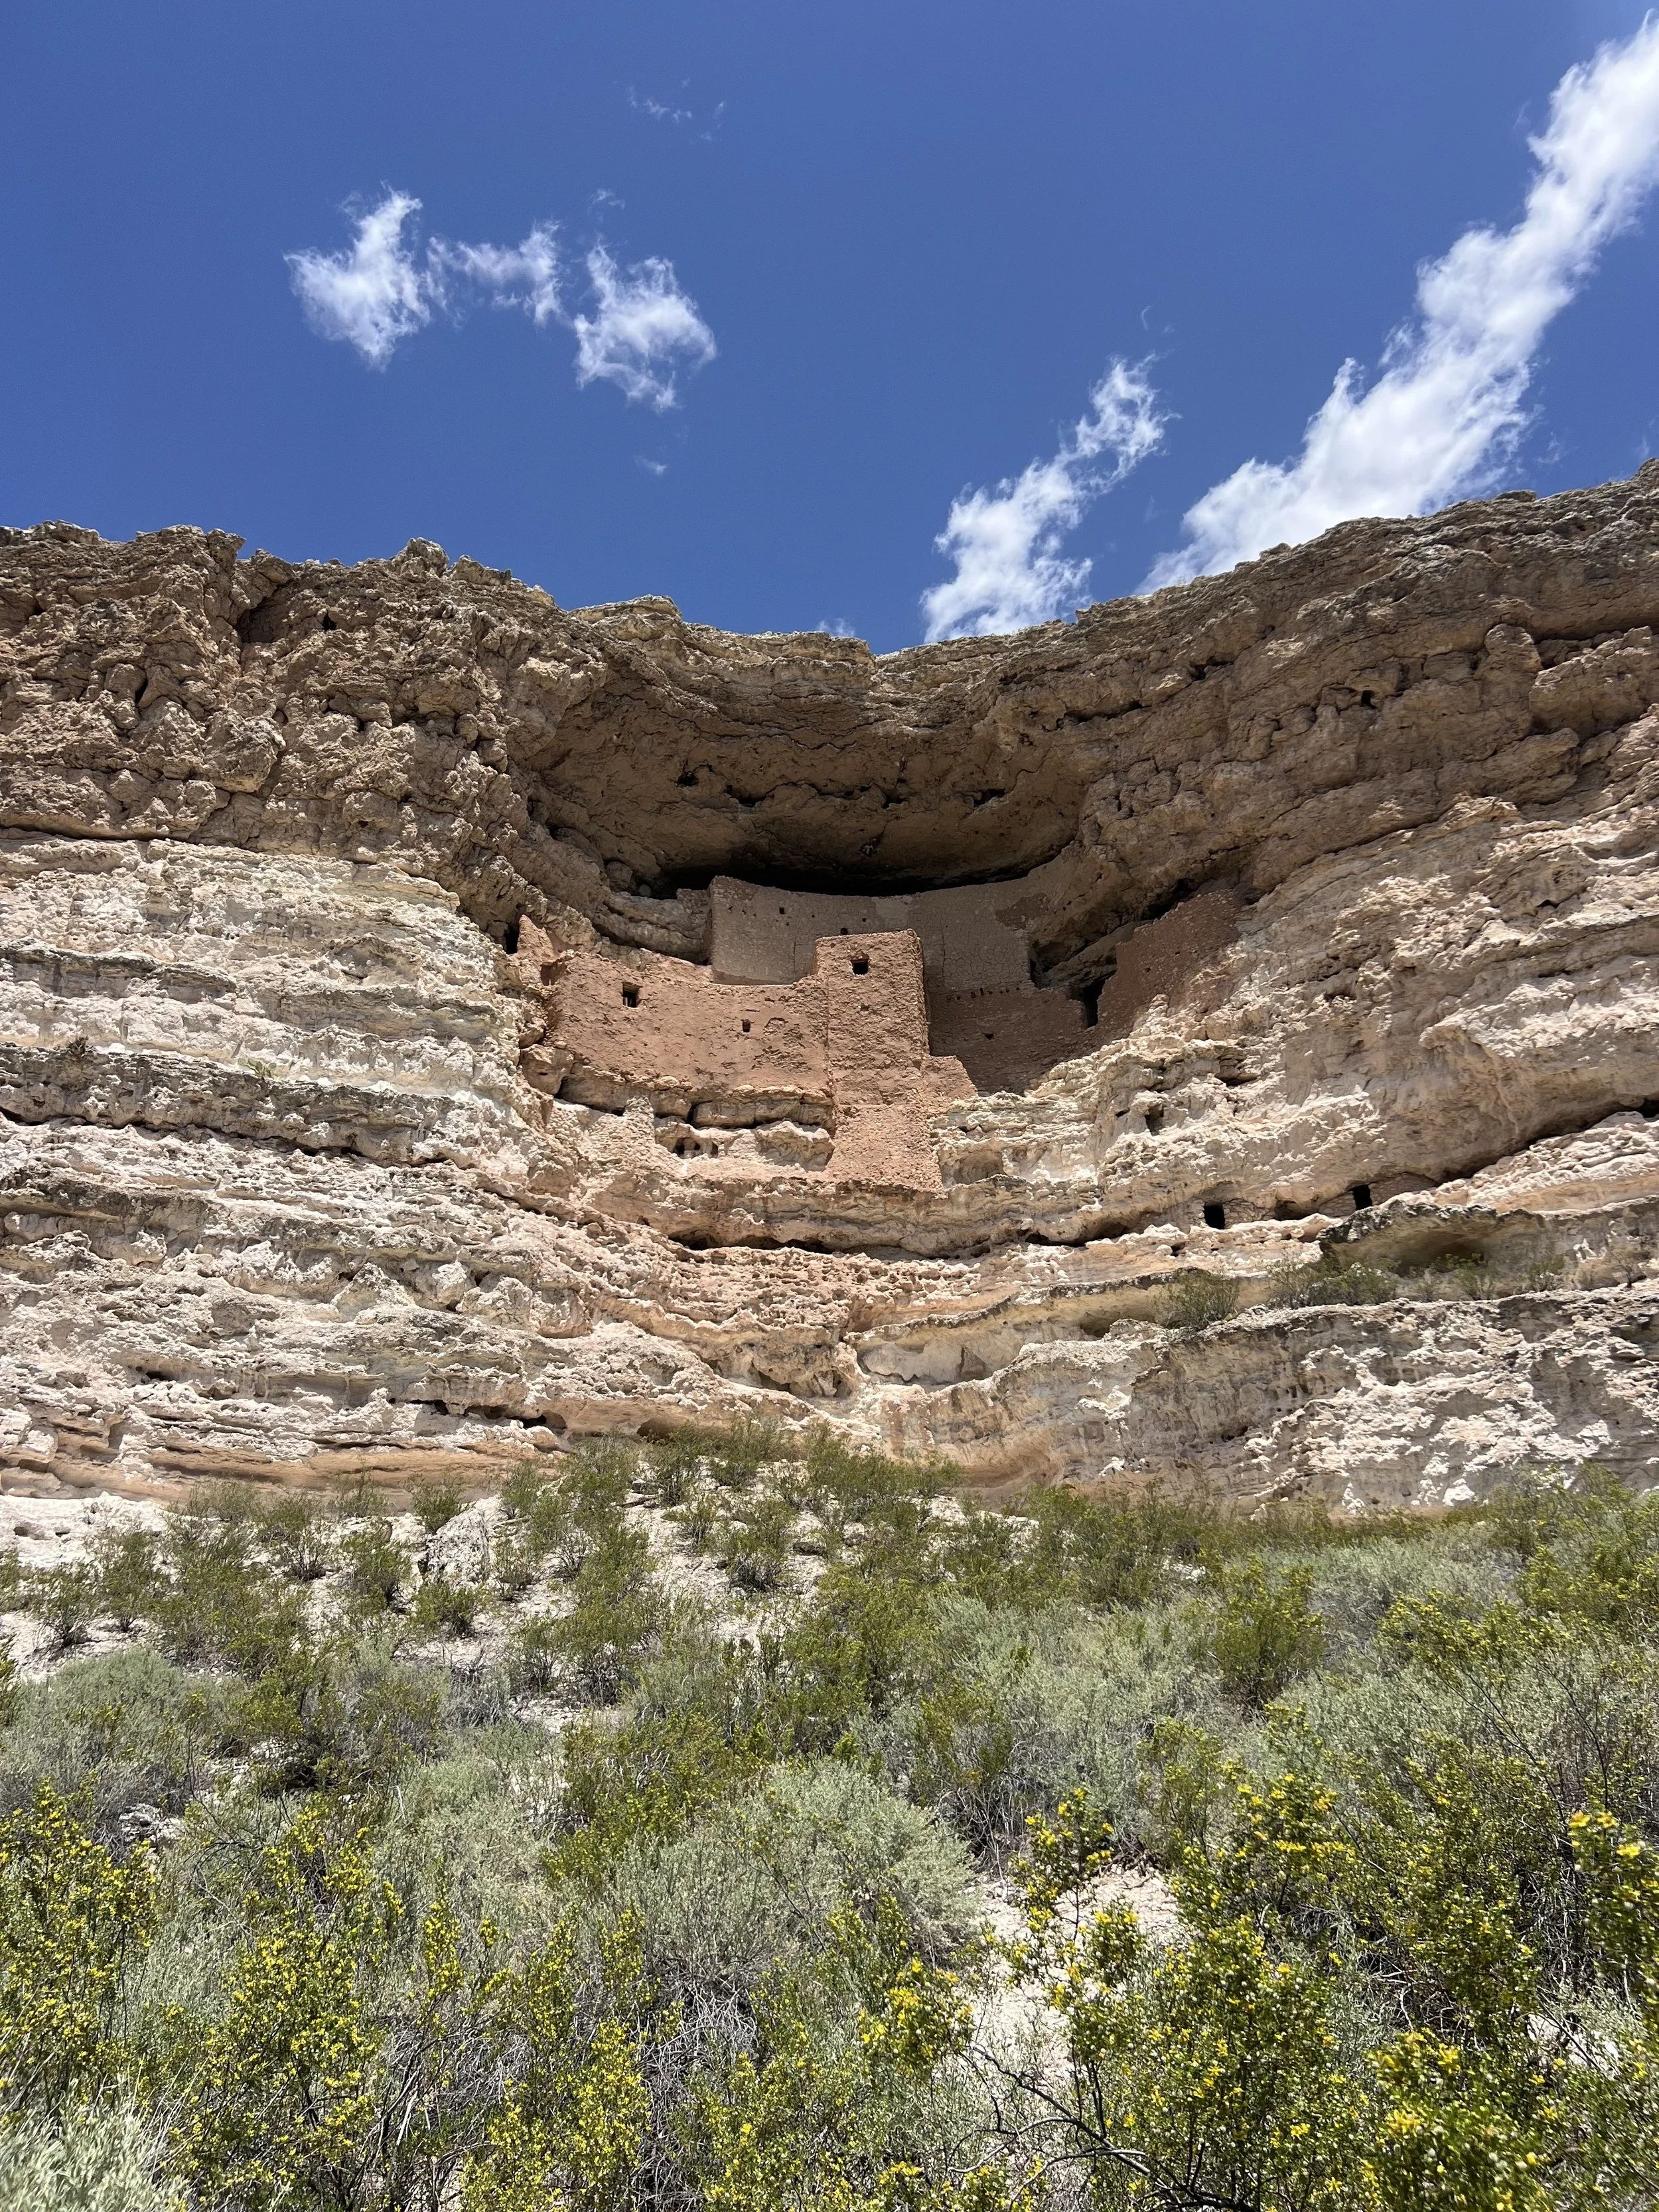
(Optional diversion from Flagstaff - Montezuma Castle)
About 30 minutes south of Flagstaff is another national monument called “Montezuma’s Castle”. It is an absolutely stunning and well preserved structure built under the cliffs. Nearby there is also a well with an interesting history and native species of fish / leeches living in it. I would budget 1-2 hours to visit the castle and the well. Free entry for national park pass holders.
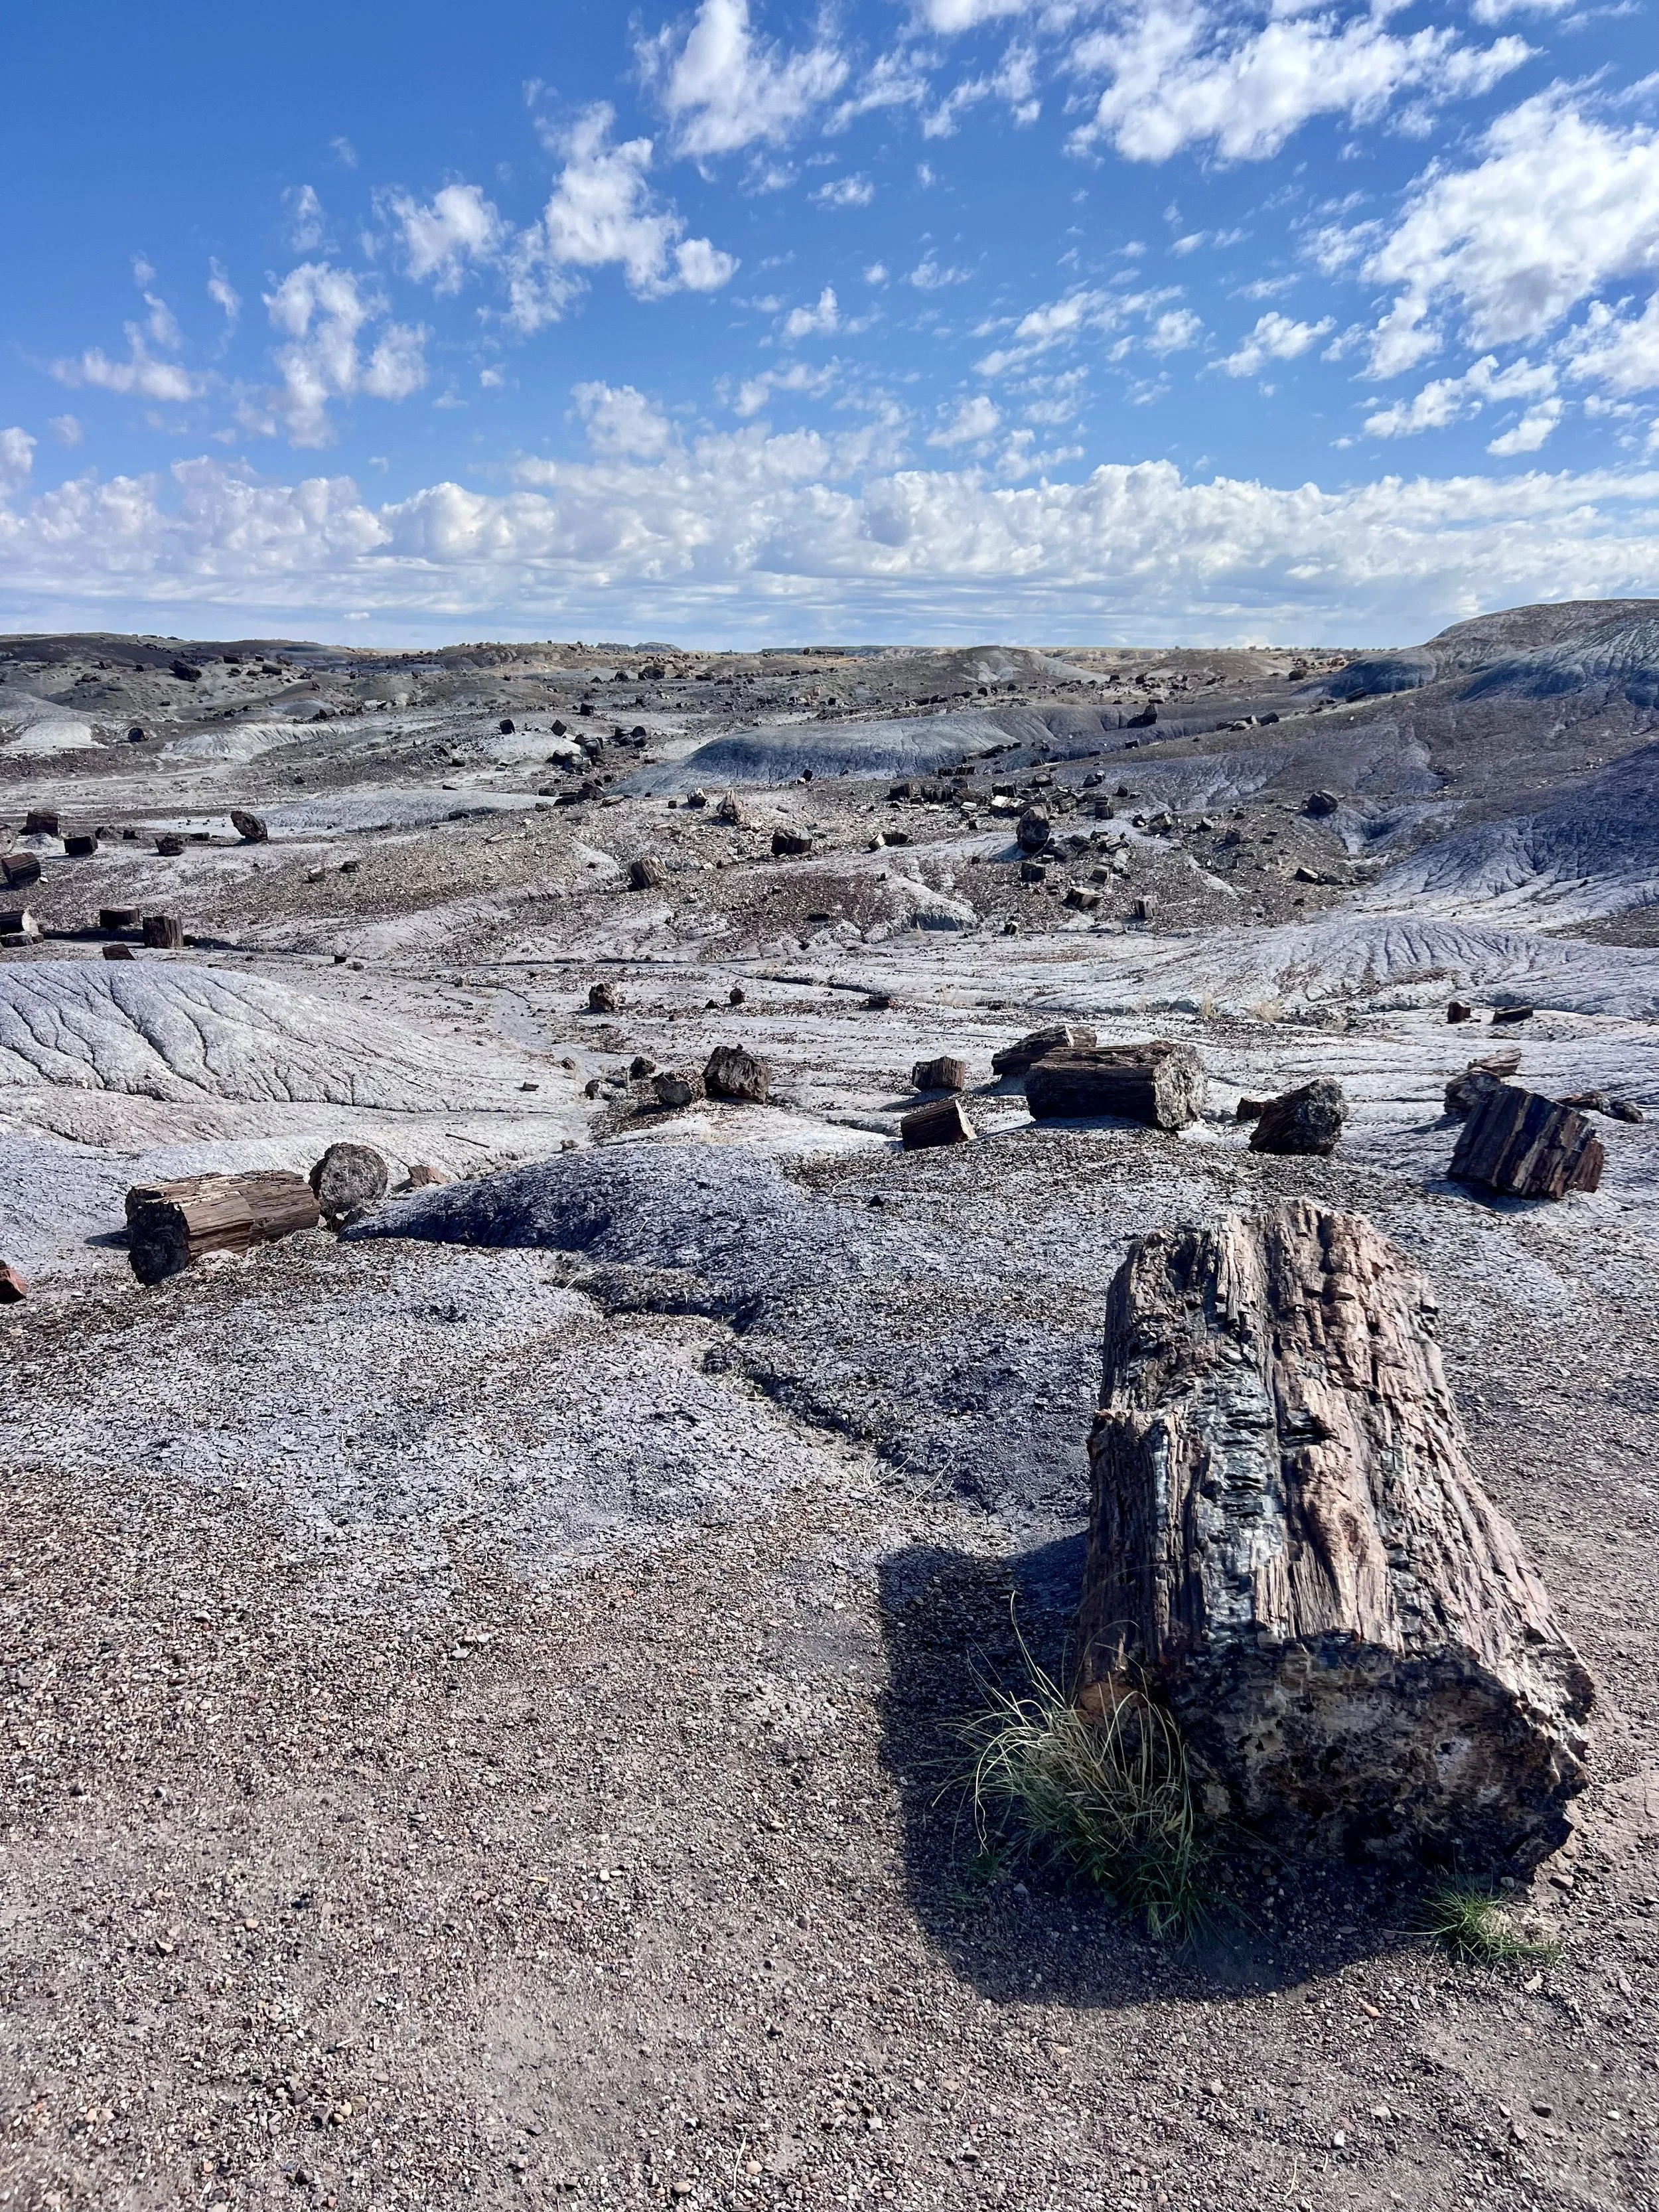
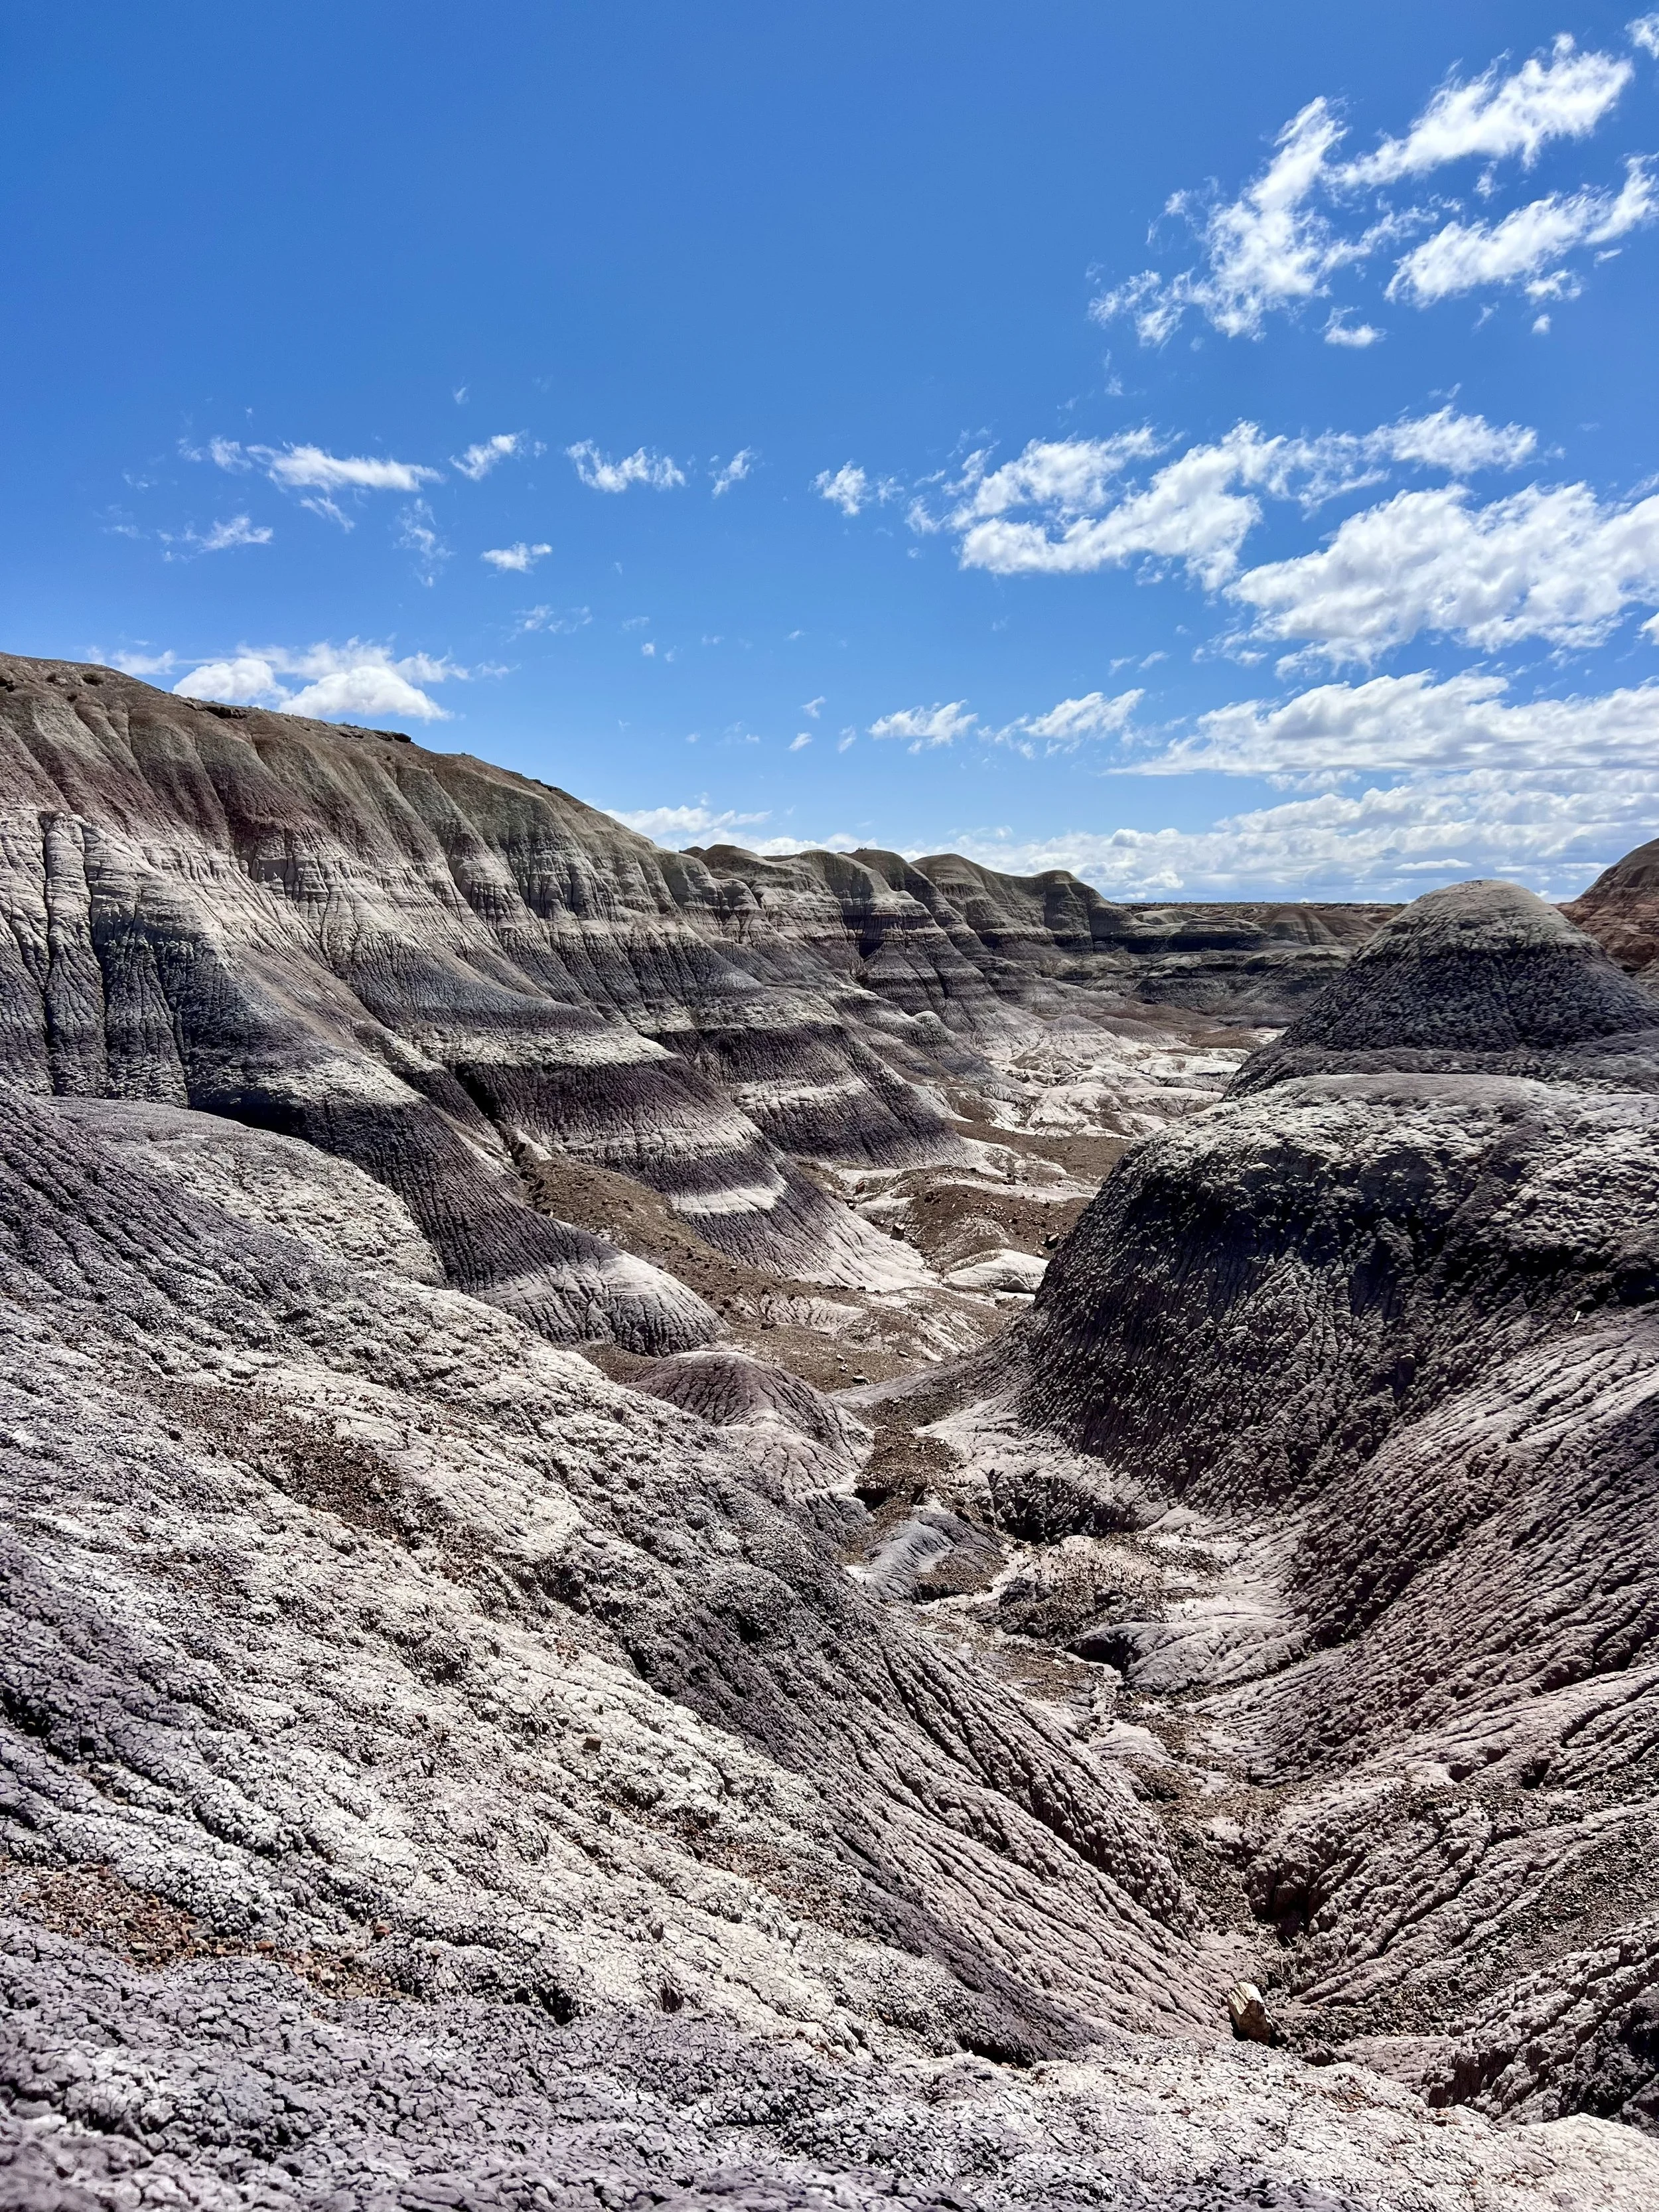
Day 12: Petrified Forest National Park
Today you will have a longer drive. From Flagstaff, drive 3 hours to Petrified Forest, entering in the South Western entrance (about 10 miles south of Holbrook). Note that the park has entrance hours, unlike many parks that are open 24 hours, so you cannot enter before 8am. The drive through the park, plus hikes and viewpoints, should take about 3 hours. Stop by the visitors center and don’t miss the giant log trail, crystal forest, the tepees, and pintado point! The road connects with the old Route 66 north of Highway 10 before re-entering the highway.
Drive 1.5 hours and grab some food in Gallup before turning off the highway and heading north towards Shiprock. Shiprock is a sacred site for the Navajo Nation, so you cannot climb or hike near it but you can pull of the highway to get a better view! Continue onward and grab a campsite in Cortez.

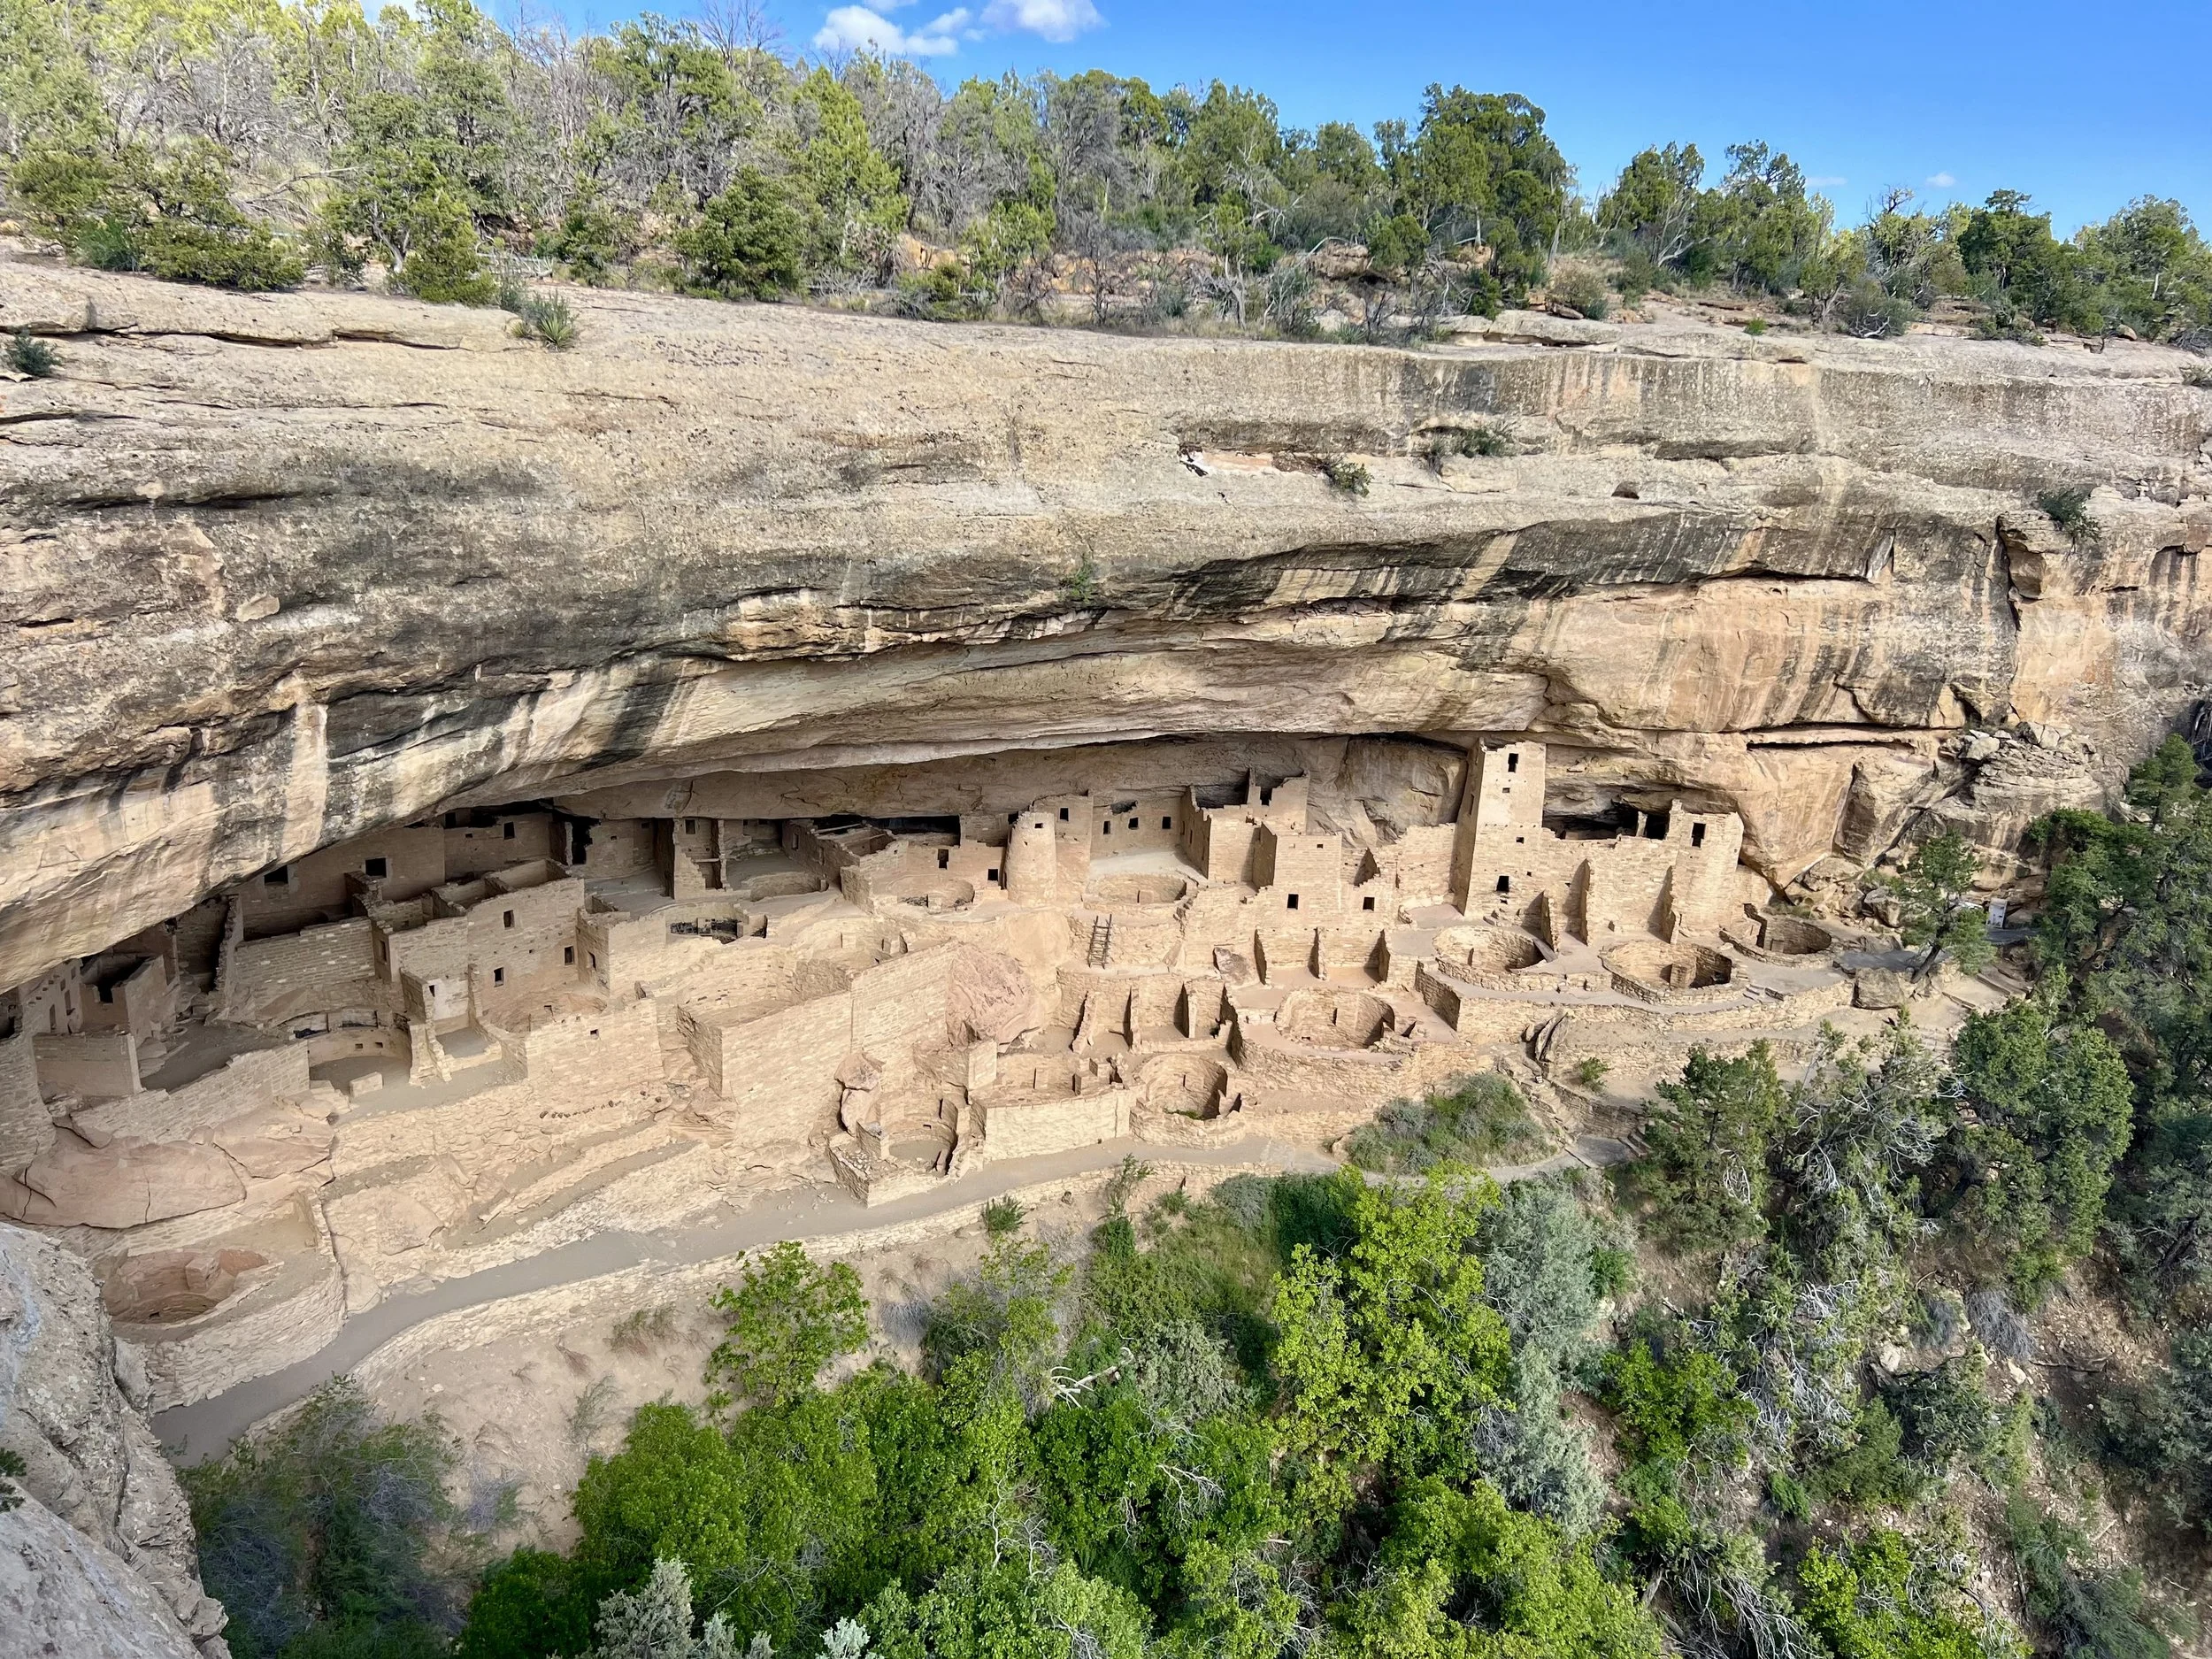
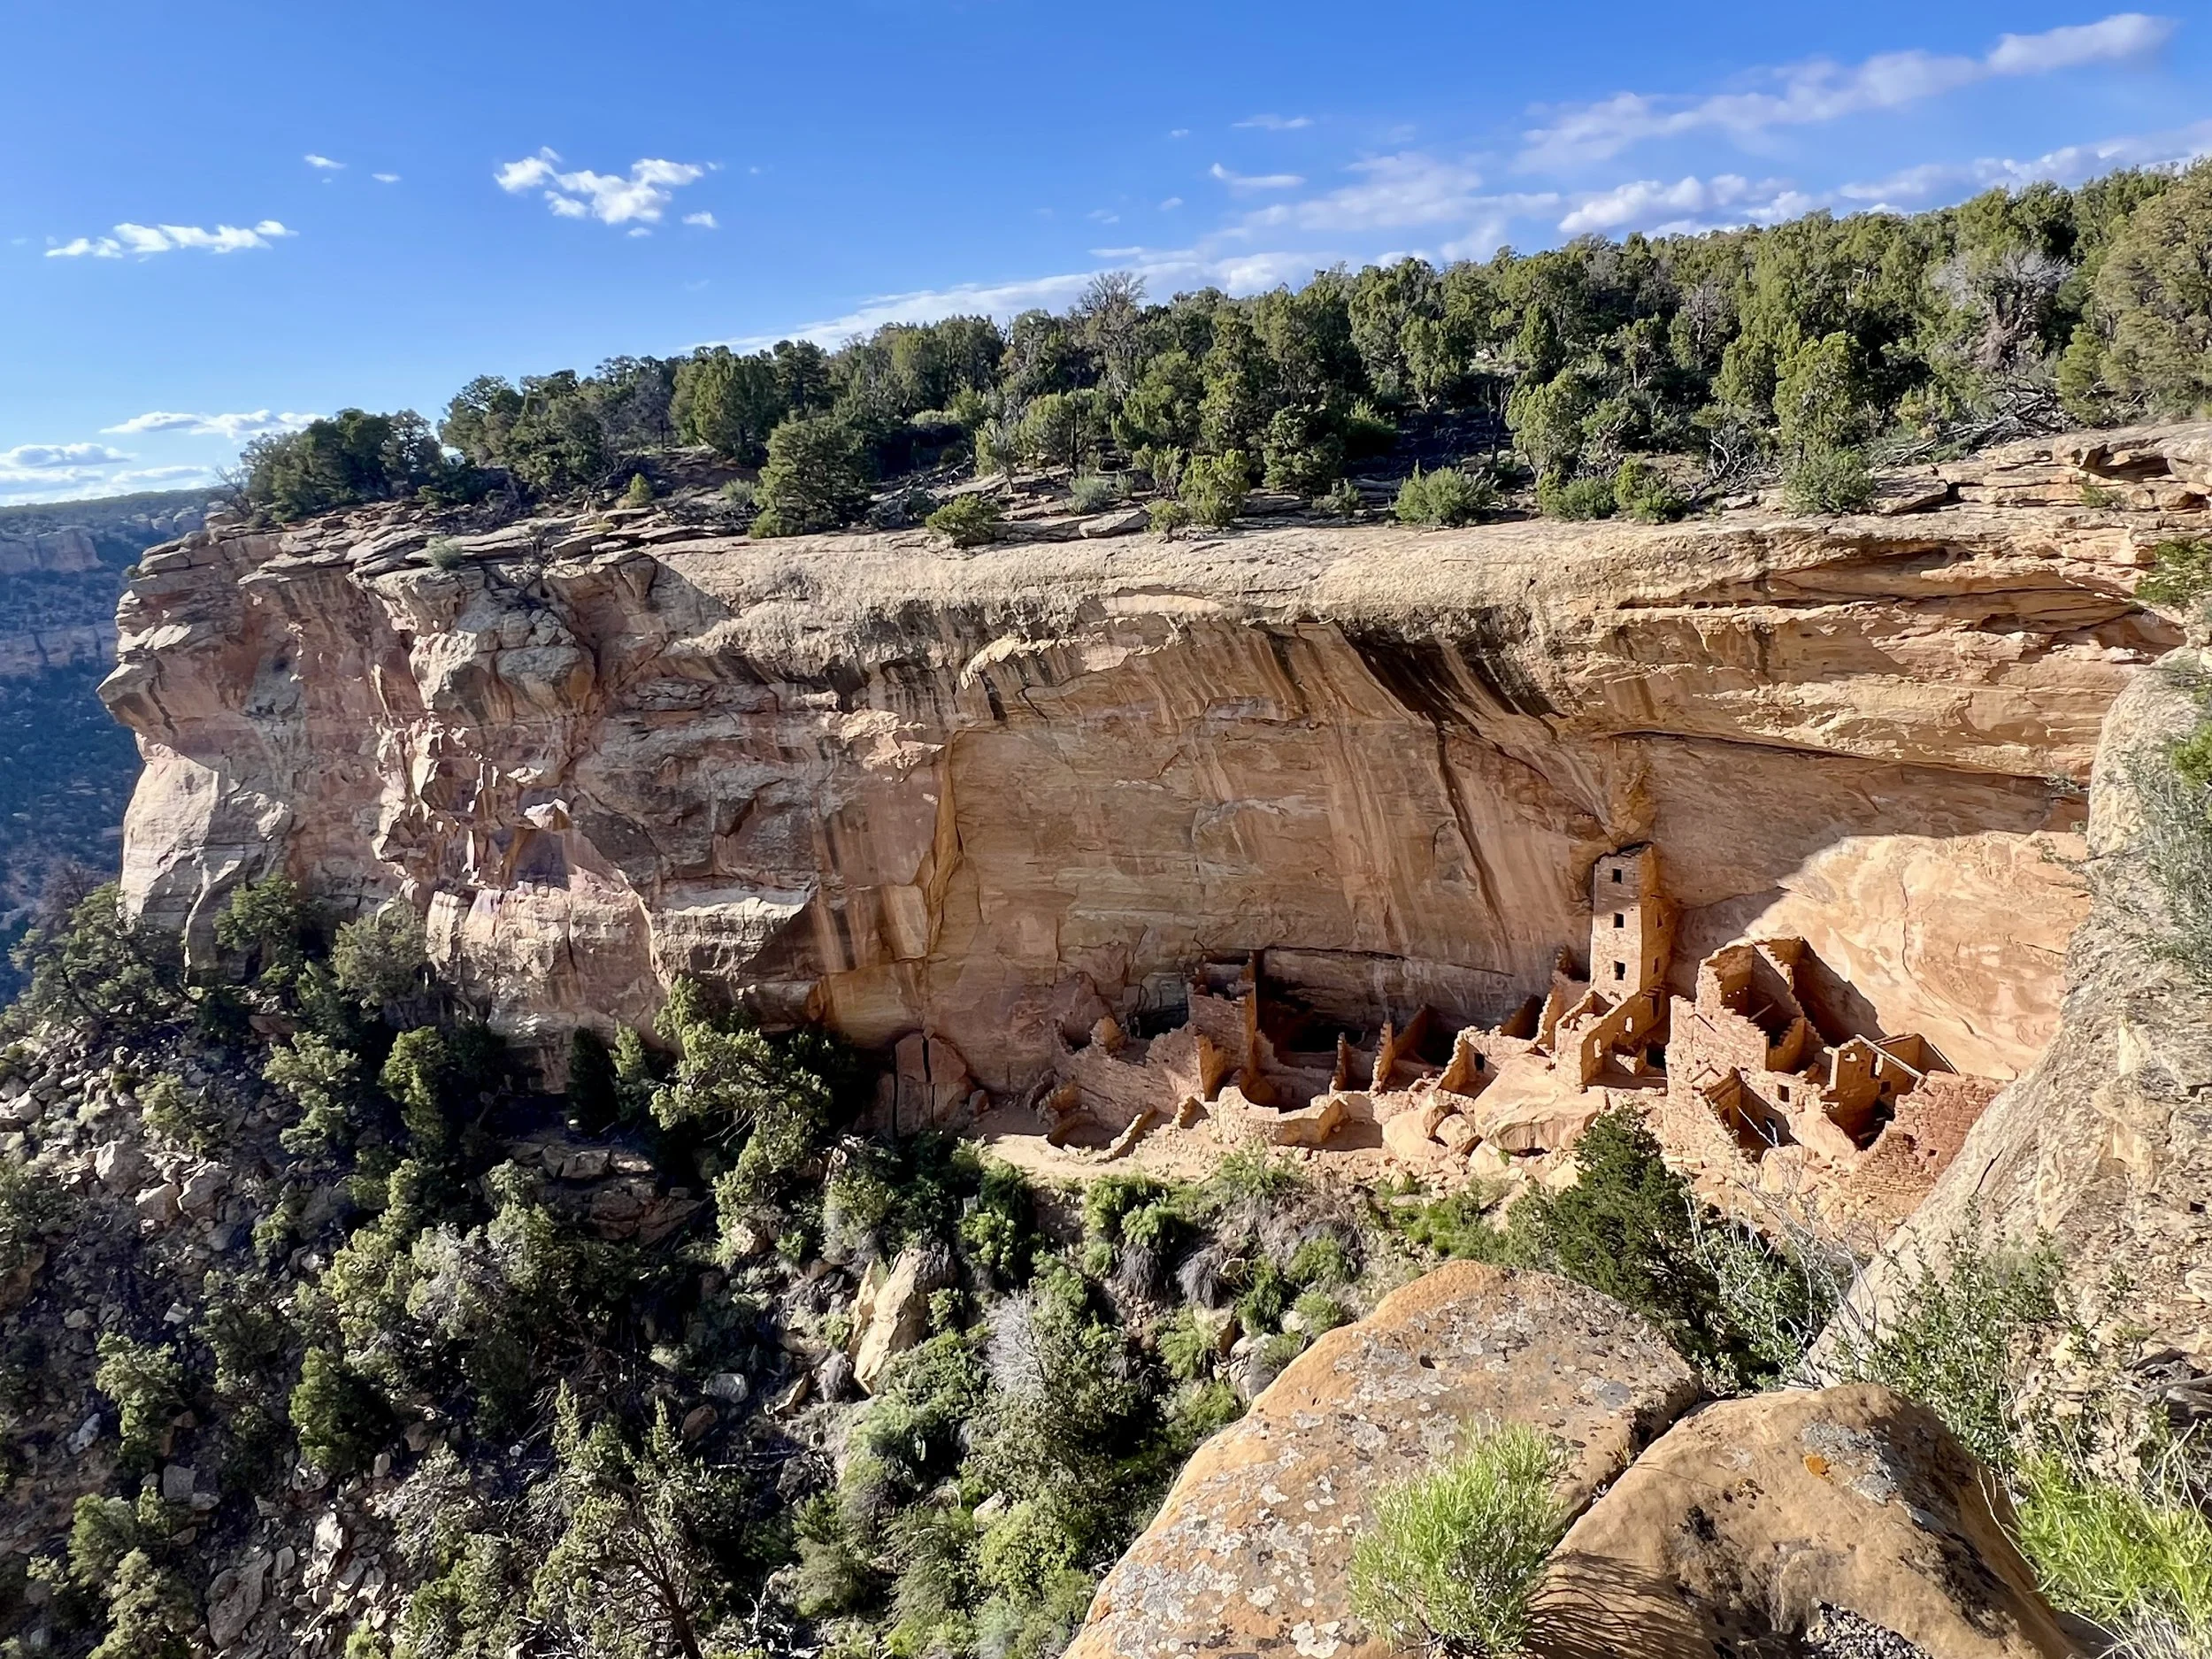
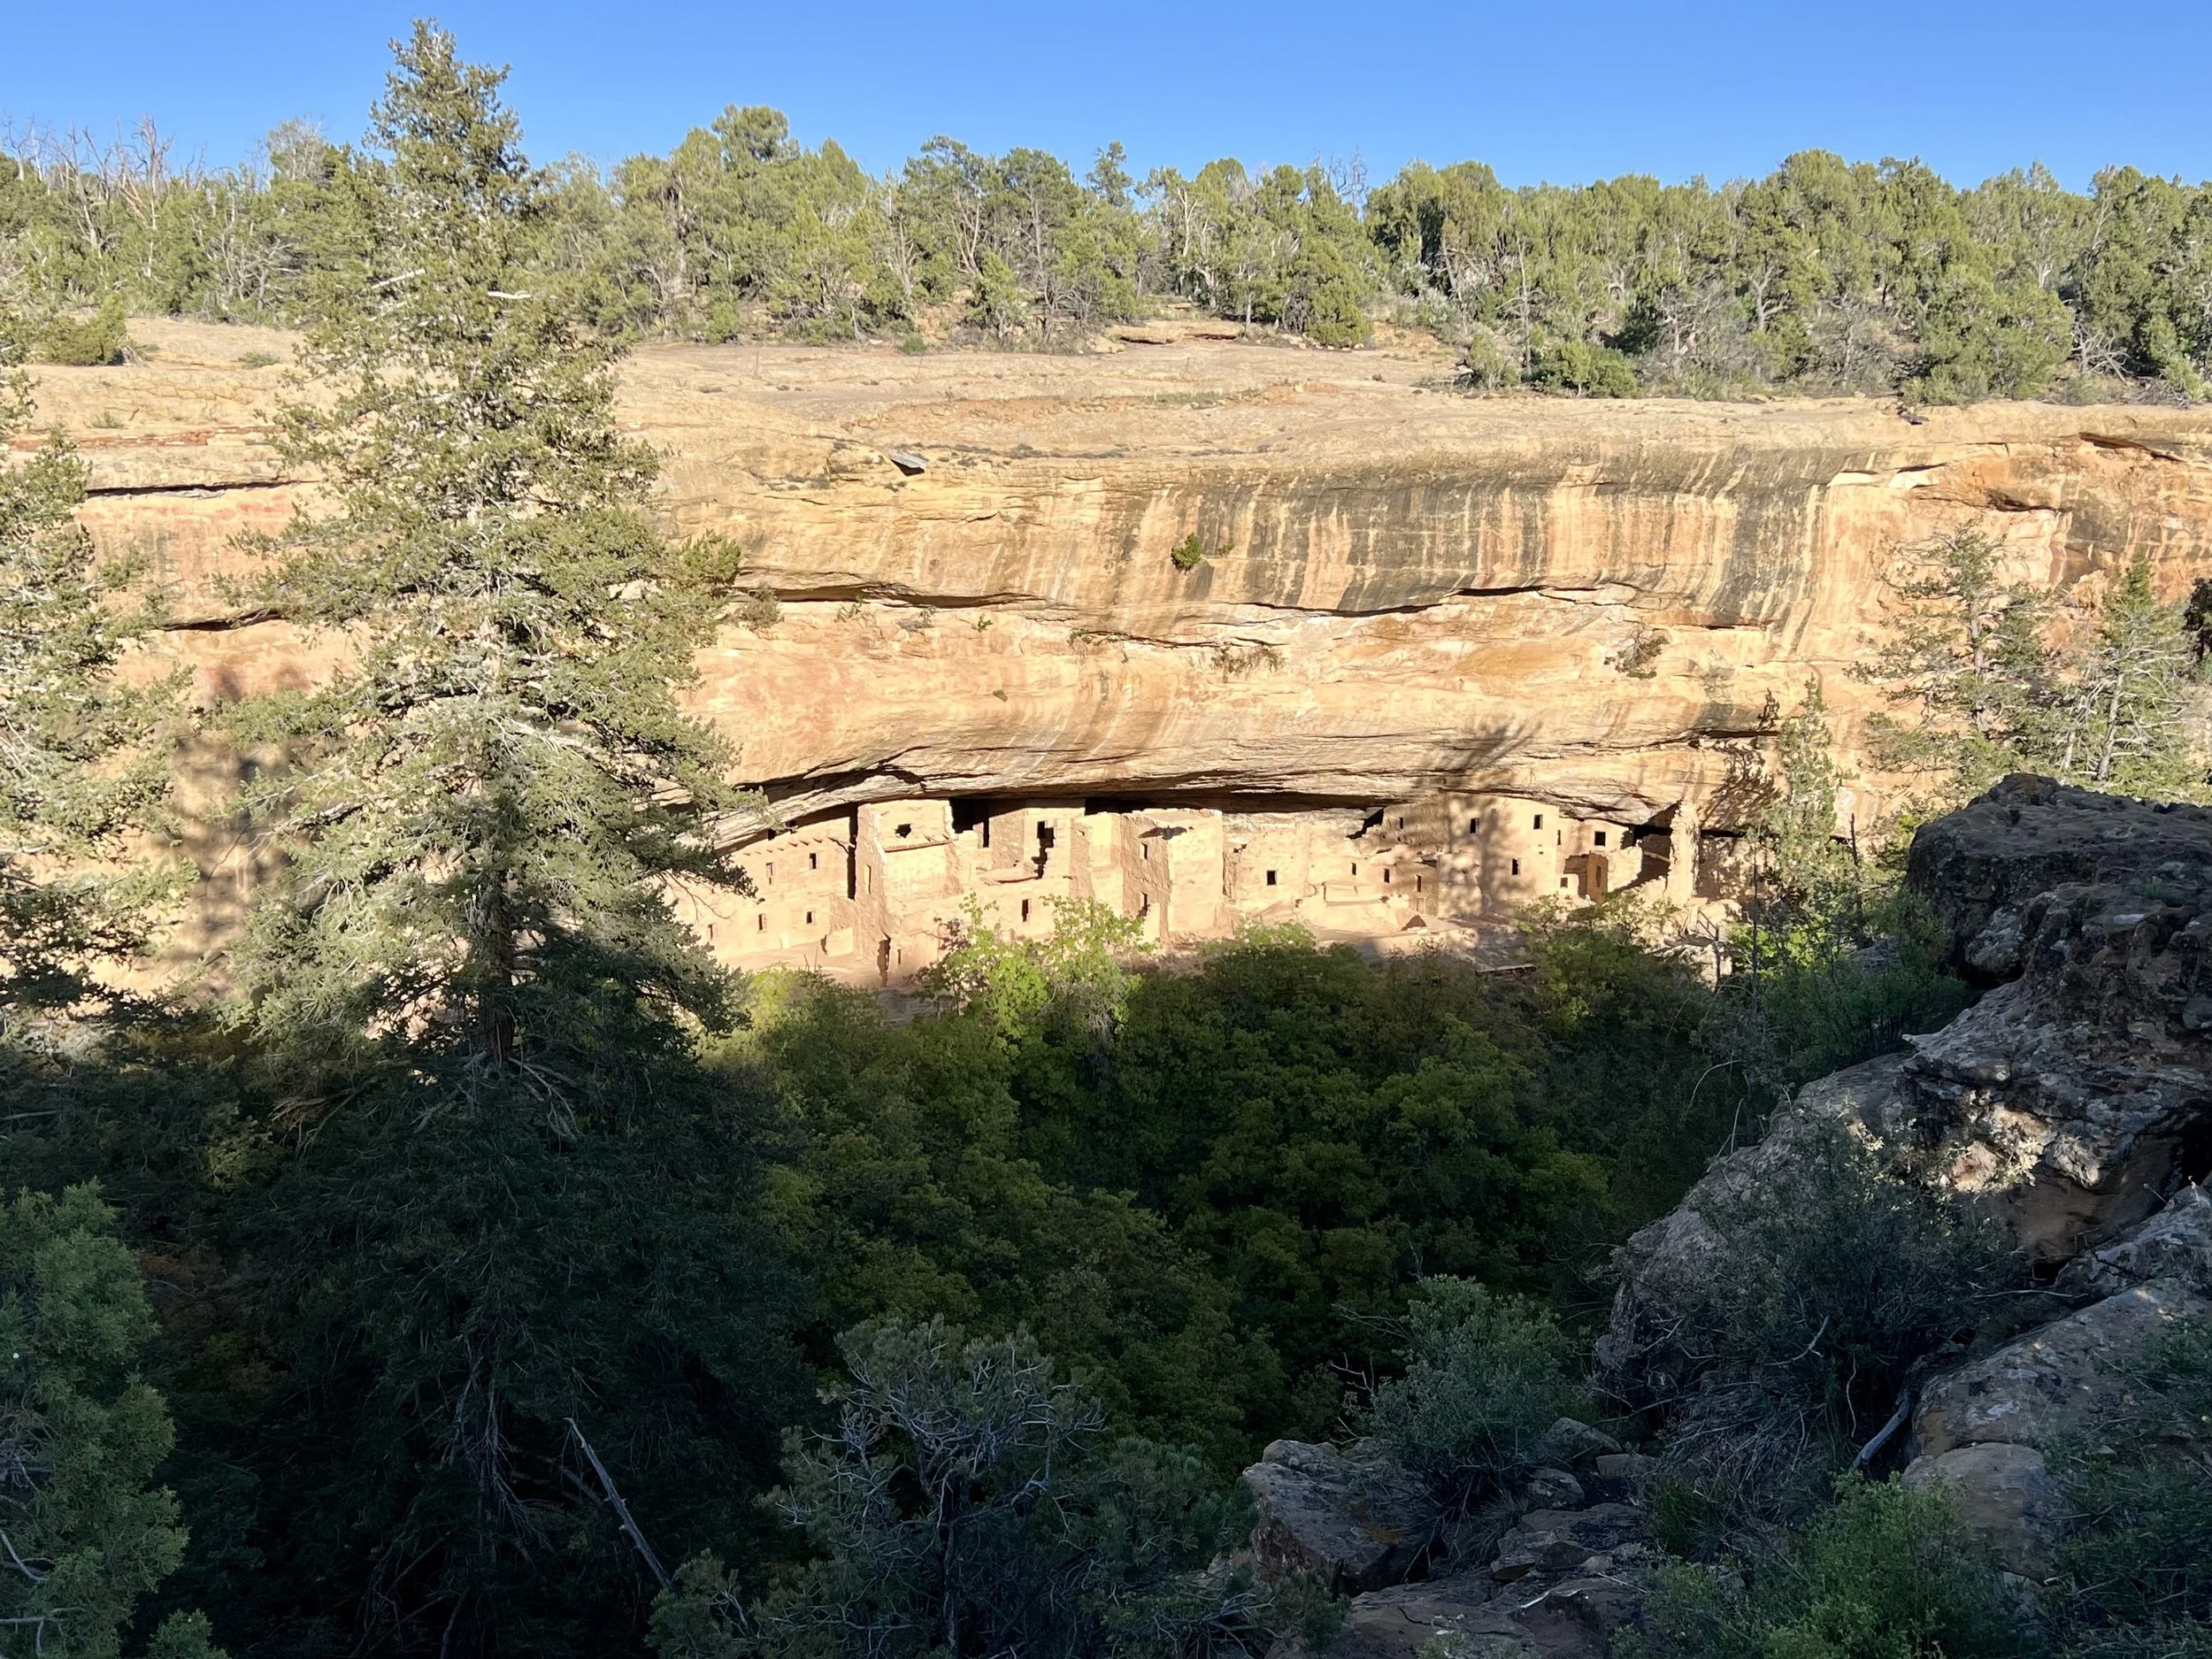
Day 13: Mesa Verde National Park
After a long driving day, today you will spend all your time in Mesa Verde National Park. The park is quite big and you will still need to do some driving in the park. You’ll enter the park and take switchbacks up the mountain to traverse along the mountain side with beautiful views. There are 2 sections of the park that you can explore. Note that if you want to enter or get close to ruins, you need to book in advance with the national park service on recreation.gov.
Camp for the night at Mesa Verde’s campsite or find a spot nearby.
Day 14: Drive back to Denver (6 hours)
Today, you will drive 6 hours back to Denver, or your loop is different, 3 hours back to Moab.